 أفيتاس هوم
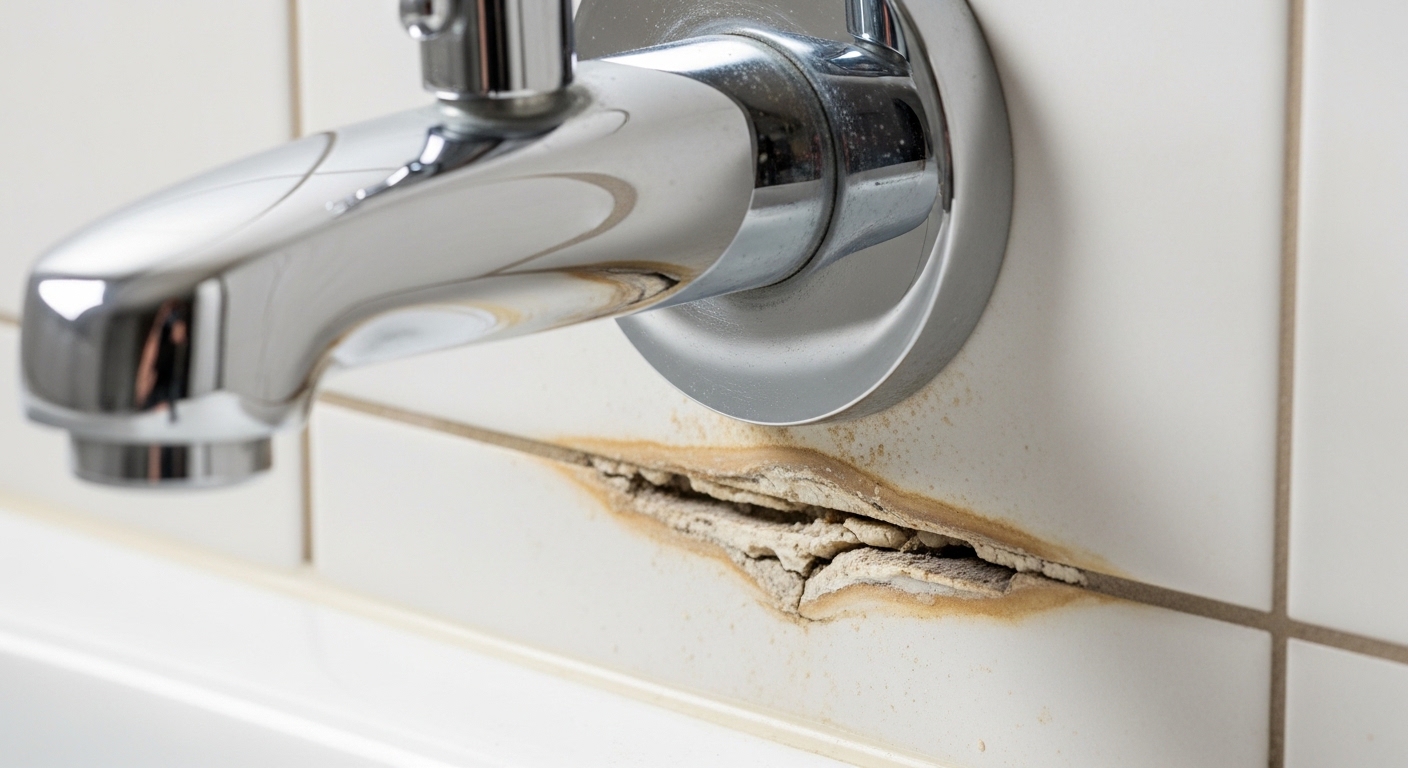
If you’ve ever stared at the ugly opening where your tub spout meets the tile, you already know why a bathtub faucet gap filler exists. That gap — the ring of empty space or the crooked line of cracked caulk around the base of your spout — isn’t just an eyesore. It’s an open door for water to run down the pipe, soak the drywall behind your tile, and start the slow, expensive rot that ends in mold and a wall you have to tear out. The good news: sealing it is one of the easiest and cheapest bathroom fixes you’ll ever do, and you have real options beyond just squirting on more caulk.
At avitashome, we’ve fitted and tested tub spouts across copper, PEX, and galvanized rough-ins for years, and the same gap problem shows up on 8 خارج 10 older tubs we see. Below is exactly how to close it for good — which filler fits which gap, what to buy, and how to install it so it actually lasts.
Why Is There a Gap Behind My Tub Spout in the First Place?
The gap is almost always caused by a copper or threaded pipe that sticks out of the wall at the wrong length — usually too short — so the decorative base of the spout can’t sit flush against the tile. It’s a rough-in and tile-thickness problem, not a defect in your spout.
Here’s what’s happening behind the wall. Your tub spout connects one of two ways: it either screws onto a 1/2-inch threaded nipple, or it slides onto a bare 1/2-inch copper stub and locks with a small set screw underneath. When a tiler adds a new layer of tile or backer board over the old wall, the finished surface moves outward — but the pipe stays put. Now the spout bottoms out on the pipe before its base ever reaches the tile, leaving a visible ring of space. On slide-on copper spouts, the reverse happens too: the pipe is cut a hair short, and the spout floats away from the wall.
Understanding which connection you have matters, because it decides whether a gap filler alone will fix the look or whether you need to adjust the pipe first. If you’re not sure what’s back there, our guide to tub spout connection types walks through how to identify a threaded versus slip-fit spout in about five minutes — do that before you buy anything.
What Actually Counts as a “Bathtub Faucet Gap Filler”?
A bathtub faucet gap filler is any trim piece or sealant that closes the space between your tub spout and the wall. In practice it comes in four forms: an escutcheon (a decorative flange or collar), a foam or rubber gap gasket, silicone caulk, or an extended-reach spout that eliminates the gap by design.
People use “gap filler” loosely, so let’s be precise about your choices. Each one solves a slightly different size and style of gap:
- Escutcheon / trim collar: A metal or plastic ring that slips over the pipe and hides the hole and any gap up to roughly 1 inch. The single most common and best-looking fix.
- Deep or extended escutcheon: A cup-shaped flange with a raised body that reaches out from the wall to cover deeper gaps of 1 to 2 inches.
- Foam or rubber gap gasket: A soft, self-adhesive ring that compresses behind the spout base. Cheap, but best as a backup layer, not the only defense.
- 100% silicone caulk: The waterproof seal that goes over any of the above. Not a filler for large gaps on its own — caulk that bridges more than about 1/4 inch cracks and fails.
- Longer or wall-hugging spout: If your gap is caused by a short spout on a long pipe, swapping to a spout with a deeper base removes the gap entirely.
Which Gap Filler Should I Use for My Gap Size and Budget?
Match the filler to the gap width: caulk alone for hairline gaps under 1/4 inch, an escutcheon plus caulk for gaps up to 1 inch, and a deep escutcheon or a new spout for anything wider. Below is the quick decision table we use on real jobs.
| Gap size | Best filler | Typical cost | Skill level | Lasts |
|---|---|---|---|---|
| Under 1/4″ | 100% silicone caulk only | $6–$10 | Beginner | 3–5 years |
| 1/4″ to 1″ | Standard escutcheon + caulk | $10–$25 | Beginner | 8–10 years |
| 1″ to 2″ | Deep/extended escutcheon + caulk | $18–$40 | Intermediate | 8–10 years |
| Over 2″ or crooked pipe | New extended-base spout or pipe adjustment | $25–$70 | Intermediate | 10+ years |
| Any size, cosmetic only | Foam gasket behind base + caulk | $8–$15 | Beginner | 2–4 years |
Notice that caulk shows up in almost every row — but never as the whole answer for a wide gap. Silicone is a sealant, not a bridge. If you try to fill a half-inch void with a fat bead of caulk, it’ll sag, trap moisture, mildew, and peel within a season. Use the trim piece to close the space, then caulk the thin final seam.
Escutcheon vs. Caulk-Only: Which Lasts Longer and Looks Better?
An escutcheon wins on both counts for any gap you can actually see. Caulk-only is faster and cheaper, but it’s a temporary cosmetic patch that yellows, cracks, and needs redoing every few years — while a properly fitted escutcheon looks finished on day one and stays that way for a decade.
Think about it the way a plumber does. Caulk’s job is to make a waterproof joint, not to be decorative. When people caulk a big gap, they’re asking the sealant to do a structural job it was never designed for. An escutcheon closes the physical opening with a solid, matching-finish ring, and then a thin line of caulk seals just the top edge where water might otherwise sneak in. That layered approach is what gives you the 8–10 year lifespan in the table above.
There’s a water-damage angle too. A bare gap or failed caulk lets shower spray and splash travel straight down the pipe and into the wall cavity. If you’ve already got water sneaking behind the fixture, you may be dealing with more than a cosmetic gap — our breakdown of a leaking bathtub faucet with a single handle covers how to tell a surface gap from an actual valve or spout leak before you seal anything shut. Sealing over an active leak just hides the damage while it keeps spreading.
How Do I Install a Bathtub Faucet Gap Filler Myself?
You can install a tub spout gap filler in about 20 to 30 minutes with a caulk gun, a set-screw hex key or pipe wrench, and a tube of 100% silicone. There’s no need to shut off the water for an escutcheon-and-caulk fix, since you’re not opening the water line — only if you’re swapping the spout itself.
Here’s the step-by-step we follow on a standard slip-fit or threaded spout:
- Clean the area. Scrape off all old, cracked caulk with a plastic putty knife and wipe the tile and spout base with rubbing alcohol. New silicone will not bond to old caulk, soap scum, or mildew.
- Check your spout type. Look underneath for a set screw. If there’s a hex screw, it’s slip-fit; if not, it threads on. This tells you whether you can slide an escutcheon on without removing plumbing.
- Slide the escutcheon on. For a slip-fit spout, loosen the set screw, pull the spout off, slip the escutcheon (and foam gasket, if using) onto the copper stub, then reseat the spout and re-tighten. For threaded spouts, unscrew the spout, add the escutcheon, and screw it back on hand-tight plus a quarter turn.
- Dry-fit and level. Make sure the spout points straight down and the escutcheon sits flat against the tile before you seal.
- Caulk the seam. Run a thin, continuous bead of 100% silicone around the top and sides of the escutcheon or spout base — but leave the very bottom edge unsealed. That gap at the bottom lets any water that does get in drain back out instead of pooling behind the wall.
- Tool the bead and cure. Smooth the caulk with a wet fingertip and let it cure a full 24 hours before you run the shower.
That leave-the-bottom-open trick surprises people, but it’s exactly how the industry recommends caulking any wall-mounted fixture — a fully sealed ring traps moisture, an open bottom edge weeps it out. If your gap traces back to the wrong spout length entirely, swapping to a better-fitting model is often smarter than fighting it with trim; a solid diverter spout like the ones in our guide to a stainless steel tub spout with diverter can come with a deeper base that closes the gap on its own.
Can I Just Use a Foam Gasket or Rubber Ring Instead?
A foam or rubber gap gasket works as a cheap, no-tools cosmetic cover, but it should never be your only water barrier. Use it to hide a gap and add a compression layer behind the spout base — then still run a silicone bead on top to actually keep water out.
Foam gaskets are self-adhesive rings you press onto the wall before pushing the spout base against them. They’re genuinely handy for renters or quick fixes because they need no caulk gun and pop off cleanly. The catch is that foam absorbs moisture over time and compresses permanently, so within a couple of years it can hold dampness against your tile — the opposite of what you want. Treat it as a spacer and looks-fixer, not a seal. The silicone is what protects the wall.
When Should I Fix the Pipe Instead of Filling the Gap?
Fix the pipe, not the gap, when the opening is wider than about 2 inches, when the spout wobbles, or when the pipe itself is crooked, corroded, or too short to seat any spout. In those cases a gap filler is lipstick on a plumbing problem, and you’ll be back at it within a year.
Signs you’ve crossed from a trim job into a plumbing job: the spout moves when you push the diverter, you can see threads or bare copper you can’t cover, or water actively drips from behind the base even after caulking. At that point you’re looking at cutting or extending the pipe nipple, or adding a threaded adapter to get the right reach. That’s still a very doable DIY afternoon — but it’s a different task than dropping on an escutcheon, and it’s worth knowing which one you’re actually facing before you buy parts.
What Finish and Size Should I Buy So It Matches My Tub Spout?
Buy an escutcheon in the same finish as your spout and handles — chrome with chrome, matte black with matte black, brushed nickel with brushed nickel — and size it to your pipe (nearly always 1/2-inch) with an outer diameter at least 1/2 inch larger than your gap. Mismatched finishes are the number-one reason a gap fix still looks unfinished.
Chrome and brushed nickel are the safest matches because they’re the most common tub-spout finishes, but matte black and brushed gold have exploded in popularity, so check before you assume. Measure your gap at its widest point and add a comfortable margin so the escutcheon fully overlaps the tile hole. And confirm your rough-in size — residential tub spouts are almost universally 1/2-inch NPT or 1/2-inch copper, but a quick check saves a return trip. If you’re pulling together a whole tub setup and want the finish to carry across the spout, handles, and trim, our brushed nickel jacuzzi faucet buying guide shows how coordinated finishes read as a deliberate design rather than a patch job.
Quick Buyer’s Recap
For the vast majority of bathrooms, the winning bathtub faucet gap filler is a finish-matched escutcheon plus a thin bead of 100% silicone — under $25, under 30 minutes, and good for close to a decade. Step up to a deep escutcheon for gaps past an inch, and only reach for a new spout or a pipe adjustment when the gap is huge or the spout is loose. Whatever you choose, never rely on a fat rope of caulk to bridge a real gap; it always fails.
FAQ
What is the cheapest way to fill the gap behind a tub spout?
The cheapest reliable fix is a $10–$15 escutcheon ring plus a $7 tube of 100% silicone caulk. A caulk-only patch is cheaper still (around $7 total) and fine for hairline gaps under 1/4 inch, but it won’t cover a visible hole and will need redoing every few years.
Can I use regular caulk instead of silicone for the tub spout gap?
Use 100% silicone or a silicone-based kitchen-and-bath caulk, not standard acrylic latex caulk. Bathtubs flex and get constant moisture, and acrylic caulk shrinks and lets water through. Look for a tube labeled 100% silicone, mildew-resistant, and rated for kitchen and bath.
How big a gap can an escutcheon cover?
A standard tub-spout escutcheon covers gaps up to about 1 inch. Deep or extended-body escutcheons handle 1 to 2 inches. Beyond 2 inches, you’re better off adjusting the pipe length or switching to a spout with a deeper base rather than trying to hide the opening with trim.
Do I need to turn off the water to install a gap filler?
No — if you’re only adding an escutcheon and caulk, you’re not opening the water supply, so there’s no need to shut it off. You only need to turn off the water if you’re removing and replacing the spout or adjusting the pipe behind it.
Should I caulk all the way around the tub spout base?
Caulk the top and sides but leave the bottom edge unsealed. That small opening at the bottom lets any water that gets behind the spout drain back out instead of being trapped against the wall, which is how you prevent hidden mold. A fully sealed ring looks tidy but traps moisture.
Will a gap filler stop water damage behind my wall?
Yes, when installed correctly a properly sealed escutcheon and silicone bead blocks splash and shower spray from running down the pipe into the wall cavity — the main cause of hidden rot around tub spouts. But if water is leaking from the valve or the spout itself rather than the gap, sealing the outside won’t stop it; you’ll need to fix the underlying leak first.
Author note: This guide was written by the avitashome fixtures team, who install, pressure-test, and finish-match tub spouts and trim across chrome, brushed nickel, and matte black lines every week. Our sizing and sealing recommendations follow standard 1/2-inch NPT and slip-fit rough-in specs and manufacturer trim tolerances, and every avitashome tub spout and escutcheon is backed by our fit-and-finish warranty. As always, if a gap traces back to a shifting pipe or an active leak, have the plumbing checked before you seal — a gap filler protects a sound wall, it doesn’t repair a failing one.