 Avitas Home
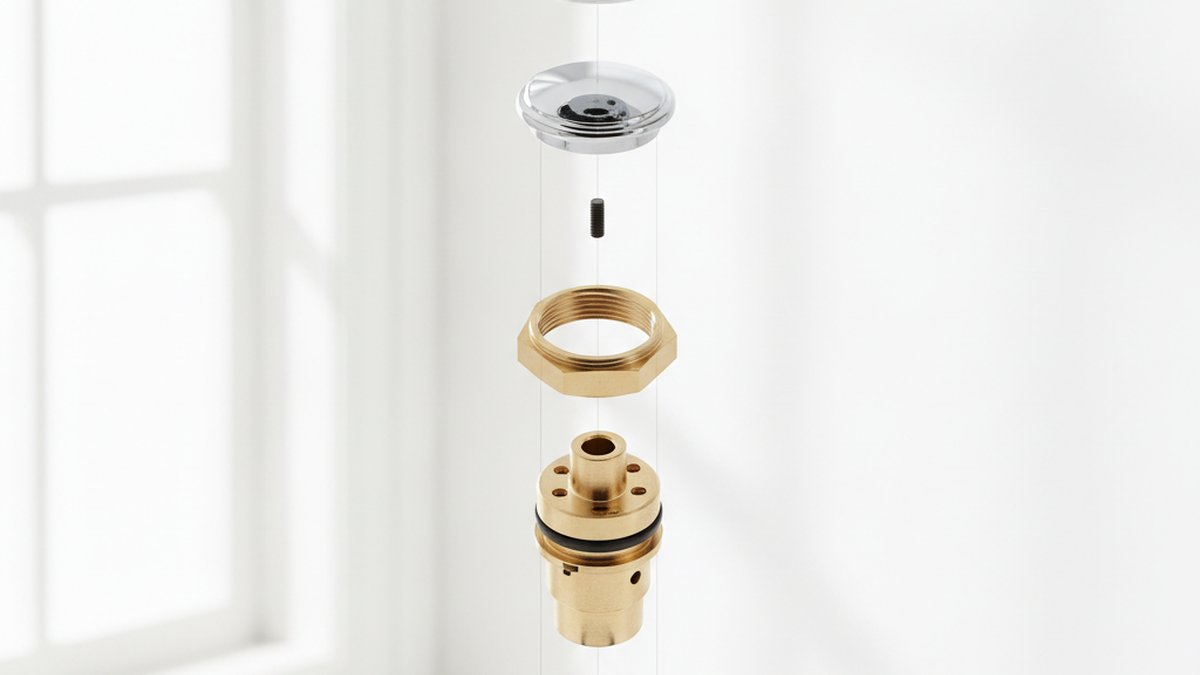
If your faucet drips after you shut it off, the handle feels gritty, or hot and cold come out backwards, a bathroom faucet cartridge replacement is almost always the fix — and it’s one of the most beginner-friendly plumbing repairs there is. The cartridge is the small valve inside the faucet body that starts, stops, and mixes your water. When it wears out, it doesn’t seal anymore, so water sneaks past and drips. You don’t replace the whole faucet; you replace a $10–$40 part.
Below I’ll walk you through exactly how to identify your cartridge, pull the old one, install the new one, and avoid the three mistakes that turn a quick job into a wet afternoon. I’ve swapped hundreds of these across Moen, Delta, Kohler, Pfister, and generic single-handle mixers, and the process is nearly identical brand to brand once you know the pattern.
What exactly is a faucet cartridge, and how do I know mine is bad?
A cartridge is the internal valve that controls water flow and temperature; it’s bad when the faucet drips with the handle fully off, the handle gets stiff or loose, or the water temperature won’t hold steady. Those symptoms mean the cartridge’s internal seals or ceramic discs have worn, cracked, or crusted with mineral scale.
Here’s how the part actually works. In a single-handle faucet, one cartridge blends hot and cold and sets the flow. In a two-handle faucet, you have two cartridges (or stems) — one under each handle — and only the leaking side needs replacing. Modern faucets mostly use ceramic-disc cartridges, which are durable but eventually get scored by grit in the water. Older or budget faucets use compression stems with rubber washers that flatten over time.
Quick self-diagnosis before you buy anything:
- Drips from the spout when off: worn cartridge seals or ceramic discs — classic cartridge failure.
- Drips from around the base of the handle: usually a bad O-ring on the cartridge or body, not the whole cartridge.
- Handle is hard to turn or grinds: mineral scale inside the cartridge — replace it, don’t force it.
- Hot and cold reversed after a repair: the cartridge went in rotated 180°; just re-seat it.
- Low flow only at this faucet: often a clogged aerator, not the cartridge — check that first. Our guide on a clogged sink aerator shows how to rule that out in two minutes.
How do I replace a bathroom faucet cartridge step by step?
Shut off the water, remove the handle, pull the retaining nut or clip, extract the old cartridge, insert the identical new one in the same orientation, and reassemble. That’s the whole job — here’s each step in detail so nothing surprises you.
- Turn off the water. Reach under the sink and close both angle-stop valves (turn clockwise). No under-sink shutoffs? Close the main house valve. Then open the faucet to release pressure and confirm the water’s actually off.
- Plug the drain. Drop in the stopper or a rag so the set screw and clip can’t disappear down the pipe. This one step saves more repairs than any other.
- Remove the handle. Pry off the decorative cap on top or front of the handle to reveal a set screw. Loosen it with a hex/Allen key (usually 7/64″ or 5/64″) and lift the handle straight off.
- Remove the retaining piece. You’ll find either a threaded brass retaining nut (turn counterclockwise with pliers or a deep socket) or a horseshoe-shaped brass/plastic clip you pull straight up with needle-nose pliers. Note which one — it tells you the cartridge style.
- Pull the old cartridge. Grip the stem with pliers and pull straight up while twisting slightly. If it’s stuck (common with scale), a cartridge puller tool made for your brand is worth the $12 — never pry with a screwdriver against the faucet body.
- Note the orientation. Take a phone photo of how the old cartridge sits — most have a flat, a tab, or a keyway that must line up so hot and cold land on the correct sides.
- Insert the new cartridge. Smear a little silicone plumber’s grease on the O-rings, then push the new cartridge in fully, matching the orientation from your photo.
- Reassemble in reverse. Retaining clip or nut, then handle, then set screw, then cap.
- Turn the water back on slowly. Reopen the angle stops gently, run the faucet 15–20 seconds to flush air and debris, and check for drips at the handle and spout.
The whole thing takes 20–40 minutes the first time and 10 minutes once you’ve done it. If you’ve ever handled a bathtub faucet cartridge swap or a Delta kitchen faucet cartridge replacement, this is the same skill on a smaller scale — the tub version just sits behind a wall plate instead of on the sink deck.
How do I find the exact right replacement cartridge for my faucet?
Match by brand and model number, not by looks — a cartridge that’s 2mm off won’t seal. The single biggest cause of a failed repair is buying a “close enough” cartridge that doesn’t fit the valve body.
Three reliable ways to identify yours, best first:
- Model number: Check the original box, the paperwork, or a stamp on the faucet base/spout. Search “[brand] [model] cartridge” and you’ll get the exact part number.
- Take the old one to the store: The surest method. Bring the removed cartridge and match it physically against packaged replacements.
- Brand + photo: Most major brands publish cartridge cross-reference charts. Moen’s common cartridge is the 1225; Delta uses RP-series cartridges and stems; Kohler and Pfister each have their own families.
Genuine (OEM) cartridges cost a little more but fit right and often carry the faucet’s lifetime warranty — many big brands will even mail you a free cartridge if the faucet is still under warranty. Cheap universal cartridges can work but are the top reason a repair still drips. Buy from the faucet’s maker or a reputable fixtures retailer, and if you’re not sure your brand is worth keeping, our rundown of the best quality faucet brands explains which ones back their parts for the long haul.
Cartridge, stem, or whole faucet — which do I actually need?
Replace the cartridge for drips and temperature issues, the O-rings for base leaks, and the whole faucet only if the body is cracked, corroded, or you want a new look. Here’s a side-by-side so you can decide before spending anything.
| Situation | What to replace | Typical cost | Time | DIY difficulty |
|---|---|---|---|---|
| Drips from spout, handle off | Cartridge | $8–$45 | 20–40 min | Easy |
| Leak around handle base | O-rings / seals | $3–$12 | 15–30 min | Easy |
| Stiff or grinding handle | Cartridge (scaled) | $8–$45 | 20–40 min | Easy |
| Cracked or corroded valve body | Whole faucet | $60–$300+ | 1–2 hrs | Moderate |
| Two-handle faucet, one side drips | One cartridge/stem | $8–$25 | 20–30 min | Easy |
The math almost always favors a cartridge. A $15 part restores a faucet that would cost $150+ to replace with labor. The exception is a faucet that’s more than 15–20 years old, visibly corroded, or a finish you dislike — at that point, replacing the whole fixture makes sense, and a fresh modern bathroom faucet often comes with a ceramic-disc cartridge rated for far longer service life.
What tools do I need, and what does a cartridge replacement cost?
You need about $10–$20 in basic tools plus the cartridge itself, so a typical DIY repair runs $18–$65 total versus $150–$250 for a plumber. Most people already own half the list.
Tool checklist:
- Hex/Allen key set (for the handle set screw)
- Adjustable wrench or channel-lock pliers
- Needle-nose pliers (for retaining clips)
- Flathead screwdriver (to pry caps)
- Silicone plumber’s grease
- Brand-specific cartridge puller (only if yours is stuck)
- An old towel and a flashlight
Cost breakdown for a DIY job: cartridge $8–$45, grease $5, puller (optional) $12. A plumber will typically charge $150–$250 for the same repair once you add a service call and labor. Unless the faucet body itself is failing, this is one of the highest-value DIY repairs in the house.
How long does a bathroom faucet cartridge last, and how do I make it last longer?
A quality ceramic-disc cartridge lasts 10–20 years; hard water is what kills them early, sometimes in as little as 3–5 years. The failure isn’t usually the plastic or brass — it’s mineral scale and grit scoring the sealing surfaces.
Extend cartridge life with a few habits:
- Flush the lines after any plumbing work. Debris knocked loose during repairs is a leading cause of early cartridge damage — run the faucet before reinstalling the aerator.
- Clean the aerator every few months. Scale that clogs the aerator is the same scale attacking the cartridge.
- Don’t over-tighten the handle when off. Cranking a single-handle faucet hard against the stop wears the seals faster.
- Address hard water. If you’re on well water or a hard-water area, a softener or filtration dramatically slows scale buildup on every fixture in the house.
One more note on standards: reputable cartridges are made to fit valve bodies certified to ASME A112.18.1 / NSF 61 for drinking-water safety, and major brands back their faucets with limited lifetime warranties that usually cover the cartridge. Keep your model number handy — it’s your ticket to a free warranty replacement part.
FAQ
Can I replace a faucet cartridge without turning off the main water?
Yes, if your sink has its own shutoff valves. Turn off the two angle stops under the sink (clockwise) and you can leave the rest of the house’s water on. Only if those valves are missing or won’t close do you need the main shutoff. Always open the faucet afterward to confirm the water is truly off before you take anything apart.
Why does my faucet still drip after I replaced the cartridge?
The three usual causes are a wrong-fit cartridge, one installed in the wrong orientation, or debris caught on the new seals. Double-check the part number matches your faucet exactly, confirm the cartridge is seated fully and lined up on its keyway, and flush the lines to clear any grit. A universal cartridge that’s slightly off is the most common culprit — OEM parts fix this.
How do I get a stuck cartridge out without damaging the faucet?
Use a cartridge puller made for your brand rather than prying. Scale locks cartridges in place; the puller threads onto the stem and pulls it straight up with even force. Soaking the exposed cartridge in white vinegar for 15–20 minutes first helps dissolve the scale. Never lever a screwdriver against the faucet body — that cracks the valve and turns a $15 repair into a full replacement.
Are all bathroom faucet cartridges the same size?
No — cartridges vary by brand, model, and even production year, and they are not interchangeable. Length, diameter, number of ports, and the keyway all differ. Match by model number or bring the old cartridge to the store. This is why “close enough” almost never seals properly.
Should I replace the O-rings while I have the faucet apart?
Yes, it’s smart preventive maintenance. O-rings are cheap ($3–$12 for a kit) and are a common source of base leaks. Since you’ve already shut off the water and disassembled the handle, swapping the O-rings and adding fresh silicone grease costs a few minutes and can prevent your next repair.
Is a cartridge replacement worth it, or should I just buy a new faucet?
Replace the cartridge if the faucet body is sound — it fixes 90% of drips for under $45. Buy a new faucet only if the body is cracked or corroded, the faucet is 15–20+ years old, or you want a new finish or style. For most faucets under a decade old, the cartridge swap is by far the better value.
Author note: This guide was written by the avitashome fixtures team, drawing on hands-on cartridge replacements across Moen, Delta, Kohler, and Pfister single- and two-handle faucets. About avitashome: we’re a dedicated faucet and bathroom fixtures retailer — faucets, shower systems, tub fillers, and repair parts are all we do, which is why our guides stick to what actually works at the sink. When in doubt about a warranty part, contact your faucet’s manufacturer with the model number before buying aftermarket.