
If you’re shopping for an outdoor faucet vinyl siding setup, the single most important decision isn’t the faucet finish or the brand — it’s how you create a flat, sealed mounting surface on a wall that is, by design, bumpy, hollow, and water-shedding. Vinyl siding is built to let water run down and out; a faucet is a hole you’re punching straight through it. Get the mounting block and the frost-free sillcock right, and you’ll have a dry wall and a spigot that survives winter. Get it wrong, and you’ll be chasing hidden leaks and split pipes for years.
This guide walks through exactly which faucet type to buy, why the mounting block matters so much, how to size it, and the real-world mistakes that cause callbacks — in plain language, with the specs you actually need at checkout.
What kind of outdoor faucet is best for a house with vinyl siding?
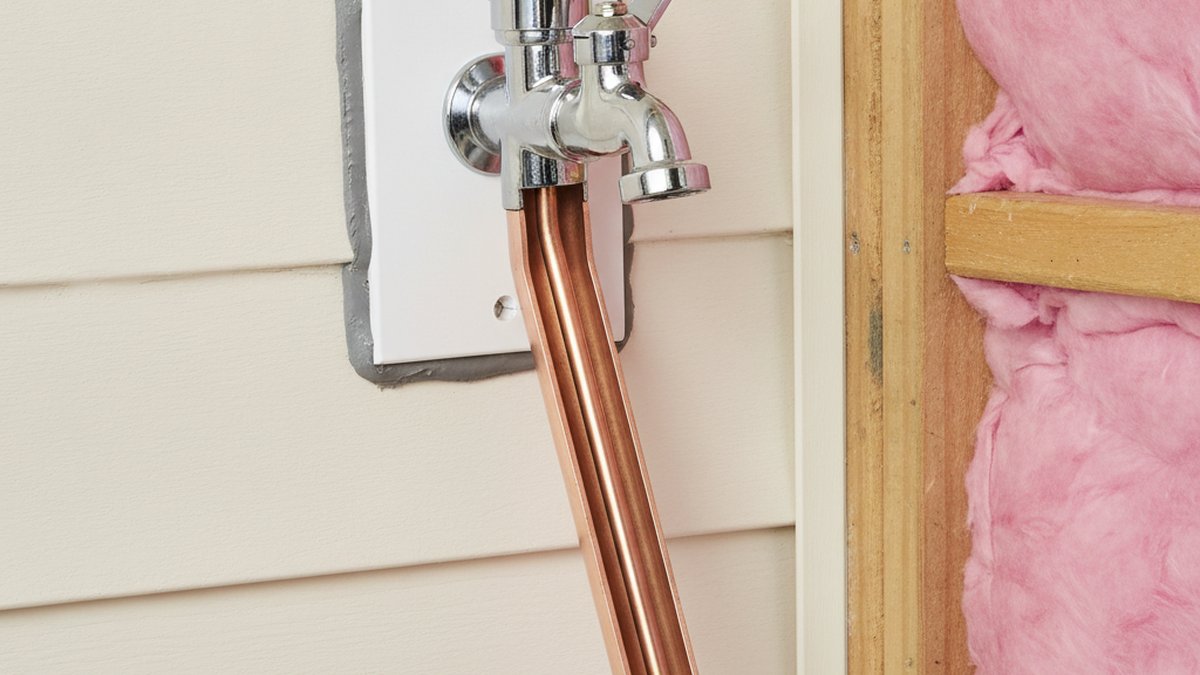
A frost-free (frost-proof) sillcock with a built-in anti-siphon vacuum breaker is the best outdoor faucet for a vinyl-sided home in almost every climate that sees freezing weather. It shuts the water off deep inside the heated wall — not at the handle outside — so the exposed portion drains and can’t freeze and burst.
The reason this matters on vinyl siding specifically: siding sits over a hollow rain-screen cavity, and the sillcock has to pass through the siding, the sheathing, and the wall insulation to reach warm interior air. A frost-free valve is designed for exactly that long run. Standard “compression” hose bibs stop the water right at the wall, so any water trapped in the pipe outside the shutoff freezes — and on a vinyl wall you often can’t even see the resulting drip until the sheathing is soaked.
Here’s how the common outdoor faucet types stack up for a vinyl-sided wall:
| Faucet type | Freeze protection | Best for vinyl siding? | Typical price |
|---|---|---|---|
| Frost-free sillcock (6″–12″ stem) | Excellent — shuts off inside heated wall | Yes — the default choice | $25–$70 |
| Standard compression hose bib | Poor — freezes in exposed pipe | Only in no-freeze climates | $10–$25 |
| Ball-valve / quarter-turn hose bib | Poor freeze protection, great flow | Warm climates or interior wall only | $15–$40 |
| Recessed/box hydrant (in-wall enclosure) | Excellent, protected & tidy | Yes — premium, cleanest look | $60–$150 |
| Wall-mount brass bibcock (decorative) | Depends on stem length | Warm climates / accent use | $30–$90 |
Whichever you choose, buy one with an integrated vacuum breaker (backflow preventer). Most U.S. plumbing codes now require anti-siphon protection on outdoor hose connections so that dirty hose water — from a pool, a sprayer, or a bucket of fertilizer — can never get siphoned back into your drinking water. It’s a small cap on top of the faucet, and reputable outdoor faucets include it. If you want a rundown of which manufacturers consistently meet those standards, our guide to the best quality faucet brands to buy in 2026 covers what separates a solid bib from a throwaway one.
Why do you need a mounting block for an outdoor faucet on vinyl siding?
You need a mounting block because vinyl siding has a raised, wavy profile and a hollow gap behind it — there is no flat, solid surface for a faucet flange to seat against or seal to. A vinyl siding mounting block (also sold as a “faucet block,” “hose bib block,” or “utility mount”) is a flat, UV-stable plastic plate that snaps or screws over the siding and gives you a clean, flat, weatherproof pad to mount the spigot on and caulk around.
Think about what happens without one. The faucet’s escutcheon (the round base plate) is flat; the siding is not. Screw the faucet straight onto the siding and the flange only touches the high ridges, leaving open channels underneath. Every drop of caulk you apply gets pushed around by the siding’s profile, and wind-driven rain runs straight behind the wall through the gaps. Within a season you’ve got wet sheathing, and vinyl hides that damage completely until it’s serious.
A mounting block solves four problems at once:
- A flat surface for the faucet flange and screws to seat against.
- A sealed penetration — you caulk the block to the siding on three sides (leaving the bottom open to drain), then caulk the pipe where it exits the block.
- Structural backing — the block, plus a solid anchor into a stud or backer board behind it, keeps the faucet from wobbling every time you crank a stiff hose fitting on.
- A finished look — a clean rectangular or beveled block reads as intentional, not a hack job.
This same “flat block on a profiled wall” logic applies to any wall-mounted fixture on a tricky surface. If you’re also weighing wall-mount hardware elsewhere in the home, the trade-offs we cover for a brass wall-mounted faucet setup — anchoring, sealing, and finish durability — carry over directly to an exterior spigot.
What size mounting block and stem length do you actually need?
Match the mounting block’s opening to your faucet flange (most take a standard 3″–4″ round base), and choose a sillcock stem long enough to reach past your wall’s insulation into heated space — usually 8″ to 12″ for a modern insulated 2×6 wall, and 6″ for an older 2×4 wall.
The stem-length math is the part people get wrong. The frost-free valve only works if the actual shutoff seat ends up on the warm side of the insulation. Add up your wall assembly: siding (~0.5″), a mounting block (~0.75″), sheathing (~0.5″), and framing plus insulation (3.5″–5.5″). If your wall is thick or heavily insulated, a 6″ sillcock can leave the shutoff inside the cold cavity — which quietly defeats the whole point and lets it freeze anyway.
A quick sizing checklist before you buy:
- Measure total wall thickness from the outer face of the siding to the interior drywall.
- Buy a sillcock whose stem is at least as long as that measurement, rounding up to the next size.
- Confirm the connection type on the interior end — 1/2″ or 3/4″ MIP/sweat/PEX — matches your supply line.
- Confirm the faucet flange diameter fits the mounting block’s recess.
- Pick a block color close to your siding (white, almond, clay, and gray are the common stock shades).
One more spec worth checking: the pitch. A frost-free sillcock must be installed with a slight downward slope to the outside so the exposed section fully drains after each use. The mounting block gives you a flat reference face, but you still angle the whole assembly down about 1/4″ so gravity empties the barrel — otherwise trapped water freezes even on a “frost-free” valve.
Can you install an outdoor faucet on vinyl siding yourself?
Yes — replacing or adding an outdoor faucet on vinyl siding is a realistic DIY job if you’re comfortable with basic plumbing connections and have access to the pipe from inside (a basement, crawlspace, or open interior wall). Budget a half-day and expect the plumbing connection, not the siding, to be the fussy part.
The general sequence looks like this:
- Shut off the water supply feeding that line and open the old faucet to drain it.
- Remove the old faucet and, from inside, the section of supply pipe it connects to.
- Cut or confirm the wall opening; slide the vinyl mounting block over the siding and fasten it into a stud or a solid backer board — never into hollow siding alone.
- Insert the frost-free sillcock through the block, pitched slightly downward, and anchor its flange with corrosion-resistant screws.
- Connect the interior end to your supply line (soldered copper, PEX crimp, or a threaded union — whatever your line uses).
- Turn the water on, check for leaks inside and out, then caulk the block-to-siding seam on the top and sides with exterior-grade sealant, leaving the bottom edge open to weep.
Two honest cautions. First, if the connection requires soldering near the wall framing, work carefully with a heat shield — vinyl siding melts and warps at surprisingly low temperatures, so protect it from any torch. Second, if you can’t reach the pipe without opening a finished wall, this crosses into a job where a licensed plumber saves you money in the long run. There’s no shame in that call; hidden water damage behind vinyl is far more expensive than a service visit.
How do you stop leaks behind vinyl siding around an outdoor faucet?
Seal the penetration in two places — the pipe where it exits the block, and the block-to-siding seam on the top and both sides — using a paintable exterior-grade sealant, and deliberately leave the bottom edge open so any water that does get in can weep back out. Sealing all four sides is the classic mistake: it traps moisture instead of shedding it.
The principle behind this is how vinyl siding is designed to work. Siding is a rain screen — it expects some water to get behind it and relies on gravity and weep paths to drain that water back out at the bottom. If you caulk a mounting block airtight on all four sides, you turn it into a bucket. Water always finds a way in (capillary action around the pipe, wind-driven rain), and with no bottom exit it sits against the sheathing.
Best practices that actually keep the wall dry:
- Use the right sealant. A high-quality exterior polyurethane or siding-rated hybrid sealant flexes with vinyl’s big seasonal expansion and contraction. Cheap silicone can’t be painted and often peels off vinyl within a year.
- Slope the faucet down. That 1/4″ downward pitch on a frost-free sillcock is both a freeze defense and a drainage feature.
- Detach the hose in fall. A hose left connected over winter traps water in the barrel and can burst even a frost-free valve. This is the number-one cause of “my frost-free faucet froze anyway.”
- Add an interior shutoff. A dedicated shutoff valve on the supply line inside lets you kill and drain that one faucet without touching the whole house — invaluable for winterizing or emergencies.
If you’re outfitting the whole exterior for warm-weather use — say, adding a hose bib near a patio or pool alongside an outdoor shower — it’s worth planning the plumbing runs together. Our guide to the best outdoor shower system setup for a backyard, pool, or beach house walks through supply, drainage, and freeze-prep considerations that pair naturally with an outdoor faucet install.
Which finish and material hold up outdoors on a vinyl-sided wall?
Choose a solid brass or stainless-steel sillcock for the water-wetted body, and match the visible mounting block and trim to your siding color. Brass resists corrosion and mineral scaling far better than the zinc or pot-metal valves on the cheapest bibs, which is why it’s the standard for faucets that live outside year-round.
Finish matters less outdoors than it does on a polished bathroom fixture, but a few points hold up:
- Brass (raw or chrome-plated): the workhorse. Long life, handles hard water and temperature swings, easy to service.
- Stainless steel: excellent corrosion resistance, popular in coastal/salt-air areas where plating can pit.
- Powder-coated or bronze finishes: fine for looks, but confirm there’s brass or stainless underneath, not just coated zinc.
The mounting block itself should be UV-stabilized PVC or a similar exterior polymer — the same material class as the siding — so it weathers at the same rate and won’t yellow or crack after a couple of summers. Stock colors (white, almond/clay, gray) are made to coordinate with common siding lines; if yours is a custom shade, most blocks are paintable with a vinyl-safe exterior paint.
How this compares to a recessed hydrant box
A recessed hydrant — a small enclosure that sets the faucet into the wall behind a flush cover — is the tidiest and best-protected option, and it pairs beautifully with vinyl siding because the box acts as its own flat mounting surface. The faucet sits inside, out of the weather and out of the way of a lawn mower or foot traffic.
The trade-off is cost and cutting: a recessed box needs a larger opening in the wall and a bit more framing work, so it’s more involved than snapping on a mounting block. For most homeowners, a frost-free sillcock on a mounting block is the sweet spot of price, protection, and simplicity. If you want the cleanest possible exterior and don’t mind the extra labor, the recessed box is a genuine upgrade — just size the stem the same way, and pitch it to drain.
FAQ
Do I really need a mounting block, or can I just caulk the faucet to the siding?
You really need one. Caulking a flat faucet flange directly to profiled vinyl siding leaves open channels under the flange that no amount of sealant can close, so wind-driven rain runs behind the wall. The mounting block gives the faucet a flat pad to seal against and something solid to screw into. It’s a $10–$20 part that prevents hundreds of dollars in hidden water damage.
Will a frost-free faucet still freeze if it’s on a vinyl-sided wall?
It can, in two situations: if the stem is too short and its shutoff seat lands in the cold wall cavity instead of heated interior air, or if you leave a garden hose attached over winter and trap water in the barrel. Buy a stem long enough for your full wall thickness, pitch it slightly downward to drain, and disconnect hoses before the first freeze.
What size mounting block should I buy?
Match the block’s recessed opening to your faucet’s flange — most outdoor faucets use a 3″–4″ round base, and standard utility blocks are sized to fit. Also confirm the block is thick and flat enough to bridge your siding’s profile, and pick a stock color (white, almond, clay, gray) close to your siding or plan to paint it with vinyl-safe exterior paint.
Can I install this without opening the interior wall?
Yes, if you can reach the supply pipe from a basement, crawlspace, or unfinished utility area behind the faucet location. That access lets you connect the sillcock’s interior end and add a shutoff valve. If the pipe is buried inside a finished, insulated wall with no access, you’ll likely need to open drywall — at which point hiring a licensed plumber is the smarter, cheaper move.
Should I caulk all four sides of the mounting block?
No — seal the top and both sides, but leave the bottom edge open. Vinyl siding is a rain screen designed to drain water that gets behind it; sealing all four sides traps moisture against the sheathing. The open bottom edge lets any water weep back out, which is exactly how the wall is engineered to shed it.
Is brass worth it over a cheap plastic-bodied hose bib?
For a faucet that lives outdoors year-round, yes. A solid brass or stainless body resists corrosion, mineral scaling, and freeze stress far better and can be rebuilt with a new washer or stem for years, whereas the cheapest zinc or plastic bibs tend to seize, crack, or leak within a few seasons. It’s a small upcharge for a fixture you don’t want to think about again.
A note on expertise, testing, and warranty
Author note: This guide was written by the avitashome fixtures team, drawing on hands-on installation experience across cold-climate and coastal homes and on the manufacturer specs we vet before listing any outdoor faucet. We install, freeze-test, and service these products, not just describe them.
Brand credibility: avitashome specializes exclusively in faucets and bathroom and utility fixtures — kitchen faucets, shower systems, tub fillers, and outdoor spigots — so our buying advice comes from a narrow, deep focus rather than a general hardware catalog. We stock outdoor faucets that carry integrated anti-siphon vacuum breakers to meet current U.S. backflow-prevention codes, and we prioritize solid-brass and stainless bodies that meet recognized lead-free (NSF/ANSI 372) drinking-water standards. Most frost-free sillcocks we carry are backed by a manufacturer warranty of five years or more on the valve body — always confirm the specific warranty on the product page before you buy, and register it after install to keep it valid.