
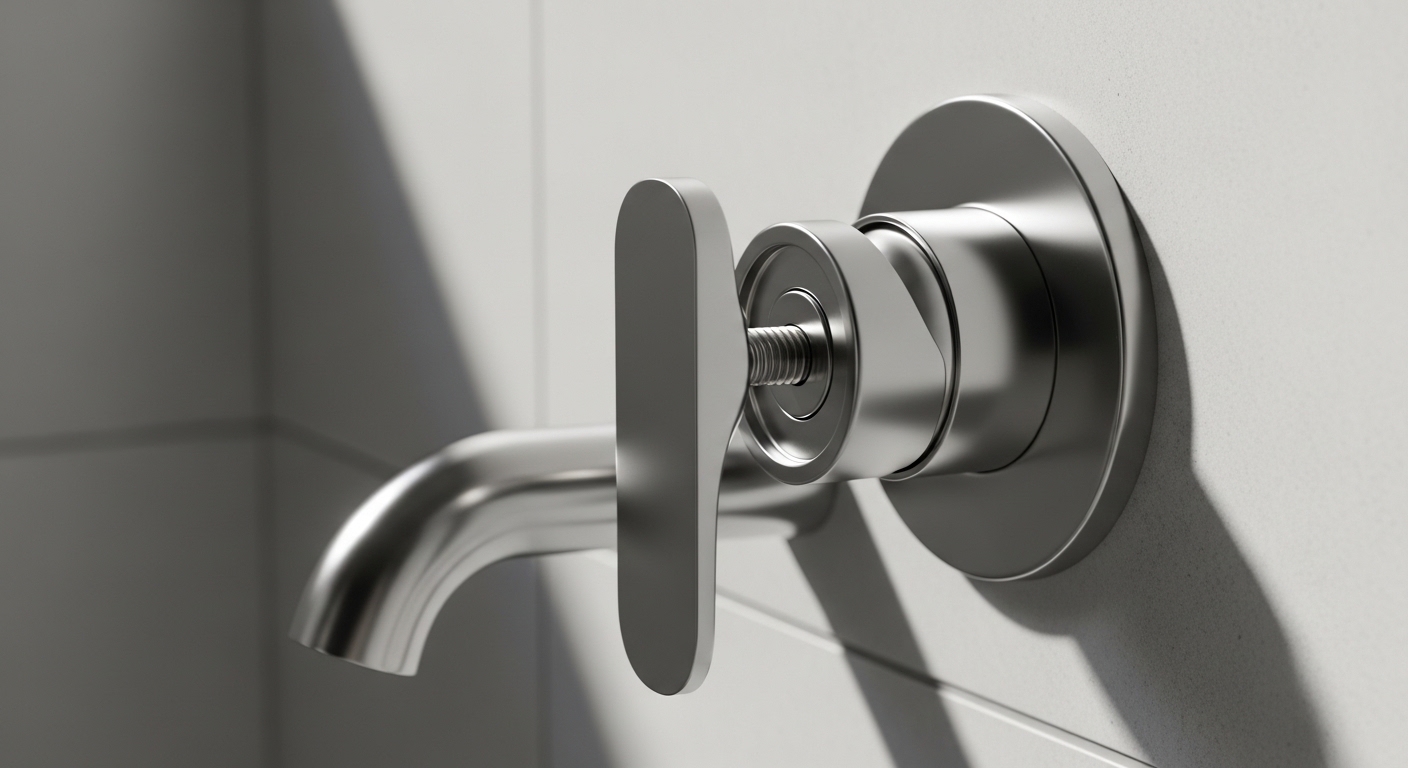
If your shower faucet feels loose — the handle jiggles, wobbles side to side, spins without changing the water, or the entire trim plate rocks against the tile — you’re dealing with one of the most common (and most fixable) bathroom problems there is. The good news: a loose shower faucet is rarely a plumbing emergency, and you almost never need to open the wall. In this guide we’ll walk through exactly what causes it, how to diagnose which part is loose, and how to tighten each one properly so it stays put. We stock and test the exact repair parts involved, so we’ll also flag when a wobble means it’s genuinely time to replace a component.
Why is my shower faucet handle loose all of a sudden?
Nine times out of ten, a suddenly loose shower handle is caused by a set screw that has vibrated and backed out over months of use. Every time you turn the handle, tiny movements slowly loosen that one small screw, and eventually the handle starts to wobble or lift off the stem.
The set screw is the hidden fastener that clamps your handle onto the valve stem or cartridge. On most single-handle shower faucets it sits underneath the handle lever or behind a small snap-on cap or button (often a red/blue hot-cold indicator). It’s usually a hex/Allen screw, occasionally a Phillips. When it loosens, the handle no longer grips the stem tightly, so you get that classic sloppy, rattly feel — or the handle turns but the water barely responds.
Other common causes, roughly in order of how often we see them:
- Backed-out set screw — the #1 cause; a 30-second tighten fixes it.
- Worn cartridge — the internal splines that the handle grips get rounded off, so the handle spins loosely no matter how tight the screw is.
- Stripped handle adapter/broret — a plastic sleeve that connects the handle to a metal stem cracks or wears out.
- Loose escutcheon (trim plate) — the decorative cover plate against the wall loosens, so the whole assembly rocks even though the handle itself is fine.
- Loose valve body behind the wall — rarer, but the actual mixing valve wasn’t secured to a stud or bracket, so the whole thing shifts when you push on it.
The fix depends entirely on which of these is loose — so before you grab a tool, spend 20 seconds figuring out what’s actually moving.
How do I tell what’s actually loose — the handle, the cartridge, or the valve?
Do a quick three-part wiggle test: grab the handle and move it. If only the handle rocks but the trim plate stays flat, it’s the set screw or cartridge. If the whole trim plate rocks against the wall, it’s the escutcheon or valve. If the handle spins in full circles without changing water temperature or flow, the cartridge splines are stripped.
Here’s how to read each result:
| What you feel | Most likely cause | Typical fix | Time / cost |
|---|---|---|---|
| Handle wobbles/lifts but trim plate is solid | Loose set screw | Tighten set screw with hex key | 10 min / $0 |
| Handle spins freely, water doesn’t change | Stripped cartridge or handle adapter | Replace cartridge and/or adapter sleeve | 30–45 min / $15–$60 |
| Whole trim plate rocks against tile | Loose escutcheon screws / failed caulk | Tighten mounting screws, re-caulk | 20 min / $0–$8 |
| Entire valve shifts inward when pushed | Valve not anchored behind wall | Secure valve to bracket/stud (access needed) | 1–2 hrs / varies |
| Handle loose + dripping when off | Worn cartridge seals | Replace cartridge | 30–45 min / $15–$60 |
This diagnosis matters because tightening a set screw won’t help a stripped cartridge, and swapping a cartridge won’t fix a valve that was never anchored. Match the fix to the symptom and you’ll only do the job once.
How do I tighten a loose single-handle shower faucet myself?
For the most common case — a loose set screw on a single-handle faucet — you can tighten it in about 10 minutes with a single hex key, no water shutoff required. Here’s the exact sequence.
- Find the set screw. Look underneath the handle lever, or pop off the small decorative cap on the front/side of the handle with a flat screwdriver or your fingernail. Behind it is the recessed set screw.
- Match the tool. Most shower set screws take a 7/64″ or 3/32″ hex (Allen) key; some use a 1/8″. A cheap folding hex-key set covers every size you’ll meet. If it’s a Phillips, use a #2.
- Seat the handle first. Push the handle firmly onto the stem in its correct position before tightening, so it grips flush and level.
- Tighten snug, not gorilla-tight. Turn clockwise until it stops and the handle no longer wobbles. Overtightening can crack a plastic adapter or strip the tiny threads — snug plus a hair more is enough.
- Re-cap and test. Snap the indicator cap back on, then work the handle through hot, cold, and off. It should feel solid with zero play.
If you tighten the set screw and the handle is still loose, or it wobbles again within days, the screw isn’t the problem — the cartridge or handle adapter is worn, and that’s the next thing to check. The same “tighten the hidden set screw” logic applies to loose bathroom and kitchen levers too; if you also have a wobbly sink lever, our guide on why a Delta faucet handle is loose and how to fix it fast walks through the same principle on a different fixture.
My handle spins in circles — do I need a new cartridge?
Yes — if the handle rotates freely without changing temperature or flow, the cartridge (or the plastic adapter connecting the handle to it) is stripped, and tightening won’t help. The splines that let the handle grip and turn the valve have worn round, so the handle just slips.
Replacing a shower cartridge is a very doable DIY job, but unlike the set-screw fix it does require shutting off the water. Here’s the outline:
- Shut off water. Use the shower’s integral stops (small screws inside the trim, if your valve has them) or turn off the house main.
- Remove the handle and trim. Take out the set screw, pull the handle, then remove the escutcheon plate.
- Pull the cartridge. Remove the retaining clip or brass nut, then pull the cartridge straight out. Many brands sell a cartridge-puller tool that makes a stuck one much easier — mineral buildup can seize them in place.
- Match the replacement exactly. Take the old cartridge to compare, or note your faucet brand and model. A cartridge that’s close-but-not-identical will leak or won’t seat.
- Reinstall in reverse. Grease the O-rings with silicone plumber’s grease, seat the new cartridge, replace the clip, reattach trim, and restore water slowly.
Buy the correct brand-specific cartridge — Moen, Delta, Kohler, and Pfister all use different, non-interchangeable designs, and generic “universal” cartridges are hit or miss. If you’re already this far into the valve, it’s worth checking whether the valve body itself is in good shape; a badly corroded or leaking valve is covered in our walkthrough on how hard a shower rough-in valve replacement is and whether you can DIY it.
What if the whole shower faucet — the trim plate — is loose against the wall?
If the entire trim plate (escutcheon) rocks or pulls away from the tile, the problem isn’t the handle — it’s the mounting screws behind the plate or failed caulk around its edge. Left alone, this lets water seep behind the wall, which is a far bigger problem than a wobbly handle.
To fix it: pop off the handle and lift or unthread the escutcheon plate. Behind it you’ll usually find either screws into a mounting bracket or a threaded collar. Snug those down so the plate sits flush and firm against the wall. Then run a thin, continuous bead of 100% silicone caulk around the top and sides of the plate (leave a small gap at the very bottom so any water that does get behind can escape). This both seals out water and stops the plate from shifting.
If the loose trim is on a wall-mounted tub or shower filler rather than a standard in-wall valve, the fix and the parts differ a bit — a loose wall-mount unit often needs its own repair kit, which we break down in which wall-mount faucet repair kit you actually need. And if your setup includes a tub spout that’s also loose or the wrong fit, understanding the different tub spout connection types will save you buying the wrong part.
How do I stop my shower faucet from getting loose again?
To keep a shower faucet from loosening repeatedly, the key is stopping the set screw from vibrating out and keeping mineral buildup from wearing the cartridge. Both are cheap, five-minute habits.
- Add a dab of removable threadlocker. A tiny drop of blue (not red) threadlocker on the set screw threads keeps it from vibrating loose without gluing it permanently. Blue lets you still remove it later with a hex key.
- Don’t crank the handle to shut off. Forcing the handle hard against the stop every time accelerates wear on the cartridge splines. Firm is enough.
- Descale periodically if you have hard water. Mineral scale is what chews up cartridge seals and handle adapters over time. Hard water is the silent killer of every fixture in the bathroom — the same reason finish and material choice matters, which we cover in our guide to the best bathroom faucet material for hard water.
- Use the right hex size. A slightly-too-small key rounds out the set screw so it can never fully tighten. Use the exact fit.
- Replace worn adapters early. If the plastic handle adapter looks cracked, swap it now — a $5 part prevents a spinning handle later.
When should I just replace the whole shower faucet instead of fixing it?
Replace the whole faucet if the valve body is corroded or cracked, if replacement cartridges are discontinued for your model, or if you’ve already swapped the cartridge and it’s still loose or leaking. At that point you’re throwing good money after bad on a worn-out valve.
A quick rule of thumb: if the fix costs less than a third of a new valve and trim, repair it. If the valve behind the wall is failing — green corrosion, pitting, threads that won’t hold — it’s time to replace, and you may as well upgrade the finish and function while the wall is open. For a cross-finish leak that keeps coming back on a tub-shower combo, our piece on fixing a leaking single-handle bathtub faucet without calling a plumber helps you decide repair vs. replace.
FAQ
What size Allen wrench tightens a loose shower handle?
Most single-handle shower faucets use a 7/64″ or 3/32″ hex (Allen) key for the set screw, with some using 1/8″. If you’re not sure, a folding metric-and-standard hex-key set covers every common size for a few dollars. Always match the exact size — an undersized key will round out the screw head and leave you unable to tighten it at all.
Can a loose shower faucet cause a leak?
Yes, indirectly. A loose handle itself usually doesn’t leak, but the same wear that loosens the handle — a failing cartridge or worn O-rings — is exactly what causes drips and temperature bleed-through. And a loose escutcheon plate lets water seep behind the wall. So if your faucet is both loose and dripping, treat it as a cartridge replacement, not just a tightening job.
Why does my shower handle keep coming loose no matter how much I tighten it?
If it loosens again within days, the set screw is fine but the cartridge splines or the plastic handle adapter are stripped, so nothing can grip firmly. The handle keeps working loose because it’s slipping on a rounded stem. The permanent fix is a new cartridge and/or handle adapter, plus a drop of blue threadlocker on the set screw.
Do I need to shut off the water to tighten a loose shower faucet?
No — tightening the set screw on the handle doesn’t touch the water path, so you can do it with the water on. You only need to shut off the water if you’re removing the cartridge or valve internals. For a simple wobble, just pop the cap, snug the set screw, and you’re done.
How much does it cost to fix a loose shower faucet?
A loose set screw costs nothing but 10 minutes and a hex key. A replacement cartridge runs about $15–$60 depending on brand. Only a corroded valve body that needs replacing — or hiring a plumber — pushes it into the $150–$400 range, and that’s the rare case. The vast majority of loose shower faucets are a free DIY fix.
Is a loose shower faucet dangerous?
It’s not immediately dangerous, but ignoring it can lead to water leaking behind the wall (from a loose trim plate) or scalding-temperature surprises (from a worn cartridge losing its temperature limit). Neither is an emergency, but both are cheaper and safer to fix now than after water damage sets in.
About the author: This guide was written by the avitashome fixtures team, drawing on hands-on installation and repair of shower valves, cartridges, and trim across every major brand. We test the repair parts we recommend against real Moen, Delta, Kohler, and Pfister valves before we stock them.
Why trust avitashome: avitashome is a dedicated faucet and bathroom-fixtures specialist, not a general home store. Our shower faucets and cartridges are pressure- and cycle-tested to meet ASME A112.18.1 / CSA B125.1 standards, and our trim kits are backed by a limited lifetime warranty on finish and function. When we say a part fits and holds, it’s because we’ve bench-tested it — not guessed.