 아비타스 홈
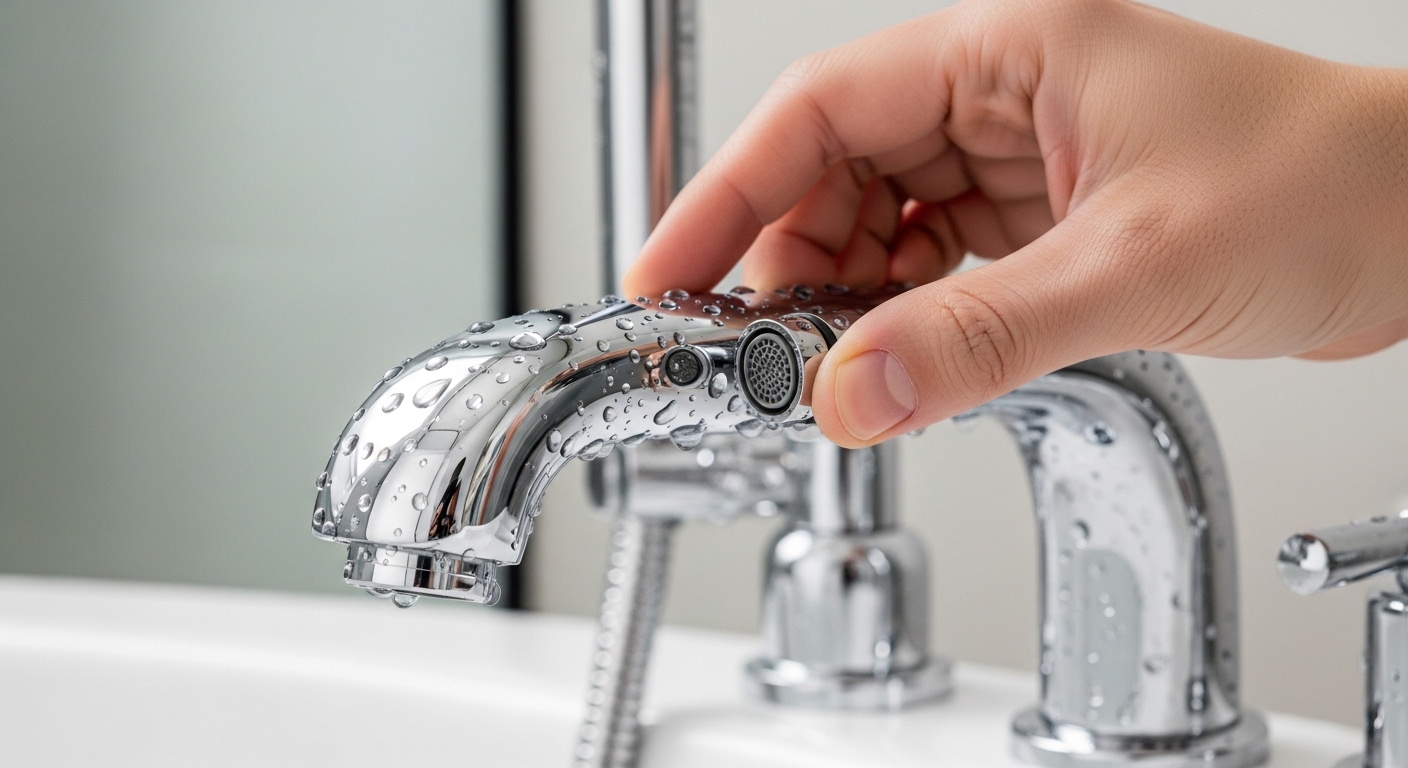
If your tub is filling slower than it used to, or the stream splits and sprays sideways, learning how to clean tub faucet aerator hardware is the cheapest fix in your whole bathroom. Nine times out of ten the problem isn’t your pipes or your water pressure — it’s a pea-sized screen clogged with hard-water minerals, grit, and little flecks of rubber. You don’t need a new faucet, and you almost certainly don’t need a plumber. You need a bowl of vinegar, an old toothbrush, and about 15 minutes.
Below I’ll walk you through exactly how to find the aerator, get it off without scratching the finish, deep-clean it, and put it back — plus how to tell when the aerator is the culprit versus when something deeper is going on.
Does a tub faucet even have an aerator?
Sometimes yes, sometimes no — and that’s the first thing to check. Many bathtub spouts are designed to fill fast, so they have no aerator at all, just an open mouth. But a lot of modern tub spouts (especially those doubling as a hand-held diverter or on combo tub/shower valves) do have a small aerator or a flow-straightening insert screwed into the tip.
Here’s how to tell in five seconds: look at the very end of the spout where the water exits. If you see a fine mesh screen or a threaded ring set into the opening, you have an aerator. If it’s a smooth open pipe, you don’t — and a weak flow points to the valve, cartridge, or supply side instead of a clogged screen.
Run your fingertip around the inside lip of the spout. A slight ridge or a knurled (textured) edge means there’s a removable insert. On kitchen and bathroom sinks aerators are nearly universal; on tubs they’re hit or miss, which is exactly why so many people get confused when their weak-flow fix doesn’t apply.
How do you clean a tub faucet aerator step by step?
Unscrew it, soak it in warm white vinegar for 30–60 minutes, scrub the screen with a toothbrush, rinse, and reassemble. That’s the entire method. Here’s the detailed version so nothing goes sideways:
- Close the drain and lay down a towel. The aerator breaks into 3–4 tiny parts and they love to disappear down the drain. Block it first, every time.
- Unscrew the aerator. Try by hand first, turning clockwise as you face up into the spout (aerators are reverse-threaded from your point of view). If it won’t budge, wrap the ring in a rubber band or a strip of electrical tape and grip it with slip-joint pliers. The tape protects the finish.
- Lay the parts out in order. Typically you’ll have the outer housing, a rubber washer or O-ring, a plastic flow restrictor, and one or two metal mesh screens. Line them up left to right so reassembly is foolproof.
- Pre-rinse and pick off debris. Hold the screen under a hard stream of water and knock loose the sand and grit. You’ll often see tiny black rubber bits — those are shed from an aging supply hose or washer.
- Soak in warm white vinegar. Submerge every part in a small bowl of plain distilled white vinegar. Warm (not boiling) vinegar works faster. Give it 30 minutes for light scale, up to an hour or overnight for a chalky, crusted aerator.
- Scrub. Use an old toothbrush or a soft brass brush to work the loosened mineral off the mesh. A straight pin clears any single stubborn hole in the screen.
- Rinse thoroughly. Flush each part under running water so no vinegar or loosened grit stays behind.
- Reassemble in the exact reverse order and hand-tighten back into the spout. Snug is enough — over-tightening cracks the plastic restrictor and chews the washer.
Turn the water on. You should get a full, straight, quiet stream immediately. If you soaked it and the flow is still weak, the aerator wasn’t the whole story — jump down to the troubleshooting section. This same vinegar routine works on shower heads and sink tips too; if you want the deeper dive on the chemistry and dwell times, our guide on how to clean a faucet head with white vinegar breaks it down further.
Why is white vinegar the go-to, and can I use something stronger?
White vinegar is the go-to because the gunk clogging your aerator is almost entirely mineral scale — calcium and magnesium carbonate from hard water — and vinegar’s mild acetic acid dissolves that scale without harming chrome, brass, or most plastic parts. It’s cheap, food-safe, and it won’t void a faucet warranty the way harsh acids can.
You can reach for a commercial lime-and-scale remover (like a CLR-type product) if an overnight vinegar soak barely dents a heavy crust, but follow these rules: never use it on brushed, matte, or coated finishes without checking the label, keep contact time short, and rinse aggressively. Avoid bleach entirely — it does nothing to mineral scale and can degrade rubber washers. Here’s how the common options stack up:
| Cleaner | Best for | Soak time | Safe on finishes? | Cost |
|---|---|---|---|---|
| Distilled white vinegar | Everyday mineral scale | 30–60 min | Yes — all finishes | ~$3/gal |
| Warm vinegar + baking soda scrub | Scale plus soap film | 30 min | Yes | ~$4 |
| Commercial lime/scale remover | Heavy crusted buildup | 2–5 min | Check label; risky on matte/coated | ~$6–10 |
| Lemon juice (citric acid) | Light scale, no vinegar on hand | 60+ min | Yes | ~$2 |
| Bleach | Not recommended | — | Damages rubber; useless on scale | — |
My honest take after cleaning hundreds of these: plain warm vinegar handles 95% of clogs. Save the strong stuff for the one aerator a year that’s truly cemented shut, and consider just replacing that part — a new aerator costs a couple of dollars.
How often should you clean a tub aerator in a hard-water home?
In a hard-water home, clean the aerator every 3 to 6 months; on softened or naturally soft water, once a year is plenty. The tell is the flow itself — the moment the stream starts to weaken, split, or sputter with air, that’s your reminder, and it’s usually faster to act on that than to keep a calendar.
Water hardness is measured in grains per gallon (gpg). Under 3 gpg is soft and you’ll rarely see buildup. Between 7 and 10 gpg is “hard,” and above 10 gpg is “very hard” — that’s where aerators crust up in a matter of months. If you’re not sure, a $10 test strip kit tells you where you stand. Homes on well water tend to run harder and also pick up more sediment, so those aerators clog fastest.
- Very hard water (10+ gpg): clean every 3 months, keep a spare aerator on hand.
- Hard water (7–10 gpg): every 4–6 months.
- Moderate (3–7 gpg): twice a year.
- Soft (under 3 gpg): once a year, or whenever flow drops.
If you’re cleaning aerators every few weeks, that’s not normal maintenance — that’s a sign of a failing water heater dip tube, deteriorating supply hoses shedding rubber, or sediment stirred up by pipe work. Recurring debris is a clue to look upstream, not just at the screen.
What if cleaning the aerator didn’t fix the weak flow?
If a clean aerator still gives you a trickle, the restriction is upstream — most often the cartridge, the shut-off valves, or the supply lines. Work from the spout backward. Here’s the order I check things in:
Compare hot vs. cold. If only hot is weak, the problem is likely the water heater or the hot-side supply. If both are weak, it’s the valve, cartridge, or main pressure. Isolating the side saves you an hour of guessing.
Suspect the cartridge. On a single-handle tub/shower valve, a scaled-up or worn cartridge chokes flow and causes temperature drift. That’s a bigger job than an aerator but still very DIY-able — our walkthrough on faucet cartridge replacement in a bathtub covers shutting off the water, pulling the retaining clip, and swapping the cartridge without a plumber.
Check the supply and stops. Partially closed shut-off valves, a kinked flexible supply line, or a clogged inline screen at the valve all throttle flow. If you’re mid-project and the spout itself is coming off, it’s worth reading up on how to change a faucet in a bathtub so you handle the threads and sealant correctly.
Whole-house low pressure. If every fixture is weak, the aerator was never the issue — look at your pressure-reducing valve or main shut-off.
Do you need to replace the aerator instead of cleaning it?
Replace it — don’t clean it — if the mesh is torn, the plastic restrictor is cracked, the threads are stripped, or a soak-and-scrub doesn’t restore full flow. At two to five dollars, an aerator is one of the cheapest parts in your home, and a damaged one will never seal or flow right no matter how long you soak it.
The catch when buying a replacement is thread size. Aerators come in a handful of standard diameters (regular male/female, junior, Tom Thumb) and getting the wrong one means a leaky, cross-threaded mess. Before you order, measure what you have — our guide to faucet aerator thread size shows you how to measure the diameter and thread pitch so the new one seats perfectly on the first try.
While you’ve got the spout apart, glance at the wall connection too. If there’s an ugly gap or a loose escutcheon where the spout meets the tile, that’s a separate quick fix — see what a bathtub faucet flange does and whether yours needs replacing.
Which tub faucet finishes need extra care during cleaning?
Chrome and stainless are bulletproof — vinegar, pliers with tape, and a brush won’t hurt them. The finishes to baby are matte black, brushed gold, oil-rubbed bronze, and any PVD or powder-coated surface, because acids and abrasive pads can dull or streak the coating over time.
For those finishes: keep the vinegar contact on the internal parts (screens and restrictor), not the visible housing; wipe the exterior with a soft damp cloth only; and never use a metal brush or scouring pad on the outside. If you’re shopping for a fixture that shrugs off hard water and looks sharp, a quality matte black tub faucet with a proper PVD coating resists spotting far better than cheap painted finishes — worth knowing before your next upgrade.
A quick word on doing this safely and right
Two safety notes. First, you don’t need to shut off the water just to clean a tub aerator — the spout isn’t pressurized once the valve is closed — but if you’re removing the whole spout or touching the cartridge, shut off the supply first. Second, don’t force a seized aerator with bare pliers; you’ll gouge the finish or snap the ring. Penetrating with vinegar-soaked paper towel wrapped around the tip for 20 minutes loosens most stuck ones before you ever apply torque.
FAQ
Can I clean a tub faucet aerator without removing it?
Partially. Fill a small sandwich bag with white vinegar, submerge the spout tip in it, and secure it with a rubber band so the aerator soaks in place for an hour. This dissolves surface scale and often restores decent flow. But it won’t flush out trapped grit and rubber flecks the way full removal and a toothbrush scrub will, so treat the bag method as a quick touch-up, not a real cleaning.
Why does my tub aerator keep clogging so fast?
Repeat clogs usually mean one of three things: very hard water depositing scale quickly, sediment in your supply lines or water heater, or an aging rubber supply hose or washer shedding little black bits into the screen. If you’re cleaning it monthly, inspect the supply hoses and consider flushing your water heater — the aerator is just catching the debris, not causing it.
Is it normal for black bits to come out of the aerator?
Yes, and they’re a clue. Small black flecks are almost always deteriorating rubber — from a supply-line washer, a hose, or the water heater’s dip tube breaking down. A few during one cleaning is harmless. A steady stream of them every time means a component upstream is failing and should be replaced before it clogs things faster.
What size is a standard tub faucet aerator?
There’s no single “tub” size — aerators use standard male and female threads in a few common diameters, plus smaller junior and Tom Thumb sizes. Tub spouts more often use a flow-straightener insert than a threaded aerator. Measure the outside or inside diameter and match the thread pitch before buying a replacement so it seats without cross-threading.
Will cleaning the aerator increase my water pressure?
It restores your flow, which feels like more pressure, but it doesn’t raise the actual pressure in your pipes. A clogged aerator physically blocks the opening, so clearing it lets your existing pressure move full volume again. If every fixture in the house is weak, that’s a true pressure issue — check your pressure-reducing valve, not the aerator.
Can vinegar damage my faucet if I leave it soaking too long?
On chrome, stainless, and brass internal parts, an overnight vinegar soak is fine. The risk is with matte, coated, or brushed-gold exterior finishes and with rubber washers, which can degrade after very long exposure to acid. Keep soaks under a few hours for those, rinse well, and you’ll have no problems.
About the author: This guide was written by the Avitas Home fixtures team, who have installed, tested, and serviced hundreds of tub, shower, and sink faucets across hard- and soft-water homes. We hands-on test aerators, flow restrictors, and finishes against real-world mineral buildup before we recommend a method or a part.
Why trust Avitas Home: At avitashome.com we specialize exclusively in faucets and bathroom fixtures. Our recommendations follow standard plumbing flow-rate specifications — most modern aerators are rated to the U.S. federal maximum of 2.2 GPM (with water-saving models at 1.5 GPM or lower) — and we only suggest replacement parts covered by manufacturer warranties. When we say a method is finish-safe, it’s because we’ve verified it, not because we read it somewhere.