 Avitas Acasă
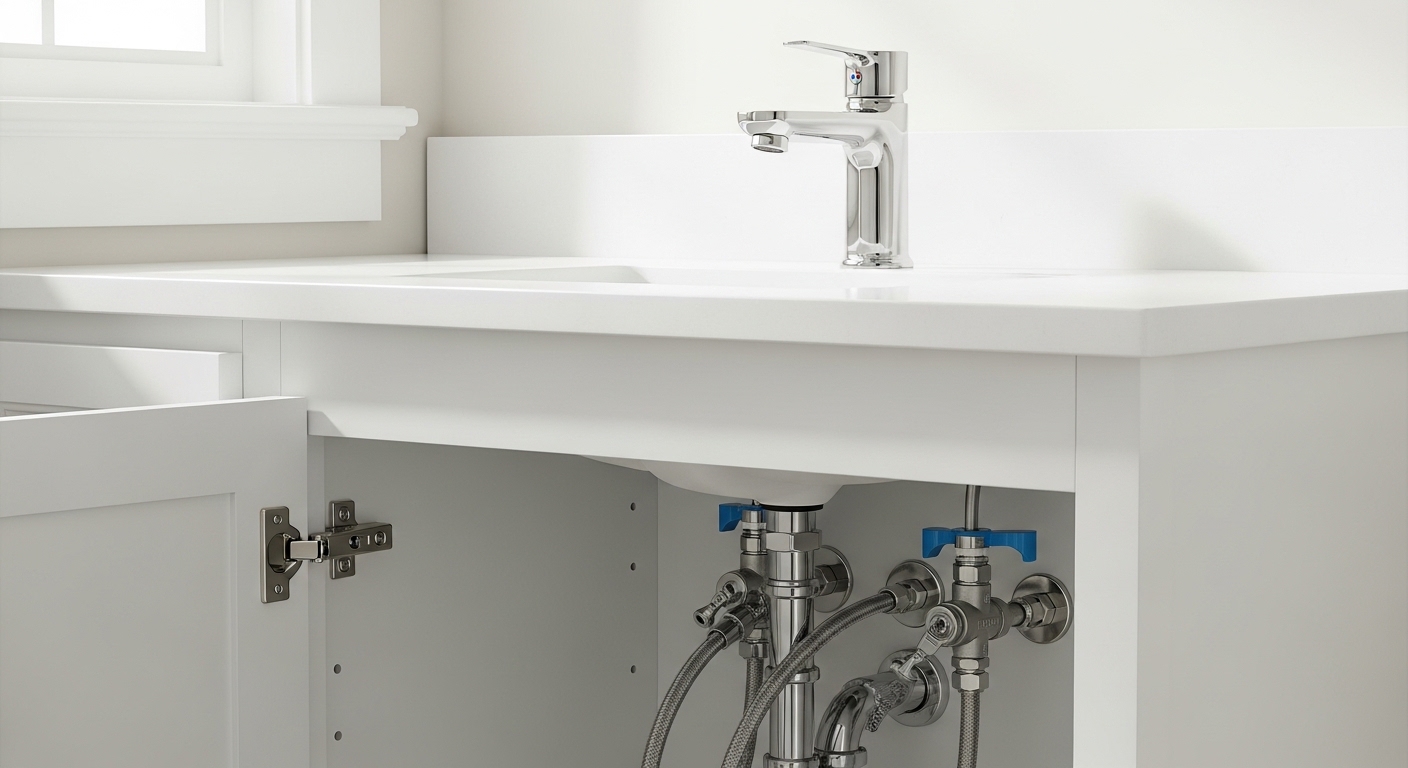
If you’re standing at the hardware store holding a Glacier Bay faucet box and wondering about the glacier bay bathroom faucet supply line size, here’s the honest answer: it’s rarely the faucet that varies — it’s your shut-off valve under the sink. Glacier Bay is Home Depot’s house brand, and its bathroom faucets follow the same North American plumbing standards as Delta, Moen, or Kohler. That means the connection sizes are predictable once you know what to look at. Below I’ll walk you through exactly what to buy, how to measure in 60 seconds, and the two or three “gotchas” that send people back to the store for a second trip.
What Size Supply Line Does a Glacier Bay Bathroom Faucet Actually Use?
For the vast majority of Glacier Bay bathroom faucets, the supply line you need is 3/8-inch compression on the valve side and 1/2-inch on the faucet side (written as 3/8″ comp × 1/2″ FIP). That is the single most common bathroom configuration in North American homes, and Glacier Bay builds to it deliberately so the faucets are compatible with standard angle-stop valves.
Here’s why that pairing exists. The little chrome or plastic shut-off valve under your sink — the “angle stop” you turn to cut the water — almost always has a 3/8-inch compression outlet in residential bathrooms. The faucet itself, meanwhile, has threaded tailpieces or shanks coming down from the base, and on Glacier Bay bathroom faucets those are typically 1/2-inch. So the supply line has to bridge those two different sizes. A 3/8″ comp × 1/2″ line does exactly that.
One important nuance: a lot of newer Glacier Bay bathroom faucets — especially single-hole and 4-inch centerset models — come with flexible supply risers permanently attached to the faucet body at the factory. When that’s the case, you don’t buy a faucet-side connection at all. You only need to match the free end of those risers to your valve, which is again usually 3/8-inch compression. Always open the box and check before you buy anything.
How Do I Know if My Faucet Has 1/2″ or 3/8″ Inlets?
Look at what’s hanging down from the bottom of the faucet before you buy a line. If you see threaded metal shanks (tailpieces) with no hose attached, measure the thread; if you see braided hoses already coming out of the faucet, the faucet side is done and you only match the valve.
Glacier Bay bathroom faucets generally fall into three setups:
- Threaded 1/2″ shanks: Common on two-handle widespread and centerset faucets. You connect a supply line with a 1/2″ FIP (female iron pipe / coupling nut) end here.
- Pre-attached flexible risers: Common on single-handle and pull-down single-hole models. The hoses are already on; you just reach the valve.
- Compression tailpieces: Less common, but some models present a smooth 3/8″ tube you connect with a compression nut.
The safest habit is to bring the faucet’s installation sheet (or a phone photo of the connections) to the store, or simply measure. Measuring is faster than you’d think, and I’ll show you next.
How Do You Measure Faucet Supply Line Size in Under a Minute?
Measure the outside diameter of the tube or the fitting, not the “nominal” name — because supply-line sizing is confusingly named. A “3/8-inch compression” fitting actually slides over a 3/8″ outside-diameter tube, and the threaded valve nut measures about 5/8″ across the threads. Don’t panic when the numbers don’t match the label; that mismatch is normal in plumbing.
Do this:
- At the valve: Look at the outlet where the old line screws on. If the compression nut is roughly 5/8″ across, it’s a 3/8″ compression valve — the default in bathrooms.
- At the faucet: If there’s a threaded shank, measure the outside diameter of the threads. Around 1/2″ to 5/8″ across the threads usually means a 1/2″ faucet inlet.
- Length: With the water off, measure from the valve outlet up to the faucet inlet, then add a few inches of slack. Buy a line that’s a little long rather than tight.
If you want a deeper walkthrough on decoding those confusing numbers across every faucet type, our guide on the most common faucet supply line size and which one fits your faucet breaks down comp vs. FIP vs. nominal sizing in plain English. And if the threads on your faucet or aerator are throwing you off, how to measure faucet aerator thread size uses the same measuring logic you’ll apply here.
Which Supply Line Length Should I Buy — 12″, 16″, or 20″?
For a standard bathroom vanity, a 16-inch or 20-inch braided line is the safe default; go 12-inch only for a shallow pedestal or very tight cabinet where a long hose would kink or coil. The most common mistake is buying too short, which forces you to stretch the line and stress the connections — a leak waiting to happen.
Here’s how to think about length by vanity type:
- Standard vanity (valves near the floor): 16″ or 20″ gives comfortable slack.
- Pedestal sink or wall-mount: Valves often sit higher, so 12″ can work, but measure — some need 16″.
- Deep or double vanity: 20″ and occasionally 24″ for faucets set far back or off-center from the valve.
Braided stainless-steel lines are worth the extra dollar or two over cheap vinyl. They resist bursting, tolerate a little bend, and last for years. Buy two — you have hot and cold — and don’t reuse old risers when you swap a faucet; a fresh pair is cheap insurance.
Glacier Bay Bathroom Faucet Supply Line — Size Comparison
Here’s the quick-reference table for matching the glacier bay bathroom faucet supply line size to your situation. Use it to grab the right line the first time.
| Connection point | Typical size | Fitting type | What it looks like |
|---|---|---|---|
| Shut-off valve (bathroom) | 3/8″ | Compression | Nut ~5/8″ across, slides over 3/8″ tube |
| Faucet inlet (2-handle Glacier Bay) | 1/2″ | FIP / coupling nut | Threaded brass shank under the faucet |
| Faucet inlet (single-hole Glacier Bay) | Pre-attached riser | Factory-installed hose | Braided line already on the faucet |
| Recommended line to buy | 3/8″ × 1/2″, 16″–20″ | Braided stainless | Silver mesh hose, two nuts |
| Older / rare setups | 3/8″ comp × 3/8″ comp | Compression both ends | Smooth tube inlet on faucet |
What Do I Do if the New Supply Line Doesn’t Fit?
If your line won’t thread on, the fix is almost always a small brass adapter — not a different faucet or valve. The two usual culprits are a 1/2″ valve (common in older homes) instead of 3/8″, or a faucet inlet that’s compression rather than FIP. A $3 adapter bridges either mismatch.
Walk through it this way:
- Valve is 1/2″ comp, line is 3/8″: Buy a 3/8″ × 1/2″ supply line, or a reducing adapter. Some homes, especially with older plumbing, run 1/2″ stops.
- Faucet shank is 1/2″ but line end is 3/8″: Use a 3/8″ comp × 1/2″ FIP line — that’s the standard bathroom line and solves it directly.
- Cross-threading: If it feels gritty going on, stop and back it off. Aluminum and brass threads cross easily and ruin the fitting. Hand-start every nut, then snug with a wrench.
Don’t over-tighten to force a fit. Braided-line nuts seal on a rubber washer or a compression sleeve, not on brute force — a quarter turn past hand-tight is usually plenty. If it drips, snug slightly, don’t crank.
Can I Just Reuse My Old Supply Lines With a New Glacier Bay Faucet?
You can, but you usually shouldn’t. If the old lines are braided stainless, under about five years old, and show no corrosion or bulging, reusing them is defensible. But rubber washers harden and compression sleeves deform over time, so a fresh pair is the smarter move on any faucet swap.
Think about what’s at stake: a supply line failure floods a cabinet, and often the floor, potentially while you’re not home. A new pair of quality braided lines costs less than a fast-food lunch. When you’re already under there installing a faucet, it’s the cheapest upgrade you’ll ever make. This is the same logic behind replacing worn internal parts during any repair — the labor is already happening, so renew the cheap consumables while you’re in there. (If you’re the type who likes to fix rather than replace, our piece on the single handle faucet gasket and how to replace it when it leaks shows the same “renew the cheap seal” mindset applied inside the faucet itself.)
Does the Faucet’s Finish or Style Change the Supply Line Size?
No. Whether your Glacier Bay faucet is chrome, brushed nickel, matte black, or brushed gold, the supply line connection sizes are the same — finish is cosmetic and doesn’t touch the plumbing threads. A single-hole faucet, a centerset, and a widespread might differ in how many holes they need in the sink and whether risers come pre-attached, but the valve-side connection stays 3/8″ compression.
What does change with style is the number of connections and the deck configuration. A widespread faucet has separate hot and cold valves plus a spout, so you’re dealing with two supply lines feeding the handle bodies. A single-hole faucet consolidates everything into one body, often with pre-attached risers. If you’re weighing a compact single-hole layout for a small vanity, our review of the Elate single hole faucet for a small bathroom vanity covers how those all-in-one bodies handle their supply connections. And if you care about what’s actually in the brass touching your water, what makes a bathroom sink faucet “lead free” is worth a read before you buy any fixture.
Step-by-Step: Connecting the Supply Line to a Glacier Bay Faucet
The actual hookup takes about ten minutes once the faucet is mounted. Here’s the sequence.
- Shut off the water at both angle stops under the sink. Turn them clockwise until they stop. Open the faucet to relieve pressure.
- Attach the faucet end first (if the risers aren’t pre-attached). Hand-thread the 1/2″ nut onto the faucet shank until snug, then a quarter turn with a wrench.
- Attach the valve end. Hand-thread the 3/8″ compression nut onto the shut-off outlet. Snug it — don’t reef on it.
- Match hot and cold. Left valve is hot, right is cold, in almost every North American install. Route the lines so they don’t cross awkwardly or kink.
- Turn the water back on slowly and watch every joint for 30 seconds. A bead of water means back off, reseat, and re-snug.
- Run the faucet hot and cold for a minute to clear air and debris, then check again once the pressure has fully built.
That’s the whole job. If you’re new to working under a sink, keep a towel and a small bowl handy — there’s always a little water left in the lines even after you shut the valves.
Why Trust This Guide
This article was written and reviewed by the fixtures team at avitashome, a specialist retailer of faucets, shower systems, and bathroom fixtures. We spend our days matching customers to the right hardware and troubleshooting installs, so the sizing advice here reflects real North American plumbing standards, not guesswork.
A quick standards note: residential supply lines and faucet connections in the U.S. are built around ASME/ANSI dimensional standards, and reputable braided lines carry certifications (look for burst-pressure ratings and a manufacturer warranty). Glacier Bay faucets themselves are backed by Home Depot’s warranty program, and legitimate fixtures should meet lead-free requirements under the U.S. Safe Drinking Water Act. When you buy a supply line, choosing one with a stated burst-pressure rating and warranty is a small detail that separates a five-year line from a five-month one.
Author note: I’ve installed and swapped more bathroom faucets than I can count, and the single most common return I see is a supply line that was bought “by the label” instead of by measuring. Measure the tube and the nut, buy braided, buy a little long, and you’ll get it right the first time.
FAQ
What size supply line comes with a Glacier Bay bathroom faucet?
Many Glacier Bay bathroom faucets — especially single-hole and single-handle models — come with flexible braided supply risers pre-attached at the faucet end, with a 3/8-inch compression connection at the free end to meet your shut-off valve. Two-handle models more often have 1/2-inch threaded shanks and no attached line, so you supply your own 3/8″ × 1/2″ braided line.
Is a bathroom faucet supply line 3/8 or 1/2 inch?
Both, in a sense. The valve end is almost always 3/8-inch compression in a residential bathroom, while the faucet inlet is commonly 1/2-inch. That’s why the standard bathroom supply line is labeled 3/8″ comp × 1/2″ FIP — it bridges the two sizes in one hose.
Are all bathroom faucet supply lines the same size?
Not quite. The valve side is standardized at 3/8″ compression in most homes, but faucet inlets vary between 1/2″ threaded, pre-attached risers, and occasional 3/8″ compression tailpieces. That’s why you measure both ends before buying rather than assuming.
How long should a bathroom faucet supply line be?
For a standard vanity, 16″ to 20″ gives comfortable slack without kinking. Use 12″ only for shallow or tight setups like some pedestal sinks. Always measure from the valve to the faucet inlet and add a few inches of slack; too-short is the most common length mistake.
Can I install a Glacier Bay faucet supply line myself?
Yes. It’s a genuinely DIY job that takes about ten minutes with an adjustable wrench. Shut off the water, hand-thread each nut to avoid cross-threading, snug about a quarter turn past hand-tight, then turn the water on slowly and check for drips. No soldering or special tools required.