 أفيتاس هوم
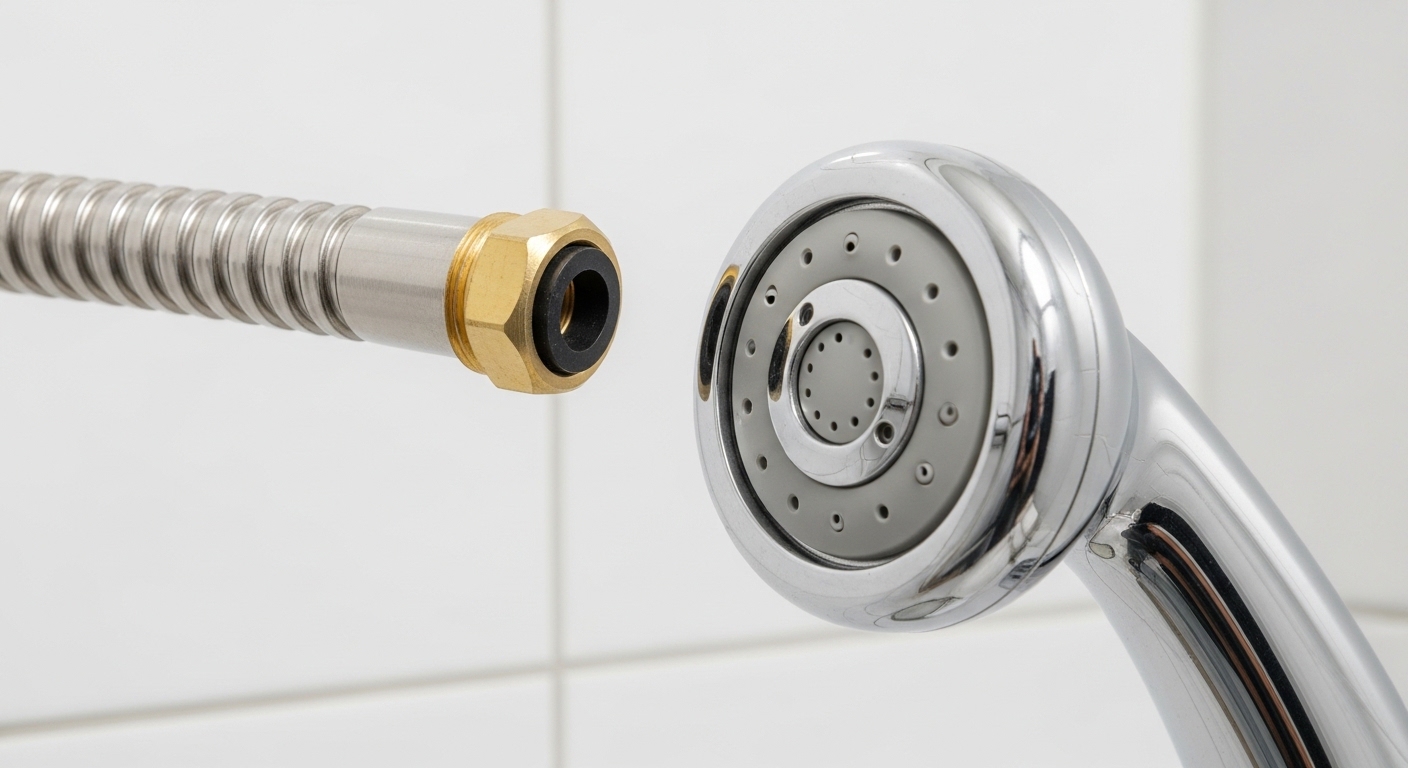
If your shower hose is dripping at the connection, kinked into a stiff coil, or the metal has started flaking, a handheld shower head hose replacement is almost always the right fix — and it’s one of the easiest plumbing swaps in the whole bathroom. You don’t need a plumber, you don’t need to shut off the main water line, and in most cases you don’t even need a wrench. Below, I’ll walk you through exactly what to buy, how the connections work, how to install it in about five minutes, and how to avoid the two mistakes that cause 90% of “my new hose still leaks” complaints.
Can you replace a handheld shower hose yourself without a plumber?
Yes — this is genuinely a DIY job for anyone, no plumbing experience required. Handheld shower hoses use a standardized threaded connection on both ends, so replacement is a “screw off the old, screw on the new” task that takes about five minutes and needs no special tools. The only thing you’re really doing is making two hand-tight connections seal properly.
The reason it’s so forgiving: the water pressure in a shower hose is low compared to a supply line, and the connections are designed to be swapped by hand. Unlike a faucet stem valve replacement or a cartridge job — where you’re working inside the wall and behind a handle — the hose lives entirely outside the wall. If something isn’t sealed right, you’ll see the drip immediately and can just re-tighten. There’s very little that can go wrong and nothing you can permanently damage.
You should call a pro only in one narrow case: if the leak is actually coming from the shower arm (the pipe stub sticking out of the wall) or from behind the wall, not from the hose ends. That’s a different repair. A hose swap fixes leaks at the hose itself and at its two threaded connections.
What size is a handheld shower hose — will any replacement fit?
Almost any standard handheld hose will fit, because both ends of a shower hose use the same universal connection: 1/2-inch NPT (which most brands label G1/2″). That’s the same thread standard used on the shower arm and on the back of virtually every handheld handset sold in North America, so a replacement hose is effectively plug-and-play.
There are really only two dimensions you need to think about:
- Thread size (the fit): Standard is 1/2-inch. Both the cone nut that screws onto your shower arm/mount and the nut that screws into the handset are this size. If you’ve ever measured a common faucet supply line size, this is the same 1/2-inch family — so if a hose says “universal 1/2-inch,” it fits.
- Length (the reach): This is where you actually have a choice. Standard hoses run 59 inches (5 feet). Longer options at 69–79 inches are great for tall showers, handheld-for-bathing-kids-and-pets setups, or a slide bar mounted high on the wall.
The one exception to “any hose fits”: a small number of proprietary or European systems use a conical rubber gasket instead of a flat washer, or a non-standard fitting. If your existing setup is a name-brand European fixture, check that end before ordering. For 95% of US bathrooms, though, a universal 1/2-inch hose is exactly what you need.
Which handheld shower hose material is best — stainless steel, brass, or plastic?
For most bathrooms, a stainless-steel hose with solid brass connection nuts is the best buy — it resists kinking, won’t crack like plastic, and lasts 5–10 years for around $10–$20. Plastic (PVC) hoses are cheaper and lighter but crack and leak sooner; brass-core hoses are the most durable but heavier and pricier. Here’s how the three compare:
| Hose type | Typical price | Lifespan | Best for | Watch out for |
|---|---|---|---|---|
| Stainless-steel (with brass nuts) | $10–$20 | 5–10 years | Everyday bathrooms — the sweet spot | Cheap versions may still have plastic nuts inside |
| Solid brass / brass-interlock | $18–$35 | 8–15 years | Hard-water homes, heavy daily use, premium builds | Heavier; can drag a lightweight handset off its holder |
| PVC / reinforced plastic | $5–$12 | 1–3 years | Rentals, quick temporary fixes, RVs where weight matters | Kinks, cracks, and gets stiff over time |
| Brass-nut + nylon core (hybrid) | $12–$22 | 4–7 years | Balancing weight and durability | Quality varies a lot by brand |
My honest recommendation: buy a stainless-steel hose but check the product photos and specs for brass connection nuts. The nuts are where leaks actually happen — a stainless outer sleeve wrapped around plastic nuts will still fail at the threads. If you have hard water and constant mineral buildup, step up to a brass-interlock hose; the same logic applies to why a rainfall shower head brass model outlasts its plastic equivalent — solid metal simply handles minerals and daily torque better.
How do you replace a handheld shower head hose step by step?
You can replace a handheld shower hose in about five minutes with no tools, just by unscrewing both ends by hand and screwing the new hose on with fresh washers. You don’t need to turn off your water — the shower valve already controls the flow, so as long as the shower is off, no water comes out. Here’s the full process:
- Unscrew the hose from the shower arm or mount. Turn the cone nut counterclockwise by hand. If it’s stuck from mineral buildup, wrap the nut in a cloth and use pliers or a wrench — the cloth protects the finish from scratches.
- Unscrew the hose from the handset. Same motion on the handheld sprayer end. Set the old hose aside.
- Check and replace the rubber washers. This is the step everyone skips — and it’s the one that matters most. Each connection has a small rubber washer (and sometimes a mesh filter screen) inside the nut. New hoses usually include fresh washers; use them. A flattened, cracked, or missing washer is the #1 cause of a hose that leaks even after replacement.
- Optional: add plumber’s tape. Wrap 2–3 turns of PTFE (Teflon) tape clockwise around the threads of the shower arm. This isn’t strictly required with a washer, but it helps guarantee a drip-free seal — the same trick that helps when you’re chasing down why a shower faucet is loose or seeping.
- Screw the new hose on — hand-tight only. Attach both ends. Turn clockwise until snug, then just a quarter-turn more with a cloth-wrapped hand. Do not crank it down with a wrench. Over-tightening crushes the rubber washer and actually causes leaks rather than preventing them.
- Test for leaks. Turn the shower on and run it for 30 seconds. Feel around both connections. A drip means the washer isn’t seated or the nut needs a small snug — not a hard crank.
That’s the entire job. If you can screw the cap onto a water bottle, you can do this.
Why does my shower hose keep leaking even after I replaced it?
A brand-new hose that still leaks almost always comes down to one of three things: a missing or doubled-up washer, over-tightening that deformed the washer, or crossed threads. All three are quick fixes. Here’s how to diagnose it fast:
- Leak at the connection, small steady drip: Unscrew, check that there’s exactly one washer seated flat in the nut. People often forget to remove the old washer and stack a second one on top — that prevents a proper seal.
- Leak that got worse after you tightened harder: You’ve crushed the washer. Back off, replace it with a fresh one, and go hand-tight only.
- Leak at the handset with reduced flow: Mineral buildup. Unscrew the handset, soak it and the filter screen — the same white-vinegar soak that works to clean a faucet head with white vinegar works perfectly on a shower handset and restores flow.
- Leak along the hose body itself: The hose is defective or pinched. This one you can’t fix — replace it.
One more overlooked cause: cross-threading. If the nut went on crooked, it’ll never seal and can strip the plastic. Always start the nut by hand and make sure it spins on smoothly before tightening.
Will a new hose fix my low shower pressure?
Sometimes — a kinked, collapsed, or mineral-clogged hose genuinely restricts flow, and replacing it restores pressure. But if the hose looks fine, the culprit is usually the handset’s filter screen or flow restrictor, not the hose. Before you blame the hose, unscrew the handset and check the small mesh screen where it meets the hose; it clogs with sediment and chokes flow.
The diagnostic sequence is the same one that solves RV shower head low pressure: (1) remove and clean the handset filter screen, (2) check for a removable flow restrictor if your pressure is legitimately too low, (3) inspect the hose for internal kinks by running water and flexing it, and only then (4) replace the hose if it’s the actual restriction. A new hose is a real fix when the old one is physically damaged inside — but it won’t do anything for a clogged sprayer or a whole-house pressure problem.
How long do shower hoses last, and how often should you replace one?
A good stainless-steel or brass hose lasts 5–10 years; a cheap plastic one may need replacing in 1–3. Rather than watching the calendar, replace yours when you see any of these signs: visible cracks or flaking on the metal sleeve, a permanent kink that won’t straighten, rust or corrosion at the nuts, a persistent drip that new washers won’t fix, or reduced flow that cleaning doesn’t restore.
Hard water is the biggest lifespan factor. Mineral-heavy water corrodes fittings and stiffens hoses faster, which is why homes with hard water often pair a durable brass hose with a quality handset. If you’re already upgrading the hose, it’s a natural moment to look at the whole showering setup — matching the finish and material of your hose to your handset keeps everything looking and lasting like a coordinated system rather than a patched-together fix.
What should you look for when buying a replacement hose?
Prioritize brass connection nuts, a length that fits your shower, and an anti-kink or double-interlock construction. Beyond material, here’s a quick buyer’s checklist:
- Universal 1/2-inch (G1/2″) fittings — confirms it fits your shower arm and handset.
- Brass nuts, not plastic — this is the single most important durability factor.
- Length that matches your space — 59″ is standard; go 69–79″ for tall users, slide bars, or bathing kids and pets.
- Anti-twist / double-interlock design — resists kinking and tangling.
- Included washers and filter screen — saves a hardware-store trip and ensures a proper seal.
- Finish match — chrome, brushed nickel, matte black, or brushed gold to match your existing handset and valve trim.
Author’s note & why trust avitashome
This guide was written by the avitashome fixtures team, drawing on hands-on installation and testing of handheld showers, hoses, and valve trim across thousands of orders. avitashome specializes exclusively in faucets and bathroom fixtures — not general home goods — so our recommendations come from living in this category every day. The hoses and handsets we stock use solid-brass fittings and are built to meet standard 1/2-inch NPT specifications, and our shower components carry manufacturer warranties so you’re covered if a fitting ever fails. When we say “hand-tight only” or “check the washer,” it’s because we’ve seen exactly which small mistakes turn a five-minute swap into a returned product.
FAQ
Are handheld shower hoses universal?
Nearly always, yes. Both ends use the universal 1/2-inch (G1/2″) NPT connection standard in North America, so a replacement hose fits virtually any shower arm and handset. The only exceptions are a few proprietary European systems that use conical gaskets or non-standard fittings — check yours if you own a specialty imported fixture.
Do I need to turn off the water to replace a shower hose?
No. The shower valve already controls water flow to the hose, so as long as the shower is turned off, no water comes out when you unscrew the hose. You only need to shut off the main water supply for repairs behind the wall, not for a hose swap.
Why does my new shower hose still leak at the connection?
Almost always a washer problem or over-tightening. Make sure there’s exactly one rubber washer seated flat in each nut — not zero, not two stacked — and tighten only hand-tight plus a quarter turn. Cranking it down with a wrench crushes the washer and causes the leak you’re trying to stop. A few wraps of PTFE plumber’s tape on the threads help too.
What length handheld shower hose should I buy?
59 inches (5 feet) is the standard length that works for most showers. Choose 69–79 inches if you’re tall, if your handset sits on a high slide bar, or if you use the handheld to bathe kids or pets and want extra reach. Longer hoses fit the same 1/2-inch connection — length doesn’t affect the fit.
Can I use plumber’s tape on a shower hose connection?
Yes, and it’s a good idea. Wrap 2–3 clockwise turns of PTFE (Teflon) tape around the shower-arm threads before attaching the hose. The rubber washer does most of the sealing, but the tape adds insurance against a slow drip. Don’t skip the washer, though — tape alone won’t seal a shower connection.
How do I know if I need a new hose or just a new washer?
If the leak is at a connection nut, start with a fresh washer and correct tightening — that fixes most leaks for pennies. Replace the whole hose only if the leak is coming from the hose body itself, if the metal is cracked or flaking, if there’s a permanent kink, or if the fittings are corroded. When in doubt, swap the washer first; it’s the cheaper, faster test.