 Avitas Inicio
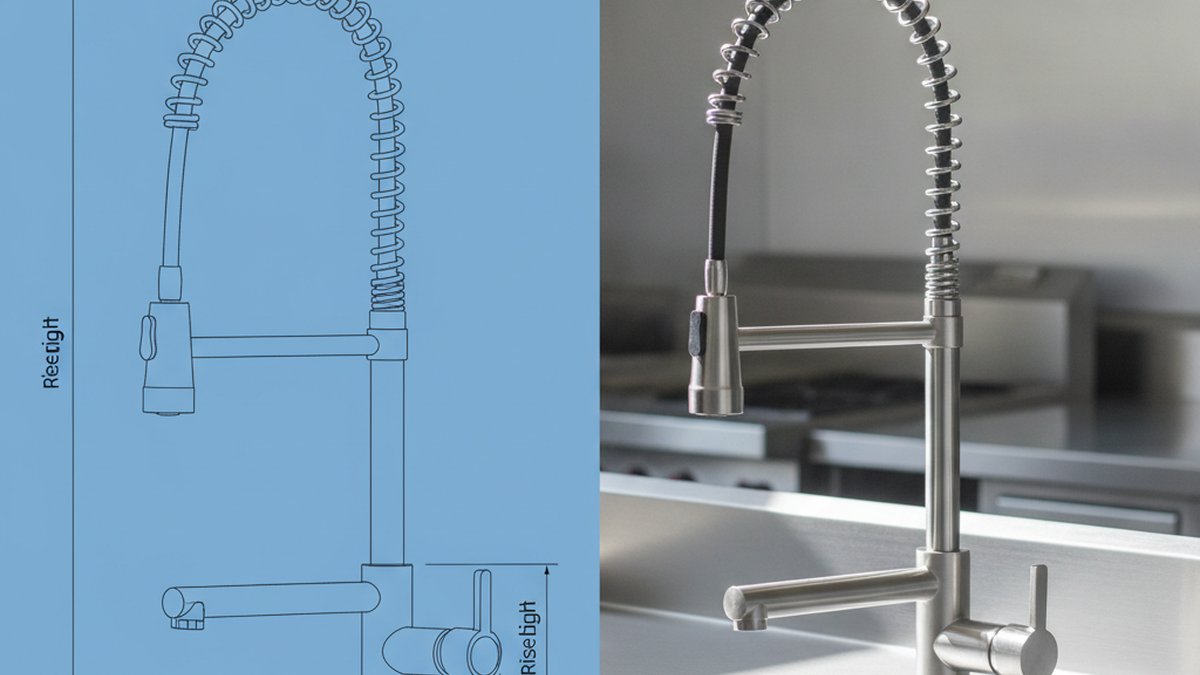
A commercial kitchen faucet cad block is a pre-drawn, dimensionally accurate digital representation of a faucet — usually a DWG file for AutoCAD or an RFA/RVT family for Revit — that architects, foodservice consultants, and kitchen designers drop straight into a floor plan, elevation, or plumbing rough-in drawing instead of drawing the fixture line by line. If you’re speccing a restaurant, hospital cafeteria, school kitchen, or a three-compartment prep sink line, the block is what tells the plumber where the deck holes land, how far the spout swings, and how much clearance you need above the sink. Below is exactly where to get good ones, how to tell a trustworthy block from a junk one, and how to keep your drawings from failing plan check.
What exactly is a commercial kitchen faucet CAD block, and why can’t you just draw it yourself?
A CAD block is a reusable object — the faucet, drawn once, correctly, so you can insert it anywhere. You could draw it yourself, but you’d be guessing at the dimensions that matter most: the center-to-center spread of the inlet shanks, the spout reach and height, the swing radius, and the pre-rinse riser height on a spring-style unit. Get any of those wrong and the drawing looks fine on screen but fails in the field.
Commercial faucets are not residential faucets scaled up. They carry real, code-driven geometry:
- 8″ center-to-center is the near-universal deck-mount standard for commercial two-handle faucets (versus 4″ or 6″ in residential), so your block’s shank spacing has to match the sink’s punched holes.
- Pre-rinse units can stand 36″–48″ tall with a flexible hose and spray valve — that height drives your upper-cabinet and shelf clearance.
- Wall-mount vs. deck-mount changes the whole rough-in: wall-mount bodies need backsplash penetrations at a set height, not deck holes.
- Vacuum breakers and atmospheric backflow add height above the flood rim that a self-drawn block usually forgets.
That’s why pulling the manufacturer’s block beats hand-drawing: the geometry is already vetted against the physical product.
Where do you actually download a commercial kitchen faucet CAD block?
Go to the manufacturer’s product page first, then look for a “Downloads,” “Specs,” “BIM,” o “Resources” tab — that’s where the DWG and Revit files live, and they’re free. For commercial kitchen faucets, the big names for spec-grade CAD are T&S Brass, Chicago Faucets, Fisher, Krowne, Encore, and Zurn; each publishes 2D DWG and, increasingly, Revit families for their pre-rinse, deck-mount, and wall-mount lines.
Here’s the practical order of operations:
- Manufacturer site (best). Search the exact model number, open the product page, download the DWG/RFA. The file is tied to that SKU, so the dimensions are trustworthy.
- BIM libraries (good). BIMobject, NBS Source, and the manufacturer’s own BIM portal host Revit families with parametric data — finish, flow rate, and connection type baked into parameters.
- CAD aggregators (use with care). Generic “free CAD block” sites host convenient symbols, but many are unbranded, unscaled, or drawn to a different standard. Fine for a concept layout; never for a permit set without checking.
- Your fixture supplier. If you’re sourcing the real faucet through a distributor, ask their spec desk — they’ll email you the CAD and the cut sheet together.
If you’re still deciding which faucet to spec before you grab its block, it’s worth reading up on the actual hardware first — our guide to the best commercial kitchen faucet from Delta for a busy kitchen walks through the pull-down and spring-style options that most often end up in a light-commercial plan, and our roundup of the best kitchen faucets by brand helps you narrow the manufacturer before you go hunting for its CAD library.
DWG or Revit family — which file format do you really need?
Use a 2D DWG block if you’re drafting flat plans and elevations in AutoCAD; use a Revit family (RFA) if your project is BIM and you need the faucet to carry data, not just lines. The format follows your workflow, not the other way around.
| Format | Best for | What it carries | Watch out for |
|---|---|---|---|
| 2D DWG block | AutoCAD plans, elevations, plumbing rough-in | Accurate linework, layers, dimensions | No embedded specs; check scale (1:1 in model space) |
| 3D DWG / SAT | Renderings, clash checks in CAD | Solid geometry, swing clearance | Heavier file; may be a simplified mesh |
| Revit family (RFA) | BIM projects, coordinated MEP models | Parameters: flow rate, finish, connection size, model # | Confirm it hosts correctly (face-based vs. work plane) |
| PDF / cut sheet | Verification, submittals | Certified dimensions and compliance data | Not insertable — reference only |
A common mistake: grabbing a slick 3D Revit family when the whole project is 2D CAD, then fighting to flatten it. Match the block to the deliverable. For a permit-stage plumbing plan, a clean 2D DWG with correct shank spacing and spout reach usually beats a heavy 3D model nobody will render.
How do you verify a CAD block is actually accurate before you trust it?
Open the block, measure it against the manufacturer’s cut sheet, and confirm three numbers: the center-to-center inlet spread, the spout reach, and the overall height above the deck. If those three match the spec sheet, the block is almost certainly drawn to scale; if any one is off, discard it.
The full verification checklist:
- Scale. The block should insert at 1:1 in model space. Draw a quick dimension across a known feature (the 8″ spread) — if it reads 8″, you’re good. If it reads 0.67′ or some nonsense, the block was drawn in the wrong units.
- Insertion point. Good blocks set the origin at a logical spot — typically the faucet centerline at the deck. A random insertion point makes alignment miserable.
- Layers. The block should live on sensible layers (fixture, hidden, centerline) so it obeys your drawing’s layer standard, not paint itself onto layer 0.
- Swing clearance. For swing-spout and pre-rinse units, confirm the spout’s arc is shown or at least dimensioned. This is what keeps the faucet from hitting an adjacent shelf.
- Connection points. Inlet locations and sizes (commonly 1/2″ NPT or 3/8″ compression) should match the model. This drives the plumber’s rough-in.
Treat the manufacturer’s PDF cut sheet as the source of truth and the CAD block as a convenience. When they disagree, the cut sheet wins — it’s the certified document your inspector references.
What dimensions must the block get right so your plan passes inspection?
The block has to nail flood-rim clearance, backflow-preventer height, and reach-over-sink geometry, because those are the numbers a plumbing plan checker actually looks for. A pretty faucet symbol that ignores air-gap requirements will get your set red-lined.
Key dimensions and why they matter in a commercial kitchen:
- Center-to-center spread (8″ standard). Has to match the sink’s punched holes and the ADA/NSF-referenced deck layout.
- Spout reach and height. Determines whether the stream lands in the bowl and clears a stacked stock pot.
- Vacuum breaker / air gap. Backflow protection often must sit a minimum height above the flood-level rim — the block should reflect that added height.
- Pre-rinse riser height. Drives clearance to shelving and overhead equipment.
- Wall-mount rough-in height. For wall-mounted commercial bodies, the inlet centerline height above the finished floor is a hard dimension for the plumber.
If your project mixes kitchen and restroom fixtures, remember the specs diverge fast — restroom lav faucets are flow-restricted and metered differently. Our breakdown of Zurn faucet aerator sizes for a commercial restroom is a handy companion when you’re speccing the wash-up side of the same building and need the right flow-control components on the drawing.
Free CAD block vs. buying from the manufacturer — is the free one good enough?
For real spec work, the manufacturer’s free block beats the third-party free block every time — and both are free, so “buying” rarely enters into it. The real trade-off is manufacturer-accurate versus generic-convenient, not free versus paid.
| Source | Cost | Accuracy | Use it for |
|---|---|---|---|
| Manufacturer DWG/RFA | Free | High — tied to a real SKU | Permit sets, submittals, BIM |
| BIM portal (BIMobject/NBS) | Free | High — parametric data | Coordinated Revit models |
| Generic free-CAD site | Free | Low–medium — often unscaled/unbranded | Concept layouts, space planning |
| Paid CAD marketplace | $ | Varies | Rarely worth it for faucets |
Bottom line: start with the manufacturer, fall back to a BIM portal, and only reach for a generic symbol when you’re roughing out a layout and dimensional precision doesn’t matter yet. Don’t pay for a faucet CAD block — the authoritative version is almost always a free download from the company that makes the fixture.
How do you insert and place the block correctly in your drawing?
Insert the block at 1:1 scale, snap its origin to the faucet centerline on the sink deck, then rotate it to match the sink’s orientation — that’s the whole workflow, and getting the origin right up front saves the most cleanup.
- Purge and audit first. Run AUDIT on a downloaded DWG to clean any corruption before you insert.
- Insert at 1:1. Confirm units match your drawing (inches vs. mm). A block drawn in mm inserted into an inch drawing shows up microscopic or gigantic.
- Snap to the deck centerline. Use the sink block’s centerline as your reference so the faucet lands over the bowl, not the drainboard.
- Check swing. For swing spouts, verify the arc clears adjacent equipment in both the plan and the elevation.
- Tag it. Add the model number and finish to the fixture schedule so the block, the schedule, and the cut sheet all agree.
One quiet gotcha: if you swap the faucet late in the project — say the client upgrades from a standard deck-mount to a pull-down sprayer model — re-download the new block instead of stretching the old one. A pull-down changes the spout envelope entirely; if you’re weighing that upgrade, our look at the best pull-down sprayer kitchen faucet in stainless steel shows how much the spout geometry shifts versus a rigid gooseneck.
FAQ
Are commercial kitchen faucet CAD blocks free?
Yes, almost always. Manufacturers like T&S Brass, Chicago Faucets, Fisher, and Zurn publish DWG and Revit files free on their product pages because CAD availability helps their fixtures get specified. You should not need to pay for a faucet CAD block; if a site is charging, check the manufacturer’s own downloads page first.
What’s the difference between a 2D CAD block and a BIM/Revit family for a faucet?
A 2D CAD block is just accurate linework you place in AutoCAD plans and elevations. A Revit family is a smart 3D object that also carries data — flow rate, finish, connection size, and model number — that flows into schedules and clash detection. Use the 2D block for flat drafting and the Revit family when the whole project is a coordinated BIM model.
Which dimensions on a commercial faucet block matter most for code compliance?
The center-to-center inlet spread (8″ is standard for two-handle commercial units), the spout reach and height, and any backflow-preventer or vacuum-breaker height above the flood-level rim. Those are the numbers a plumbing plan checker verifies, so they must match the manufacturer’s certified cut sheet exactly.
Can I use a residential faucet CAD block for a commercial kitchen plan?
Not safely. Residential blocks typically use 4″ or 6″ centers, shorter spouts, and no allowance for pre-rinse height or atmospheric backflow. Commercial kitchens have code-driven geometry — flood-rim clearance, air gaps, 8″ centers — that a residential block ignores, so it will misrepresent the rough-in.
How do I know if a downloaded CAD block is drawn to the correct scale?
Insert it at 1:1 and dimension a known feature. Measure across the inlet shanks — a standard commercial deck faucet should read 8″ center-to-center. If it reads that, the block is scaled correctly; if it reads a fraction of that or something odd, the block was drawn in the wrong units and should be discarded.
Do CAD blocks tell me the faucet’s flow rate and warranty?
A 2D DWG block usually does not — it’s geometry only. A Revit family often embeds flow rate (GPM) and connection data as parameters, but for warranty, NSF/ANSI certification, and lead-free (NSF/ANSI 372) compliance you should always pull the manufacturer’s spec sheet. The CAD file draws the faucet; the cut sheet certifies it.
A note on getting this right the first time
Author note: This guide was written by the avitashome fixtures team, drawing on hands-on experience speccing and supplying deck-mount, wall-mount, and pre-rinse commercial faucets for foodservice and light-commercial kitchens. We’ve watched enough plan sets get red-lined over a wrong shank spread or a forgotten vacuum-breaker height to know that the CAD block is where accuracy starts.
Why trust us: avitashome supplies residential and commercial kitchen and bath fixtures, and we work directly with the cut sheets, certifications, and CAD/BIM libraries our customers rely on to spec and install. When we point you at a dimension, it’s the one that shows up on the certified spec — the same document tied to the product’s warranty and its NSF/ANSI 61 and 372 (lead-free) compliance testing. Always confirm the current block and cut sheet against the exact model number before you issue a drawing, because manufacturers revise geometry and revision-date the files as products change.