 Avitas Inicio
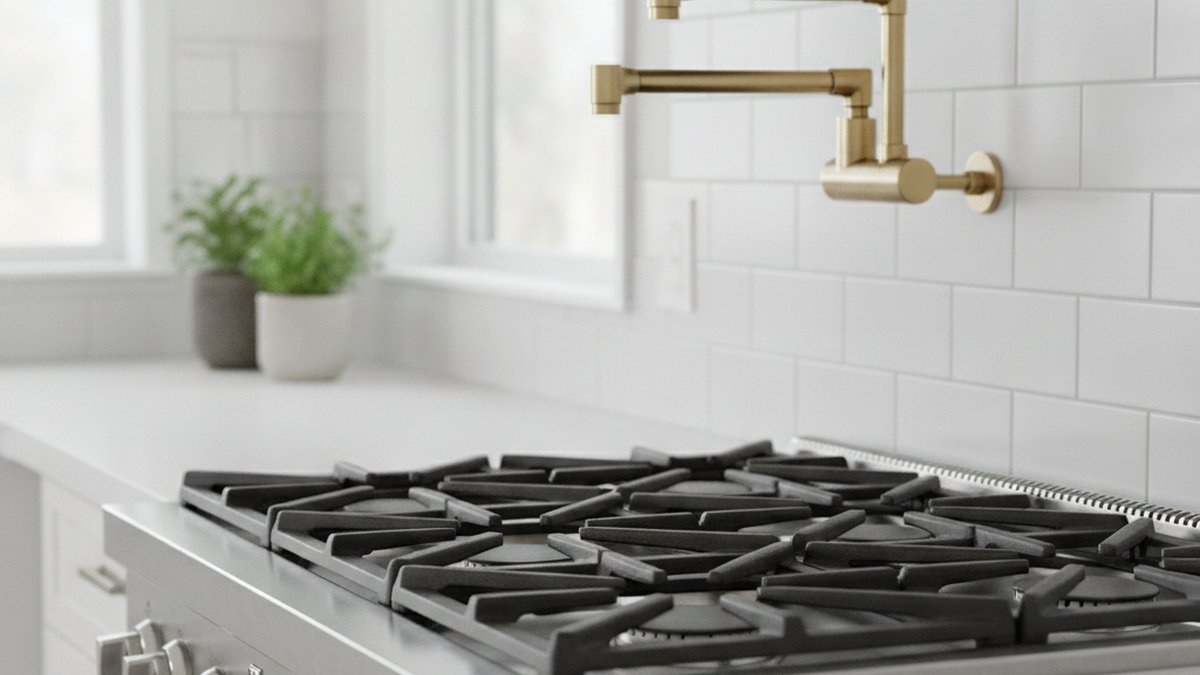
If you’ve been researching the pot filler faucet history because you’re deciding whether one deserves a spot above your stove, here’s the short version: this fixture was born out of pure practicality in commercial kitchens, not out of style. A pot filler (sometimes called a “kettle faucet” o “pasta arm”) is a jointed, articulating faucet mounted on the wall or deck near your cooktop. Its whole reason for existing is to deliver water to the pot instead of forcing you to carry a full, sloshing 20-pound pot from the sink to the burner. Understanding where it came from actually makes it much easier to judge whether it’s the right buy for your kitchen — so let’s walk through the story, the mechanics, and the real-world verdict.
Where did the pot filler faucet actually come from?
The pot filler was invented for professional cooks, and its earliest ancestors show up in commercial and industrial kitchens in the first half of the 1900s. Restaurants running big stockpots, pasta stations, and steam kettles needed a fast way to add water at the range without shutting down the line. Hauling a full pot from a wash sink to a burner was slow, dangerous, and a genuine injury risk — hot floors, crowded lines, and heavy loads don’t mix.
The solution was elegant: put a small, dedicated cold-water tap on the wall right over the cooking surface, and give it a folding, double-jointed arm so it could swing out over any burner and then tuck back out of the way. The articulating “accordion” arm you see today is a direct descendant of industrial swing-arm faucets used in factories and commercial food prep. For decades, this was strictly back-of-house restaurant equipment — you’d never see one in a family home.
That began to change in the late 1990s and accelerated through the 2000s. As open-concept kitchens, pro-style ranges (think 36-inch and 48-inch gas cooktops), and the “restaurant kitchen at home” trend took off, high-end builders and appliance makers started offering the pot filler as a luxury upgrade. It became a signal that a kitchen was serious about cooking. By the 2010s, major faucet brands had residential pot filler lines in multiple finishes, and today they’re a common request even in mid-range kitchen remodels.
What problem does a pot filler faucet solve — and is that problem yours?
A pot filler solves exactly one problem well: it eliminates carrying heavy, full pots across your kitchen. If you regularly boil pasta, make stock, cook for a crowd, fill canning pots, or heat water for large batches, that’s a real, repeated pain — and a pot filler fixes it every single time. If you rarely cook with anything bigger than a saucepan, the fixture is mostly decorative.
Here’s the honest math on who benefits:
- You cook big, often: pasta night, soup, chili, seafood boils, home canning, big holiday meals. A full 12-quart stockpot weighs roughly 25–30 pounds. Carrying that dripping across the room is where a pot filler earns its keep.
- You have a pro-style range: deep burners and wide cooktops pair naturally with a wall-mounted filler, and the aesthetic matches.
- Mobility or reach matters: for anyone who struggles with lifting, filling the pot on the burner is far safer.
- You mostly reheat and make small meals: honestly, you may not need one — the sink already covers you.
One thing to be clear about: a pot filler delivers cold water only. It’s not a second sink, and there’s no drain under it, so you never want to use it for rinsing or washing. It fills pots. That’s the job.
How does a pot filler faucet work, and how is it different from a kitchen faucet?
A pot filler works by tapping a single cold-water supply line into the wall (or deck) near your cooktop and feeding it through a folding, articulated arm with a spout at the end. Unlike a standard kitchen faucet, it has no hot line, no drain, and no mixing valve — it’s built around reach and fold-away convenience, not versatility.
Most residential pot fillers include two shutoff valves: one at the base (at the wall) and one at the spout tip. That dual-valve design is a safety feature — it lets you position the arm and control flow right at the pot, while the base valve stays as a backup shutoff. The double joint means the arm extends outward and also swings side to side, so one filler can reach every burner on a typical 30- to 36-inch range and then fold nearly flat against the wall when you’re done.
| Feature | Pot Filler Faucet | Standard Kitchen Faucet |
|---|---|---|
| Water supply | Cold only | Hot & cold |
| Mounting | Wall-mounted (most) or deck-mounted | Deck-mounted at sink |
| Primary job | Fill pots on the cooktop | All-purpose washing, rinsing, filling |
| Reach | Folding double-jointed arm, 18–24″ | Fixed or pull-down spray, at sink only |
| Drain below? | No | Yes |
| Typical valves | Two (base + spout) | One mixing valve |
| Best for | Frequent large-pot cooking | Everyday kitchen use |
Because a pot filler is such a specialized tool, it doesn’t replace your main faucet — it complements it. If you’re also shopping your primary tap, our guide to the best pull-down sprayer kitchen faucet in stainless steel under $250 pairs well with a pot-filler-equipped setup, since the two fixtures divide the workload.
Wall-mounted vs. deck-mounted pot filler: which should you buy?
Choose a wall-mounted pot filler if you’re remodeling and can run a new cold line inside the wall behind your range — it’s the classic look and keeps your counter clear. Choose a deck-mounted pot filler if you can’t open the wall but you have counter space beside the cooktop, since it taps into a horizontal surface instead.
The wall-mounted version is what most people picture and what came straight out of commercial kitchens. It requires a plumber to bring a cold-water supply up through the wall to roughly 24 inches above the cooktop, plus in-wall bracing to hold the fixture solidly. This is the biggest reason a pot filler is easiest to add during a renovation rather than as a retrofit — opening a finished, tiled wall is the expensive part.
The deck-mounted version is a good workaround. It bolts to the countertop next to the range and folds down when not in use. You still need a cold line, but it’s plumbed like a normal deck faucet. If you love wall-mounted fixtures generally, you might also look at how the same mounting logic applies elsewhere — our piece on a brass wall-mounted faucet setup covers the durability and installation trade-offs of wall mounting in depth.
What height and placement do the pros recommend?
Mount the pot filler so the spout clears your tallest stockpot with room to spare — generally around 22 to 26 inches above the cooktop surface, centered over the range. You want the folded arm to sit above splatter range but low enough that water drops cleanly into a pot on the back burner. Always confirm the exact rough-in height with the manufacturer’s spec sheet before your plumber sets the supply line, because it varies by model and arm length.
What finishes and materials should you look for in a quality pot filler?
Look for solid brass construction with a ceramic-disc valve and a corrosion-resistant PVD finish — that combination is what separates a filler that lasts 20 years from one that leaks in two. Because a pot filler sits directly in the heat, steam, and grease of a working cooktop, material quality matters even more here than at the sink.
Here’s what to prioritize, in order:
- Solid brass body: resists corrosion and handles the temperature swings above a range far better than zinc alloy.
- Ceramic-disc valves: these are the drip-resistant standard; they outlast rubber washers by a wide margin.
- PVD finish: physical vapor deposition finishes (common on matte black, brushed gold, brushed nickel) resist scratching and the grease-and-steam environment above a stove.
- Stainless or brass internal components: avoid plastic internals where you can — they degrade faster in heat.
- Dual shutoff valves: as noted, a base valve plus a spout valve is both convenient and safer.
Finish choice is mostly about matching your range and hardware. Matte black and brushed gold dominate 2026 kitchens, while brushed nickel and polished chrome remain the safe, timeless picks. Whatever you choose, buy the pot filler and your main faucet in the same finish family so the metals read as intentional. If you’re not sure which manufacturers to trust, our roundup of the best quality faucet brands to buy in 2026 explains how to tell a genuinely well-built fixture from a shiny-but-hollow one.
How do you install a pot filler faucet?
You install a pot filler by running a dedicated cold-water supply line to the wall or deck near your cooktop, securing the fixture to solid backing, connecting the supply, and pressure-testing for leaks before you close the wall. For wall-mount installs on a finished wall, this is a job for a licensed plumber; deck-mount installs are more DIY-friendly.
The general sequence looks like this:
- Plan the water line. Tap into an existing cold line and route it to the mounting point. During new construction or a remodel, this is done before drywall and tile go up.
- Add backing. Install a wood block or bracket between studs so the fixture has something solid to anchor to — a pot filler cantilevers weight and shouldn’t hang on drywall alone.
- Set the rough-in. Bring the supply stub-out to the manufacturer’s specified height and location.
- Mount and connect. Attach the fixture body, connect the supply with the correct fittings and thread sealant, and hand-tighten before final wrenching.
- Pressure-test. Turn the water on and check every joint before sealing the wall. This step is non-negotiable — a leak behind finished tile is a nightmare to fix.
Because a hidden leak above your stove can do real damage, take connections seriously. If you ever do spot a drip at the base or spout later on, the fix is usually a worn valve or loose fitting — the same principles in our walkthrough on why a kitchen faucet drips and how to fix it yourself apply directly to pot fillers, since they share ceramic-disc valve internals.
Is a pot filler faucet worth the money in 2026?
A pot filler is worth it in 2026 if you genuinely cook with large pots on a regular basis and you’re already remodeling — the convenience is real and it adds a pro touch that appeals to buyers. It’s not worth it if you’d have to open a finished, tiled wall just to add one you’ll rarely use.
Expect a quality residential pot filler to run roughly $150 to $500 for the fixture itself, with professional wall-mount installation typically adding several hundred more depending on how far the plumber has to route the new line. Deck-mount installs cost less in labor. In terms of resale, a pot filler reads as a premium, thoughtful feature in a kitchen — it rarely hurts value and often helps, especially in homes with pro-style ranges. The takeaway from its whole history is consistent: it’s a working cook’s tool that happens to look great, so buy it if you’ll actually use it.
FAQ
Who invented the pot filler faucet?
No single inventor is credited with the modern pot filler; it evolved from industrial and commercial swing-arm faucets used in factories and professional kitchens through the early-to-mid 1900s. Restaurant equipment makers refined the folding, double-jointed arm for cooktop use, and residential faucet brands adapted that design for home kitchens starting in the late 1990s and 2000s.
Do pot fillers have hot water?
No. A standard pot filler supplies cold water only. It’s designed to fill pots that you then heat on the burner, so there’s no hot line or mixing valve. If you specifically want near-boiling water on demand, that’s a different fixture — an instant-hot water dispenser at the sink — not a pot filler.
Can you add a pot filler to an existing kitchen without remodeling?
Sometimes, but it depends on wall access. If you can reach the back of the cooktop wall from an adjacent room, closet, or unfinished basement/pantry, a plumber may be able to run the cold line without demolishing your finished, tiled range wall. Otherwise, a deck-mounted pot filler beside the cooktop is the easier retrofit because it plumbs like a normal counter faucet.
How high should a pot filler be mounted above the stove?
Most installers set the spout roughly 22 to 26 inches above the cooktop so it clears a tall stockpot with room to lower the arm in. Always check your specific model’s spec sheet first, since arm length and reach vary and the manufacturer’s rough-in height is what your plumber should follow.
Do pot fillers leak or drip over time?
A quality pot filler with ceramic-disc valves and solid brass construction should stay drip-free for many years. When one does leak, it’s almost always a worn valve cartridge or a loose supply connection, both of which are repairable. Because a leak here sits above your range, it’s smart to buy a fixture with a strong warranty and to have connections pressure-tested at install.
Are pot fillers just for show?
Not if you cook big. For anyone who regularly boils pasta, makes stock, cans, or cooks for a crowd, a pot filler is a genuine time-and-back saver that comes straight from its practical restaurant roots. For someone who mostly makes small meals, though, it will function more as an attractive accent than a daily-use tool.
A note on our expertise
About the author: This guide was written by the Avitas Home fixtures team, drawing on hands-on installation and testing of kitchen and bath faucets across hundreds of real remodels. We evaluate pot fillers the way a working cook would — reach, fold-away clearance, valve feel, and how the finish holds up to steam and grease over time.
Why trust Avitas Home: avitashome specializes exclusively in faucets and bathroom and kitchen fixtures, so we’re not a general home store guessing at plumbing — this is all we do. We recommend fixtures built to recognized North American plumbing standards (look for cUPC/NSF certification and lead-free compliance), and we favor models backed by a manufacturer’s limited lifetime warranty on the finish and function, because a fixture mounted above your stove needs to be a buy-it-once decision. If you’re weighing a heavy-duty setup for serious cooking, our comparison of a commercial-grade Delta kitchen faucet for a busy kitchen is a useful companion read alongside this one.