 아비타스 홈
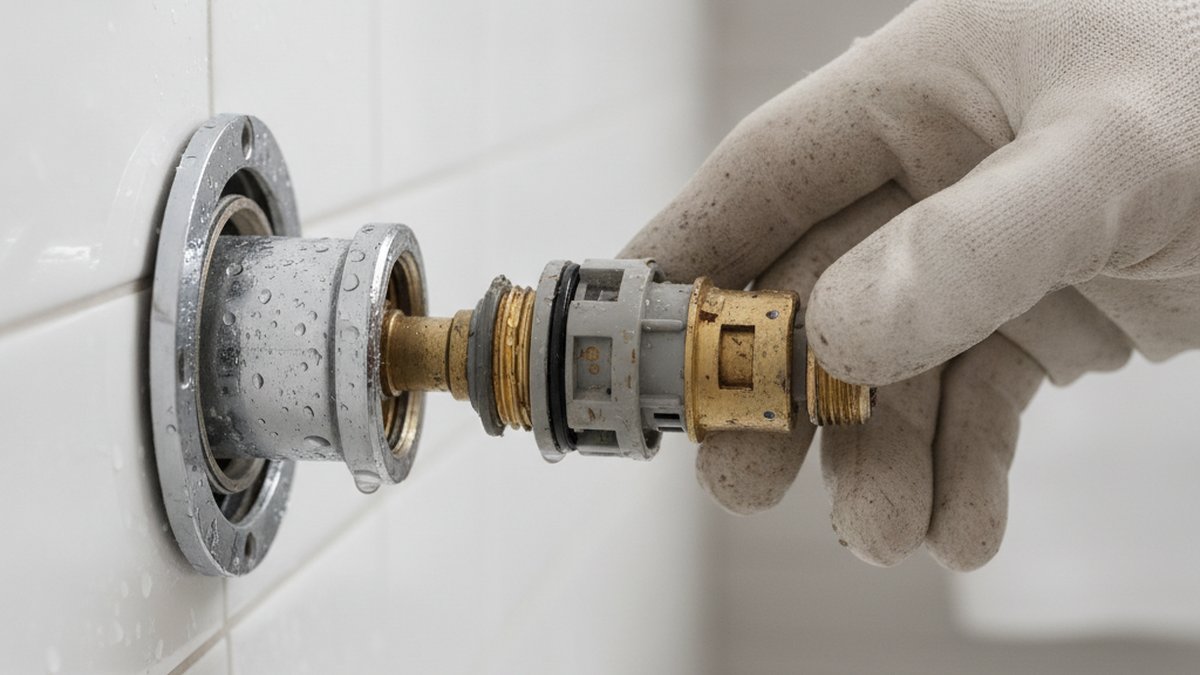
If your tub is dripping, the handle spins loosely, or hot and cold won’t mix right, a bathtub faucet replacement cartridge is almost always the cure — and it’s one of the most beginner-friendly plumbing repairs you can do. The cartridge is the plastic-and-rubber valve buried inside your faucet body that controls water flow and temperature. When its internal seals wear out, you get drips, temperature swings, or a handle that feels gritty. Swapping it is far cheaper and less invasive than replacing the whole valve, and in most cases you never touch a wall or a soldered pipe.
Below, I’ll walk you through exactly how to identify the right cartridge, remove a stuck one, install the new one correctly, and know when a cartridge swap won’t be enough. This is written for a real person standing in their bathroom with a screwdriver, not a keyword page.
What exactly is a bathtub faucet cartridge, and how do I know mine is bad?
A bathtub faucet cartridge is the replaceable valve core inside a single-handle (or some two-handle) tub faucet that regulates how much water flows and how hot it gets. You know it’s bad when you see one of these classic symptoms: a constant drip from the tub spout even when the handle is fully off, water that suddenly runs scalding then cold, a handle that turns too easily or too stiffly, or a loud squeal/whistle when running.
Here’s the quick logic: the spout drips because the cartridge’s internal seals no longer seat fully. Temperature swings happen because a pressure-balancing cartridge’s internal spool has scaled up or worn. A stiff handle usually means old grease and mineral buildup inside the cartridge. Almost none of these are a “buy a new faucet” problem — they’re a $20 part.
- Constant drip from the spout → worn cartridge seals or seats
- Scalding-then-cold water → failed pressure-balancing cartridge
- Handle turns but water barely changes → cartridge stem stripped internally
- Squealing or whistling → mineral buildup narrowing the cartridge ports
- Handle very hard to turn → dried grease/scale inside the cartridge
One caveat: if water is leaking behind the wall or from the spout base rather than out the spout, the problem may be the valve body or the spout O-rings, not the cartridge. If your drip is at the spout’s connection to the wall, check the bathtub faucet flange and spout seals first before you blame the cartridge.
How do I find the exact replacement cartridge for my tub faucet?
Match the cartridge by brand and model, not by looks — a cartridge that’s a millimeter off in length or has splines in the wrong place will leak or won’t seat. The fastest path is to find the faucet brand stamped on the trim or handle, then look up the cartridge part number for that model. If you can’t find a model number, pull the old cartridge out first and match it physically at the store or online.
Every major brand uses its own cartridge family, and they are not interchangeable. Here’s how the common ones break down so you can order the right one the first time:
| Brand | Common Cartridge Type | Typical Part # / Family | Price Range | Handle Style |
|---|---|---|---|---|
| Moen | 1222 / 1225 pressure-balance | 1222, 1225, 1225B | $20–$45 | Single handle |
| Delta | RP19804 / RP46074 balance spool | RP19804, RP46074 | $18–$40 | Single handle (Monitor) |
| Kohler | Rite-Temp pressure-balance | GP876851, GP500520 | $35–$60 | Single handle |
| Price Pfister | 0X8 / JV series | 974-042, S10-100 | $15–$35 | Single/two handle |
| American Standard | Ceramic disc / balance | 994053-0070A | $25–$50 | Single handle |
Pro move: take a clear photo of the handle and trim, and snap the brand logo before you shop. If your faucet is a two-handle setup where each side has its own valve, you may actually be dealing with faucet stems rather than a single cartridge — in that case my guide on faucet stem valve replacement covers the slightly different removal steps.
What tools do I need, and how much does a cartridge swap really cost?
You need almost nothing specialized: the cartridge, an Allen/hex key or Phillips screwdriver, adjustable pliers, and often a brand-specific cartridge puller (about $10–$15). Total out-of-pocket for a DIY job is usually $30–$75 in parts and tools, versus $150–$350 if you call a plumber — most of a plumber’s bill is labor for a repair that takes them 20 minutes.
Here’s the realistic shopping list before you start:
- Exact-match replacement cartridge (brand-specific)
- Allen key set or the handle screwdriver that fits your set screw
- Adjustable pliers or channel-lock pliers
- Cartridge puller tool (brand-specific — Moen and Delta each sell one)
- Plumber’s silicone grease (never petroleum-based — it destroys rubber seals)
- White vinegar and an old toothbrush to clean scale out of the valve body
- A towel and a flashlight
Buy the silicone grease even if the instructions don’t mention it. A light coat on the new cartridge O-rings makes installation smoother, prevents future squealing, and extends the seal life by years. Skipping it is the number one reason a “new” cartridge starts sticking within a season.
How do I actually replace a bathtub faucet cartridge step by step?
Shut off the water, remove the handle and trim, pull the old cartridge, insert the new one in the same orientation, and reassemble — that’s the whole job in one sentence. Now here’s the detailed version so nothing surprises you.
1. Shut off the water. Use the bathroom’s local shutoffs if you have an access panel behind the tub; otherwise turn off the main. Open the tub faucet to drain residual pressure and cover the drain with a rag so no small screws disappear.
2. Remove the handle. Pop off the decorative cap or button, then loosen the set screw with your Allen key or screwdriver. Pull the handle straight off. If it’s stuck from corrosion, wiggle gently — don’t pry hard against the wall.
3. Remove the trim and retaining clip. Unscrew the escutcheon (the round trim plate) and any temperature-limit stop. You’ll usually find a small horseshoe-shaped retaining clip holding the cartridge in — pull it straight up and out with needle-nose pliers. Do not lose this clip.
4. Pull the old cartridge. Grip the cartridge stem with pliers and pull straight out, twisting slightly to break the mineral bond. Stubborn ones need the brand’s cartridge puller, which threads on and pulls it out cleanly without damaging the valve body. Note the exact orientation — mark the “up” position with a marker before it comes out.
5. Clean the valve body. Reach in with a vinegar-dipped toothbrush and clear any scale or grit. A clean bore is what lets the new cartridge seat perfectly.
6. Install the new cartridge. Lightly grease the O-rings, then push it in the same orientation as the old one (hot/cold matters — installing it 180° off reverses your handle). Reinsert the retaining clip until it clicks fully home.
7. Reassemble and test. Reattach trim, handle, and set screw. Turn the water back on slowly and check for drips and correct hot/cold direction before you tighten everything down. If temperature is reversed, you installed the cartridge flipped — just pull and rotate it 180°.
This same basic sequence applies to deck-mounted tub faucets too, though the access is different. If yours sits on the tub deck rather than the wall, my walkthrough on changing a faucet on a garden tub shows how to work through the deck without cracking the surround.
What if the cartridge is stuck and won’t come out?
A stuck cartridge is almost always mineral scale gluing it into the valve body, and the fix is a brand-specific cartridge puller plus patience — never brute force. Yanking with pliers can snap the plastic stem off inside the body, which turns a 30-minute job into a nightmare. Here’s the escalation ladder that works:
- First: confirm the retaining clip is fully removed — a half-seated clip is the most common reason a cartridge “won’t budge.”
- Second: spray white vinegar or penetrating lubricant around the stem and wait 15–20 minutes to dissolve scale.
- Third: use the manufacturer’s cartridge puller tool — it grips the cartridge and pulls dead-straight with leverage the body can handle.
- Fourth: gently rock the puller side to side to break the bond; twist a quarter turn each way before pulling.
- Last resort: if the stem snaps, you’ll need an extraction kit or a plumber — this is the one scenario worth the call.
Homes with hard water see stuck cartridges far more often. If your fixtures constantly scale up, that same mineral load is clogging your aerators and spouts too — worth a periodic tub faucet aerator cleaning to keep flow strong throughout the bathroom.
When should I replace the whole valve instead of just the cartridge?
Replace the entire valve — not just the cartridge — when the valve body itself is cracked, corroded through, or so old that replacement cartridges are discontinued. If a fresh cartridge still leaks, or if you see green corrosion and pitting inside the brass body, the cartridge won’t seal against a damaged bore no matter how new it is.
Signs it’s a whole-valve job:
- You installed a new cartridge and it still drips → the valve seats are worn
- Visible cracks or heavy pitting inside the valve body
- Your faucet brand no longer makes a matching cartridge (very old fixtures)
- Water is leaking behind the wall, not from the spout
- You want to add a modern anti-scald pressure-balancing valve for safety
A full valve swap usually means soldering or push-fit connections behind the wall and is where I’d genuinely recommend a licensed plumber for most homeowners. But that’s the exception — the overwhelming majority of dripping tub faucets are solved by the cartridge alone. If your leak turns out to be a worn seal at the handle base rather than the cartridge, check whether it’s actually a single handle faucet gasket issue, which is an even cheaper fix.
How long does a new cartridge last, and how do I make it last longer?
A quality replacement cartridge lasts 5–10 years, and you can push it toward the high end by greasing the seals at install, cleaning scale periodically, and not over-tightening the handle. The single biggest killer is hard water — mineral deposits that grind the internal seals every time you turn the handle.
To extend cartridge life: use silicone grease at installation, run the faucet occasionally if it’s in a guest bath (dry seals crack), avoid forcing a stiff handle, and if you have very hard water, consider a whole-home softener. Genuine OEM cartridges from the faucet’s own brand almost always outlast cheap universal knock-offs, which is why we stock brand-matched replacement parts rather than generic bin cartridges.
FAQ
Are bathtub faucet cartridges universal or brand-specific?
They’re brand-specific, and usually model-specific within a brand. A Moen 1225 will not fit a Delta valve, and even within Moen, older and newer bodies use different cartridges. Always match by brand and model number, or pull your old one and match it physically. “Universal” cartridges exist but often fit poorly and leak.
Can I replace a tub cartridge without turning off the main water supply?
Only if your tub has dedicated local shutoffs behind an access panel. Most tub/shower valves don’t, so you’ll need to shut off the main. Opening the valve to release residual pressure after shutoff is essential either way — otherwise you’ll get a face full of water when the cartridge comes out.
Why does my faucet still drip after I replaced the cartridge?
Three likely reasons: the cartridge is the wrong model, the retaining clip isn’t fully seated so the cartridge sits slightly proud, or the valve body seats are worn and no cartridge will seal. Double-check the part number and clip first; if both are correct, you’re looking at a valve-body problem.
How much does a plumber charge to replace a bathtub cartridge?
Typically $150–$350 including the part, with most of that being labor and a service-call minimum. Since the actual repair takes 20–40 minutes and the part is $15–$60, doing it yourself saves the bulk of that cost — this is one of the highest-value DIY plumbing jobs there is.
What’s the difference between a cartridge and a stem valve?
A cartridge is a single self-contained unit that handles both flow and temperature mixing, common in modern single-handle faucets. Stem valves are older, usually one per handle (hot and cell separately), and use a rubber washer at the tip. Two-handle tub faucets often use stems; single-handle faucets use cartridges.
Do I need an anti-scald cartridge, and is it worth the extra cost?
If your faucet is a single-handle pressure-balancing (anti-scald) design, yes — you must replace it with the matching pressure-balance cartridge to keep the scald protection working. It’s worth every penny: it stops the “someone flushed the toilet and now I’m getting burned” temperature spike. Don’t downgrade to a non-balancing cartridge to save a few dollars.
About the author: This guide was written by the avitashome fixtures team, drawing on hands-on experience installing and servicing hundreds of tub, shower, and kitchen valves. We’ve pulled, matched, and re-seated cartridges from every major brand covered above.
Why trust avitashome: avitashome specializes in faucets and bathroom fixtures, and we stock brand-matched replacement cartridges and parts rather than generic substitutes. Cartridges we recommend meet ASME A112.18.1/CSA B125.1 valve standards and NSF/ANSI 61 lead-free requirements, and quality OEM cartridges typically carry manufacturer warranties of 5 years or more — which is exactly why we steer customers toward tested, standards-compliant parts instead of cheap universal cartridges that void your faucet’s warranty.