 아비타스 홈
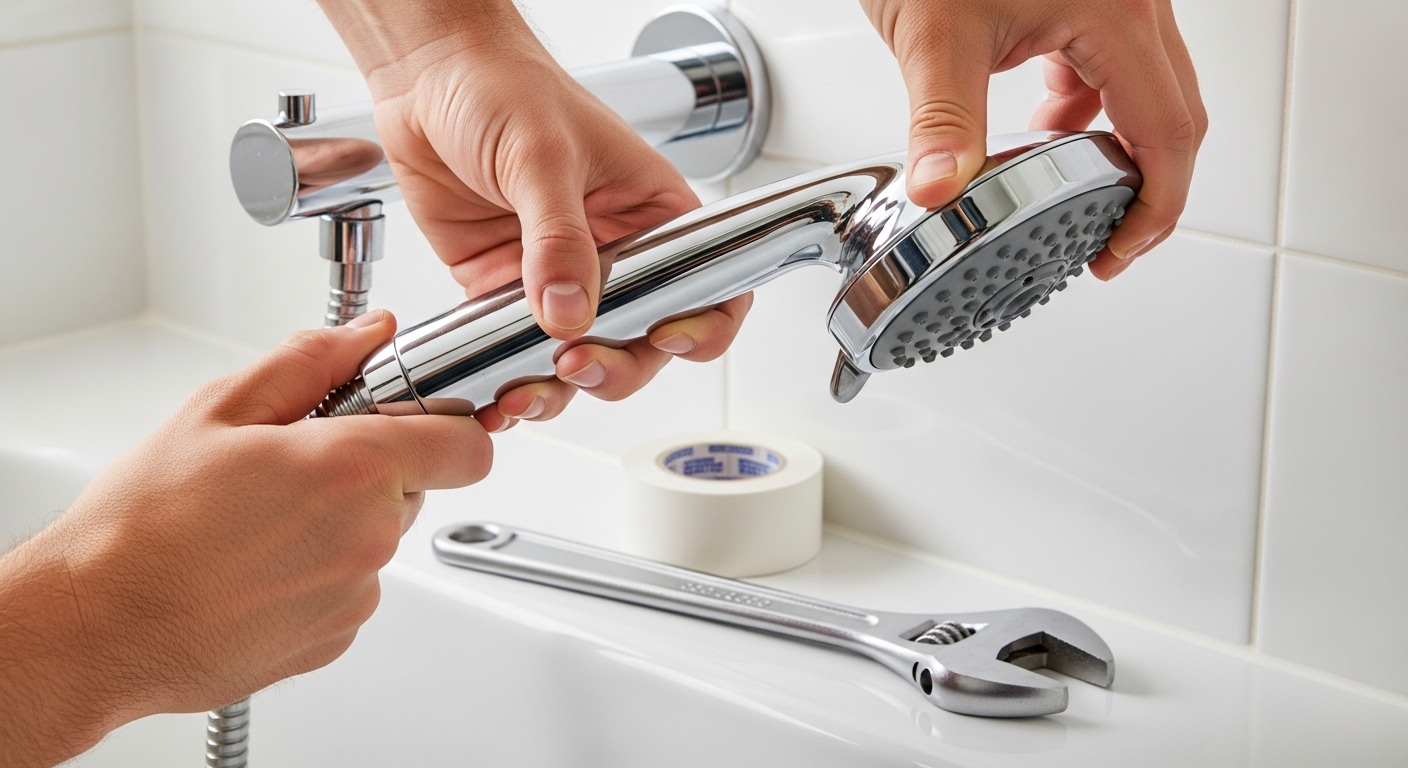
If you’ve searched for a “how to replace shower head video,” you’ve probably noticed most of them stretch a 7-minute job into a 20-minute clip. So here’s the honest version, in writing, that you can skim before or during the swap. Replacing a shower head is genuinely one of the easiest plumbing upgrades in the whole bathroom — there’s no water shut-off at the wall, no soldering, and no cutting. If you can screw in a lightbulb and you own a wrench, you can do this today.
Below, we’ll walk through exactly what to do, what tools you need, the mistakes that cause leaks, and how to handle the two or three situations that actually trip people up (a stuck head, a wobbly shower arm, or the wrong thread size). By the end you’ll know whether you even need to watch a video at all.
Do I really need to watch a video, or is replacing a shower head that simple?
For a standard threaded shower head, you do not need a video — the whole thing is four steps. Almost every shower head in North America connects to a ½-inch NPT (National Pipe Thread) shower arm, which means the head you buy at any store will thread onto the pipe already sticking out of your wall. You’re not touching the plumbing inside the wall at all.
Here’s the entire process in order:
- Twist off the old head. Turn it counter-clockwise (lefty-loosey) by hand. If it won’t budge, grip the shower arm with one hand and use an adjustable wrench or channel-lock pliers on the head’s nut. Wrap the wrench jaws in a cloth to avoid scratching the finish.
- Clean the threads. Peel off the old plumber’s tape and any crusty mineral buildup on the shower arm threads with an old toothbrush and a rag. Threads must be clean and dry for a good seal.
- Wrap fresh plumber’s tape. Wind PTFE (Teflon) tape clockwise around the shower arm threads 3–4 times, pulling it snug into the grooves.
- Screw on the new head. Hand-tighten it clockwise until snug, then give it about a quarter turn more with a wrench. Don’t crank it — over-tightening cracks plastic fittings.
That’s it. Turn the water on and check for drips at the connection. If a video helps you feel confident, watch one — but the reason searches for a “how to replace shower head video” are so popular isn’t difficulty, it’s reassurance. This is a beginner job.
What tools and materials do I actually need to replace a shower head?
You need almost nothing — an adjustable wrench and a roll of plumber’s tape cover 90% of installs. Everything on this list costs under $20 total, and you likely already own most of it.
- Adjustable wrench or channel-lock pliers — only if the head is on tight. Hand pressure alone works surprisingly often.
- PTFE / Teflon / plumber’s tape — the single most important item. It seals the threads and prevents leaks. Never skip it.
- A rag or old cloth — to protect the finish and grip slippery parts.
- An old toothbrush — for scrubbing mineral scale off the shower arm threads.
- White vinegar (optional) — great for dissolving hard-water buildup on threads. If your old head was clogged with limescale, that same scale is on the arm.
You will not need to shut off the water to the house. The shower valve keeps the water back as long as the faucet handle is off — the shower arm above it is dry. That’s why this job feels almost too easy the first time.
How much plumber’s tape should I use, and which direction?
Wrap 3–4 layers, clockwise, in the same direction you’ll screw the head on. Wrapping clockwise (when looking at the end of the arm) matters because it keeps the tape from unraveling as the head threads on. Pull the tape tight so it molds into the thread grooves rather than sitting loosely on top. Too little tape and you get a slow drip; way too much and the head won’t seat properly. Three or four snug wraps is the sweet spot for a ½-inch NPT connection.
My old shower head won’t unscrew — how do I remove a stuck one?
A stuck shower head is almost always corrosion or hardened mineral scale welding the threads together — and the fix is grip plus patience, not brute force. Here’s the safe sequence so you don’t snap the shower arm inside the wall (which turns a 10-minute job into a real repair).
- Stabilize the arm. Wrap one hand (or a wrench with a cloth) firmly around the shower arm so the twisting force goes into the head, not the pipe joint hidden in the wall.
- Use two tools. One wrench holds the arm still; the other turns the head counter-clockwise.
- Break the scale. If it’s still frozen, soak a rag in white vinegar, wrap it around the connection for 30–60 minutes, then try again. Vinegar dissolves the limescale acting as glue.
- Protect the finish. Always pad the wrench jaws with a cloth or rubber band so you don’t chew up the chrome or brushed nickel.
If the shower arm itself starts to unscrew from the wall instead of the head, that’s okay — you can replace the arm too (it’s cheap), but avoid over-twisting it, because the elbow fitting behind the drywall is the part you don’t want to disturb. If your shower arm or head feels loose and wobbly even after a proper install, that’s a separate issue worth reading up on in our guide to why a shower faucet gets loose and how to tighten it for good.
How do I stop my new shower head from leaking at the connection?
99% of shower-head leaks come from one of two things: not enough plumber’s tape, or cross-threading the head. Fix both and the drip disappears. Here’s the checklist when you see water seeping from where the head meets the arm:
| Leak symptom | Most likely cause | Fix |
|---|---|---|
| Steady drip at the arm/head joint | Too little or no plumber’s tape | Remove head, add 3–4 clockwise wraps of PTFE tape, reinstall |
| Head sits crooked or won’t tighten | Cross-threaded (started at an angle) | Unscrew fully, restart threading by hand, straight and slow |
| Leak only under full pressure | Worn internal washer / O-ring | Replace the rubber washer inside the swivel nut |
| Water sprays from behind the wall plate | Loose shower arm at the wall elbow | Re-tape and reseat the shower arm, don’t over-torque |
| Drips long after you shut off water | Trapped water draining, not a leak | Normal — a head holds a little water and empties for a minute |
That last row matters: a shower head that keeps dribbling for a minute or two after you turn it off is almost always just trapped water draining out — not a defect and not a leak. If it drips for 10+ minutes or never stops, the problem is upstream at the shower valve cartridge, not the head you just installed.
Should I hand-tighten or use a wrench on the new head?
Start by hand, finish with a light quarter-turn from a wrench — and stop there. Hand-tightening first guarantees you’re not cross-threading. The quarter-turn with a wrench compresses the tape enough to seal without stressing the fitting. Over-tightening is one of the most common mistakes in DIY shower head videos: people crank a plastic-threaded head until the collar cracks, then wonder why it leaks worse. Snug, not gorilla-tight.
How do I know if a new shower head will fit my shower arm?
If your shower is anywhere in the U.S. or Canada, the answer is almost certainly yes — the industry standard is ½-inch NPT, and virtually all wall-mount shower heads and arms use it. That universal thread size is exactly why you can walk into any store, grab a head, and know it’ll fit the pipe at home. The only real variables are aesthetic (finish, spray style) and functional (rainfall vs. handheld vs. combo), not thread compatibility.
There are two edge cases worth checking:
- Handheld shower conversions. If you’re switching to a handheld sprayer, the hose and the arm-mount bracket also thread ½-inch NPT, but you may need a new hose over time. Our walkthrough on handling a handheld shower head hose replacement yourself covers which hose to buy and how to avoid kinks.
- European or specialty fixtures. Some imported systems use a G½ (BSP) thread, which looks nearly identical but seals differently. If a head won’t seat despite clean threads, thread standard mismatch is the suspect.
Thread sizing trips people up on aerators and small fittings more than on shower heads, but if you want to understand how pipe threads are measured so you never buy the wrong part again, our explainer on figuring out the faucet aerator thread size you actually have uses the same measuring logic.
Which type of shower head should I upgrade to while I’m at it?
Since you already have the head off, it’s the perfect moment to upgrade rather than just replace like-for-like — and the right pick depends on your water pressure and habits. Here’s a quick comparison of the common types so you’re not guessing.
| Shower head type | Best for | Watch out for |
|---|---|---|
| Fixed wall-mount | Simplicity, low cost, reliable spray | Fixed height and angle |
| Handheld on a slide bar | Rinsing kids/pets, cleaning the tub, accessibility | Hose can wear out over years |
| Rainfall (large face) | Spa-like drenching feel | Needs decent water pressure; brass lasts longer than plastic |
| Dual / combo (fixed + handheld) | Most flexibility, shared family bathrooms | More connection points to seal |
| High-efficiency / low-flow | Saving water and energy bills | Look for pressure-compensating models so it still feels strong |
One material note: if you’re eyeing a rainfall head, the body material genuinely matters for longevity. A solid metal body resists warping and mineral cracking far better than thin plastic — we break down why in our look at whether a brass rainfall shower head is worth it versus plastic. For a family bathroom, a combo unit with a handheld is usually the most versatile upgrade.
What’s a good water flow rate, and does low-flow mean weak?
Modern U.S. shower heads are capped at 2.5 gallons per minute (GPM) by federal standard, and many efficient models run 1.75–2.0 GPM without feeling weak. The trick is pressure-compensating technology — the head narrows the spray channels to keep the stream forceful even at lower volume. So no, “low-flow” no longer means a sad trickle. A well-engineered 1.8 GPM head can feel just as strong as an old 2.5 GPM one while cutting your water and heating costs.
How do I keep my new shower head from clogging with hard water?
Clean it every few months with white vinegar — hard-water minerals are the number-one killer of shower head spray. If you have hard water, calcium and magnesium slowly plug the nozzles, weakening the spray and causing that annoying sideways squirt. The good news is the fix is a kitchen staple.
The simplest method: fill a plastic bag with white vinegar, slip it over the head so the nozzles are submerged, secure it with a rubber band, and leave it overnight. In the morning, rub the rubber nozzles with your thumb to release the loosened scale and run hot water through. The same acidic principle works on any clogged fixture — our guide on cleaning a faucet head with white vinegar to restore flow walks through it in detail, and it applies directly to shower heads too. Do this two to four times a year and your new head will spray like new for a decade.
FAQ
Do I need to turn off the water to replace a shower head?
No. As long as your shower faucet handle is in the off position, the shower valve holds the water back and the shower arm above it stays dry. You only touch the pipe sticking out of the wall, so there’s no need to shut off the house supply. Just make sure the shower is turned off before you unscrew the head.
How long does it take to replace a shower head?
About 5 to 10 minutes for a standard threaded head. The actual swap — unscrew, clean threads, tape, screw on the new one — takes only a few minutes. Most of the “time” in tutorial videos is explanation. Budget extra time only if the old head is corroded and stuck, in which case a vinegar soak may add 30–60 minutes of waiting.
Why does my new shower head still leak after I installed it?
The most common reasons are too little plumber’s tape or cross-threading. Remove the head, wrap the shower arm threads 3–4 times with fresh PTFE tape (clockwise), and rethread the head slowly by hand so it starts straight. Finish with just a light quarter-turn from a wrench. If it still leaks under pressure, replace the small rubber washer inside the head’s swivel nut.
Can I replace a shower head without any tools at all?
Often, yes. If the old head loosens by hand and the new one threads on snugly, you can do the whole job tool-free — though you should still use plumber’s tape for a reliable seal. A wrench only becomes necessary when the old head is stuck or you want that final snug quarter-turn. Keep a cloth handy either way to protect the finish and improve grip.
Will any shower head fit my shower arm?
Almost certainly, if you’re in the U.S. or Canada. The standard shower arm thread is ½-inch NPT, and nearly every wall-mount shower head sold here is built for it. The main exceptions are some imported European fixtures using G½ (BSP) threads. If a head won’t seat despite clean, dry threads, a thread-standard mismatch is the likely culprit.
Is it worth upgrading to a handheld or rainfall head while I’m replacing mine?
Yes — the connection is identical ½-inch NPT, so upgrading costs no extra effort, only the price of the head. A handheld on a slide bar is the most versatile for families, kids, and cleaning; a rainfall head gives a spa feel but wants decent water pressure and a metal body for longevity. Since the head is already off, it’s the ideal moment to choose the style you actually want rather than replacing like-for-like.
The bottom line
You don’t need a plumber, and you barely need a video. Replacing a shower head is a genuine 10-minute, beginner-friendly job: unscrew counter-clockwise, clean and tape the threads, screw the new one on clockwise, and check for drips. Keep a roll of plumber’s tape on hand, don’t over-tighten, and rinse the head in vinegar a few times a year to fight hard water. Do that, and your shower will spray strong for years — no service call required.
Author note: This guide was written by the avitashome fixtures team, drawing on hands-on installation and testing of hundreds of shower heads, faucets, and bathroom fittings. avitashome specializes exclusively in faucets and bathroom fixtures, and every product we recommend is evaluated against U.S. plumbing standards, including the ½-inch NPT thread specification and federal 2.5 GPM flow limits. When choosing a new head, always check the manufacturer’s warranty — quality brands back their finishes and internal cartridges for years, which is a reliable signal of build quality.