 Avitas Home
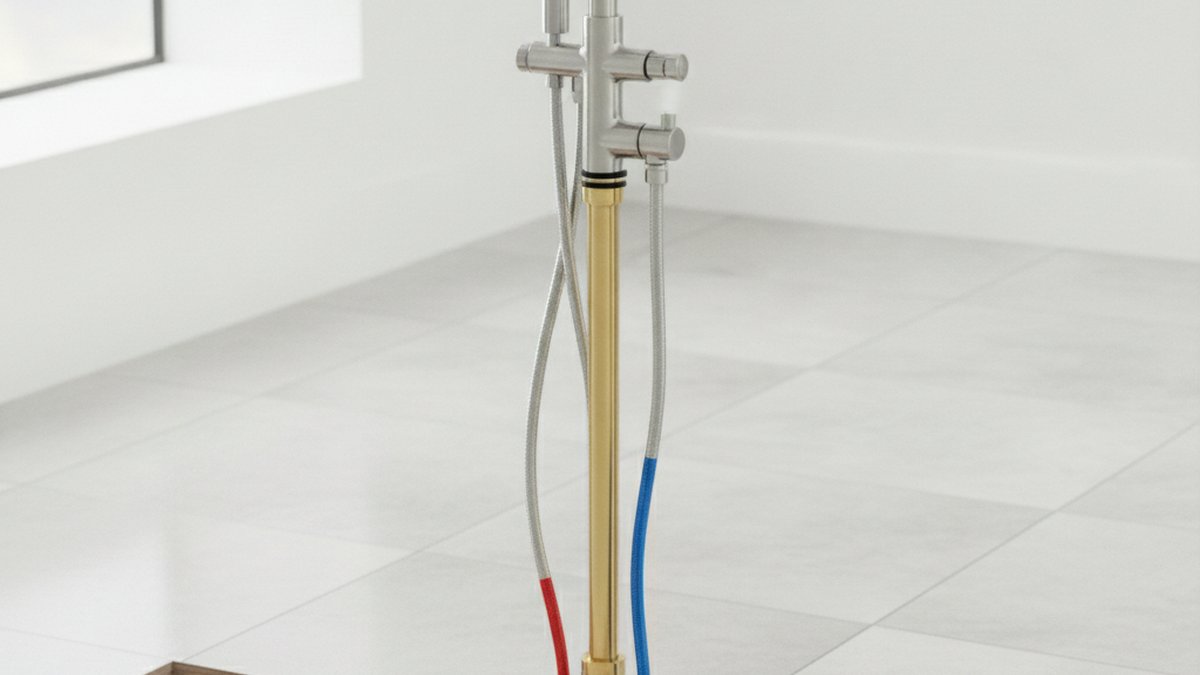
If you’ve been shopping for a floor-mounted tub filler, you’ve probably noticed the listing mentions a freestanding tub faucet base — sometimes called a floor mount base, base plate, or standpipe cover — and wondered whether it’s a separate part you have to buy, or something already included. Here’s the plain-English version: the base is the foundation of the whole faucet. Everything above it (the tall riser tube, the spout, the handles, the handshower) is only as stable as the base bolted to your floor. Get the base wrong and you end up with a wobbly faucet, a slow leak under the finished floor, or a filler that fails inspection. Get it right and you have a sculptural, hotel-style tub filler that lasts 15–20 years.
At avitashome we sell and install freestanding tub fillers every week, and the base is the single part buyers understand the least. So let’s fix that — what it is, what’s inside it, how to size and install one, and how to avoid the three mistakes that cause 90% of freestanding filler problems.
What is a freestanding tub faucet base actually made of, and what does it do?
A freestanding tub faucet base is a two-part assembly: a structural mounting bracket that bolts to your floor (or subfloor), and a decorative escutcheon cover that slips over it to hide the hardware and the plumbing rough-in. Its job is to transfer the leverage of a 30–43 inch tall faucet into your floor without any wobble.
Think about the physics for a second. A floor-mounted tub filler is essentially a tall lever. Every time someone bumps the spout, leans on it, or hangs a wet towel over it, that force multiplies at the bottom. The base has to resist all of it. That’s why a quality base isn’t a thin decorative ring — it’s a heavy cast-brass or stainless mounting plate, usually with a separate internal bracket that grips the riser pipe and anchors it with two to four lag bolts or expansion anchors.
Inside a typical freestanding tub faucet base you’ll find:
- The floor flange / mounting bracket — the load-bearing metal plate that bolts down. This is the part that actually holds the faucet up.
- The standpipe or riser sleeve — the vertical tube (often 1/2″ or 3/4″ supply) that carries hot and cold water up to the spout, either as two separate lines or a single combined riser.
- The decorative escutcheon cover — the shiny cone or cylinder you actually see, which hides everything above.
- A rough-in valve or supply elbows — the connection point where your home’s water lines meet the faucet, usually just below or at floor level.
- Set screws and a trim ring — small hardware that locks the cover in place and seals the gap against the floor.
Some brands sell the base and the trim as one complete kit; others split it into a “rough-in” (the guts you install first, before tiling) and a “trim kit” (the finished cover and spout you install last). Knowing which model you’re buying matters, because a rough-in-and-trim system lets you tile your floor cleanly around the plumbing and finish months later — a real advantage on a slow renovation.
Do I actually need a special base, or can I use any tub faucet on the floor?
You need a base designed for a freestanding (floor-mounted) filler — you cannot repurpose a deck-mount or wall-mount tub faucet to stand on the floor. The difference isn’t cosmetic; it’s structural and code-related.
A deck-mount Roman tub faucet is built to bolt down through a horizontal tub deck, where the load pushes straight down into a rigid surface. A wall-mount filler ties into framing behind the wall. A freestanding filler, by contrast, cantilevers up from a single point on the floor, so it needs a purpose-built base with a wide footprint and deep anchoring. If you’re weighing floor-mount against wall-mount for a standalone tub, our guide on choosing a wall mount faucet for a stand alone tub walks through when each layout makes sense — wall-mount can be smart when floor access is limited.
There’s also a code angle. Freestanding fillers deliver a lot of water fast (many are rated 6–10+ GPM to fill a deep soaking tub quickly), and because the spout sits above the flood rim of the tub, most jurisdictions require the supply to be protected against backflow. A properly engineered base routes the plumbing so it complies. A jury-rigged setup often doesn’t.
How much does a freestanding tub faucet base cost, and what should I budget?
Expect to spend between $150 and $900 for a freestanding tub faucet base as part of a complete filler, with most solid mid-range kits landing around $300–$500. The base by itself, if sold separately, usually runs $60–$200 depending on the metal and finish.
Price tracks three things: the mass and material of the base (cheap zinc alloy vs. heavy cast brass), the finish quality, and whether a handshower and diverter are integrated. Here’s how the tiers usually break down:
| Price tier | Typical base material | What you get | Best for |
|---|---|---|---|
| $150–$300 | Zinc alloy or thin brass | Basic single-riser filler, spout only, limited finishes | Rentals, budget remodels, guest baths |
| $300–$550 | Solid cast brass | Heavier base, handshower + diverter, popular finishes (matte black, brushed gold, chrome) | Most homeowners — the sweet spot |
| $550–$900+ | Premium cast brass / stainless | Designer styling, thermostatic valve, PVD finishes, longer warranty | Luxury master baths, high-use spa tubs |
My honest advice: don’t buy the cheapest base you can find. The base is a permanent, hidden structural part — you never want to reopen a tiled floor to replace a corroded zinc bracket. Spend where it counts. A solid cast-brass base from a reputable brand is worth the extra $100. If you want a specific well-reviewed example to anchor your comparison, see our breakdown of which Delta freestanding tub filler to buy for your soaking tub — Delta’s floor-mount bases are a good benchmark for build quality and warranty.
How do you install a freestanding tub faucet base without leaks? (Step by step)
You install a freestanding tub faucet base by roughing in the water supply through the floor, bolting the mounting bracket to solid framing, connecting the supply lines, then sliding the decorative cover over the top. The single most important rule: the bracket must anchor into structural framing or a blocking board — never into tile or thin subfloor alone.
Here’s the realistic sequence for a slab or wood-frame floor:
- Plan the rough-in location first. The base sits a few inches from the tub. Measure from the tub’s finished position and mark exactly where the supply lines come up. On a freestanding tub, that spot is usually behind or beside the tub where the faucet won’t crowd the person bathing.
- Run and cap the supply lines. Bring 1/2″ (or 3/4″ for high-flow) hot and cold lines up through the floor. Pressure-test them before you close anything up.
- Add blocking. If you have a wood subfloor, install a 2x block or a plywood pad between the joists so the lag bolts bite into something solid. On a concrete slab, use rated concrete/expansion anchors.
- Bolt down the mounting bracket. Level it, then torque the bolts evenly. It should not move at all when you push on it hard.
- Connect the faucet body to the supplies. Use fresh braided stainless connectors and thread sealant or new washers at every joint. This is where leaks start, so take your time.
- Seat the riser and spout, then the cover. Slide the decorative escutcheon down, seat it against the floor, and lock the set screw.
- Run water and inspect underneath. Fill the tub once completely, then check every connection with a dry paper towel. A slow drip shows up on paper before it shows up as damage.
The techniques here overlap a lot with retrofitting other tub faucets. If you’re replacing an existing tub filler rather than building new, our walkthrough on how to change a faucet on a garden tub without wrecking the deck covers the shut-off, teardown, and reseal steps that apply here too. And if your project is actually a wide deck-mounted tub, the best Roman tub faucet long-reach spout guide may be the layout you really want instead.
What’s the difference between a single-riser and dual-riser freestanding tub faucet base?
A single-riser base carries both hot and cold water up through one visible tube (the mixing happens inside the base or at the spout), while a dual-riser base shows two separate vertical pipes for hot and cold. The choice is mostly about looks, footprint, and how many supply penetrations your floor needs.
Single-riser designs are the most common today because they look cleaner — one elegant column rising from the floor — and they need only one hole through the finished floor. Dual-riser (sometimes called “H-pipe” or twin-riser) designs have a more traditional, industrial look and split the hot and cold into two visible tubes joined near the top. Here’s how they compare in practice:
| Feature | Single-riser base | Dual-riser base |
|---|---|---|
| Floor penetrations | One (cleaner, easier to seal) | Two (more rough-in precision needed) |
| Look | Sleek, modern, minimal | Traditional, statement piece |
| Install difficulty | Easier — one alignment point | Harder — both risers must align |
| Stability | Relies fully on the base bracket | Two contact points add rigidity |
| Typical cost | Slightly lower | Often higher (more visible metal) |
For most modern bathrooms with a smooth acrylic or stone soaking tub, a single-riser base is the safer, easier, and cleaner-looking choice. Reserve dual-riser for a deliberately vintage or industrial design where the exposed twin pipes are the point.
How do you keep a freestanding tub faucet base from leaking or corroding over time?
The two things that kill a freestanding tub faucet base are hidden slow leaks at the floor connections and finish corrosion from standing water pooling around the base. Both are preventable with a solid seal at install and a two-minute wipe-down habit afterward.
A few field-tested tips:
- Seal the escutcheon to the floor. A thin bead of clear silicone where the cover meets tile keeps splash water from wicking under the base and corroding the bracket. Leave a small gap at the back as a “tell-tale” so any internal leak has somewhere to escape and show itself.
- Dry the base after bathing. Matte black and brushed gold PVD finishes are tough, but chrome and cheaper coatings spot from hard-water minerals. A quick wipe prevents it.
- Watch the flow. If the spout output weakens over months, the culprit is usually mineral buildup at the spout aerator, not the base — the same issue that plagues sinks. Our guide on how to clean a tub faucet aerator when the water barely trickles out fixes that in a few minutes.
- Re-check the set screw once a year. Vibration and daily use can loosen the cover’s set screw. A quarter-turn snug keeps the faucet feeling rock-solid.
Hard water is the quiet enemy of every fixture in the house, tub fillers included. If your area runs hard, treating the water upstream extends the life of every valve and cartridge — worth reading our take on whether a tap water filter attachment is actually worth it.
Author note & why you can trust this guide
This guide was written by the avitashome fixtures team — the same people who spec, sell, and field-support freestanding tub fillers for homeowners and contractors across the country. We’ve installed and troubleshot floor-mount bases on everything from budget acrylic soakers to 400-pound stone tubs, so the advice here comes from real jobsites, not a spec sheet.
On the standards side: reputable freestanding tub fillers and their bases are manufactured to ASME A112.18.1 / CSA B125.1 (the North American faucet standard) and typically carry lead-free certification to NSF/ANSI 372. When you shop, look for a base with a solid brass or stainless bracket, a genuine finish warranty (quality brands offer limited lifetime coverage on the finish and mechanical parts), and clear GPM and rough-in documentation. Those three things separate a filler that lasts two decades from one you’ll be re-plumbing in three years.
FAQ
Is the base included when I buy a freestanding tub filler?
Usually yes — most complete freestanding tub filler kits include the mounting base, bracket, and decorative cover. But some brands sell the rough-in valve and the finished trim (which includes the visible base cover) as two separate purchases. Always confirm the listing includes both the structural bracket and the escutcheon before you check out.
What size supply lines does a freestanding tub faucet base need?
Most freestanding fillers use 1/2″ supply lines, but high-flow models rated 8+ GPM often call for 3/4″ lines to fill a deep tub quickly without a pressure drop. Check the manufacturer’s rough-in sheet — undersizing the supply is the most common reason a beautiful filler ends up feeling weak and slow.
Can I install a freestanding tub faucet base on a concrete slab floor?
Yes. On a slab, you anchor the mounting bracket with rated concrete or expansion anchors instead of lag bolts into wood, and the supply lines are typically stubbed up from within or beneath the slab during rough-in. Because slab work has to be planned before the concrete is poured or requires core-drilling afterward, decide on your faucet location early.
How far from the tub should the base sit?
Position the base so the spout clears the tub rim and pours cleanly into the basin — usually 2 to 6 inches from the outside of the tub, depending on the faucet’s spout reach. Always confirm against your specific faucet’s reach dimension and your tub’s wall thickness before you rough in the plumbing, because moving it later means opening the floor.
Why does my freestanding tub faucet wobble even though the base is bolted down?
A wobble almost always means the mounting bracket wasn’t anchored into solid framing — it’s bolted to thin subfloor or tile that flexes. The fix is to remove the cover, add blocking between the joists (or proper anchors in a slab), and re-torque the bracket. A correctly installed base should not move at all, even when you push firmly on the spout.
Does a freestanding tub faucet base need backflow protection?
Often, yes. Because the spout sits above the tub’s flood rim, many plumbing codes require the supply to be protected against back-siphonage, typically handled within the faucet’s valve design or an added vacuum breaker. Buy a certified filler and follow local code — this is one area where a licensed plumber’s sign-off is worth it.