 Pagina iniziale di Avitas
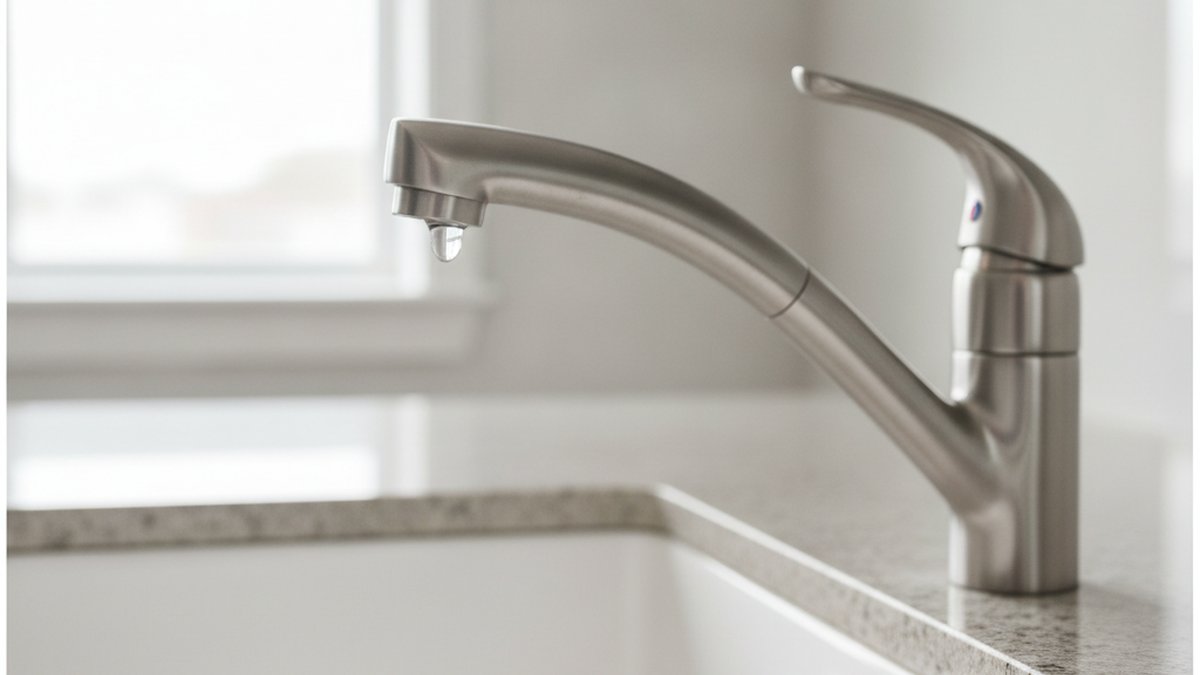
If you’re staring at a dripping faucet kitchen problem right now — that slow tick… tick… tick into the sink at 2 a.m. — here’s the honest answer: it’s a small, cheap, fixable thing 95% of the time. A steady drip is your faucet telling you one internal part has worn out and stopped sealing. It is not a sign you need a whole new faucet, and it’s almost never a job that requires a plumber’s bill. Below, I’ll walk you through exactly what causes the drip, how to diagnose which part failed, and how to fix each one step by step — the same way I’d explain it to a friend leaning over my shoulder.
And it’s worth fixing fast. A faucet dripping once per second wastes roughly 3,000 gallons a year — enough water for 180 showers, straight down the drain and onto your bill.
What actually causes a kitchen faucet to drip?
A kitchen faucet drips because one of four internal parts has worn out and can no longer form a watertight seal: the cartridge, the O-rings, the valve seat, o (on older two-handle faucets) the rubber washer. Water is under constant pressure behind the valve, so the moment a seal degrades, that pressure pushes a little water past it — and you get a drip.
Which part is to blame depends heavily on your faucet type. Here’s how the common designs fail:
- Cartridge faucets (most modern single-handle and many two-handle models): a plastic or ceramic-disc cartridge controls flow and temperature. When its internal seals wear or the ceramic discs get scored by mineral grit, the faucet drips from the spout even when “off.”
- Ball faucets (older single-handle kitchen faucets with a rounded cap): use springs, rubber seats, and O-rings. These have the most small parts and are the most common droppers.
- Compression faucets (older two-handle, one hot / one cold): use a rubber washer that presses against a valve seat. The washer flattens and hardens over time — this is the classic “old faucet drip.”
- Ceramic-disc faucets: very durable, but the inlet/outlet seals and the disc cartridge itself can still fail after years of hard water.
Two culprits sit behind almost all of these failures: age (rubber and plastic seals simply harden and shrink) and hard water (calcium and magnesium deposits scratch sealing surfaces and jam moving parts). If you’re on well water or a hard-water city supply, expect to replace seals more often.
How do I tell which part is causing the drip?
Match where and when the water appears to the failing part — the location is your best diagnostic clue. Before you buy anything, spend two minutes reading the leak:
| Symptom / where it leaks | Most likely cause | Typical part cost |
|---|---|---|
| Drips from the spout tip when handle is fully OFF | Worn cartridge, valve seat, or washer | $8–$40 |
| Leaks from around the base of the spout when running | Worn spout O-rings | $5–$15 |
| Leaks under the handle / at the handle base | Cartridge seal or handle O-ring | $8–$25 |
| Weak/sputtering flow AND drip | Clogged aerator + worn cartridge | $5–$40 |
| Puddle in the cabinet under the sink | Supply line or shutoff valve — not the faucet body | $6–$20 |
One important distinction: if you find water under the sink in the cabinet, that’s usually a supply-line or shutoff-valve issue, not the faucet’s internal seals — a different (and equally cheap) repair. A drip from the spout is the internal-seal story this article is about.
How do I fix a dripping single-handle kitchen faucet step by step?
For the most common setup — a modern single-handle cartridge faucet — you fix a drip by shutting off the water, removing the handle, pulling and replacing the cartridge, and reassembling. It’s a 30-minute job with a hex key, a screwdriver, and pliers. Here’s the full sequence:
- Shut off the water. Turn both shutoff valves under the sink clockwise until they stop. Open the faucet to release pressure and confirm the water is truly off.
- Plug the drain. Drop in a stopper or a rag so no tiny screws or clips vanish down the pipe. This one habit saves so many headaches.
- Remove the handle. Most single-handle faucets have a small set screw under a decorative cap or at the back of the handle base — loosen it with an Allen/hex key and lift the handle off.
- Expose the cartridge. Unscrew or unclip the retaining nut/collar, then pull the retaining clip (a small horseshoe-shaped clip) with needle-nose pliers. Note its orientation.
- Pull the cartridge straight up. If it’s stuck with mineral scale, wiggle gently or use a cartridge-puller tool. Take a photo first — the cartridge must go back in the same rotational position or your hot/cold will be reversed.
- Inspect and replace. Look at the O-rings and cartridge body. Replace the whole cartridge (safest) or just the O-rings if that’s clearly the only worn part. Bring the old cartridge to the store or match the model number for an exact fit.
- Lubricate and reassemble. Coat new O-rings with plumber’s-grade silicone grease (never petroleum jelly — it degrades rubber). Reinsert the cartridge in the correct orientation, replace the clip, and rebuild in reverse order.
- Test slowly. Turn the shutoffs back on gradually, run the faucet, and check for drips at the spout, base, and under the sink.
If you have a Delta-style single-handle faucet, the process is nearly identical but the cartridge and clip design is brand-specific — we walk through that exact model in our guide to a Delta faucet cartridge replacement on a kitchen faucet, which is worth reading before you buy the part so you get the right one the first time.
What if it’s an older two-handle faucet that drips?
On an older two-handle compression faucet, the drip is almost always a flattened rubber washer or a corroded valve seat under the handle that’s leaking — and the fix is a $2 washer plus a few minutes per handle. First, figure out which handle is the culprit: shut off one supply valve at a time and see if the drip stops. If closing the hot side stops the drip, the hot handle’s washer is the problem.
To fix it: remove the handle, unscrew the packing nut, lift out the stem, and you’ll see the rubber washer held by a brass screw at the bottom. Swap in an exact-size replacement washer. While you’re in there, run a fingertip around the valve seat inside the faucet body — if it feels rough or pitted, the water will chew through your new washer quickly, so dress it smooth with an inexpensive seat-grinding tool or replace the seat.
Leaks around the handle base rather than the spout usually point to a worn seal or gasket rather than the washer. If your single-handle unit leaks specifically at the handle when it’s running, the culprit is often the base seal — our breakdown of the single handle faucet gasket and how to replace it when it leaks covers that exact fix, including how to tell a gasket leak from a cartridge leak.
Should I fix the drip or just replace the whole faucet?
Repair it if the faucet is under ~10 years old, the finish still looks good, and you can get the right cartridge or washer — the parts cost under $40 and the fix takes under an hour. Replace the faucet if it’s badly corroded, the manufacturer no longer makes the cartridge, or you’ve already rebuilt it once and it’s dripping again. Here’s the practical math:
| Situation | Best move | Rough cost |
|---|---|---|
| Faucet under 10 yrs, cartridge available | Repair (replace cartridge/O-rings) | $5–$40 |
| Rubber washer worn on older 2-handle | Repair (replace washer + dress seat) | $2–$15 |
| Cracked body, corroded base, or discontinued parts | Replace faucet | $90–$400+ |
| You want a pull-down sprayer or updated finish anyway | Replace faucet | $120–$350 |
If you land in the “replace” column, don’t buy blind — the brand you choose largely determines how easy the next repair will be, because good brands keep cartridges in stock for a decade. Our roundup of the best kitchen faucets by brand compares long-term parts availability and warranty, and if you specifically want a sprayer model, the best pull-down sprayer kitchen faucet in stainless steel under $250 guide is a good shortlist.
How do I stop my kitchen faucet from dripping again?
Prevent repeat drips by controlling hard-water buildup and using the right grease on seals — mineral scale is the number-one thing that destroys cartridges and O-rings prematurely. A few habits go a long way:
- Clean the aerator every few months. A clogged aerator raises back-pressure inside the faucet and stresses the seals. It also fixes weak flow — the same trick that revives a clogged sink aerator when the water barely comes out.
- Use silicone plumber’s grease on every seal you touch. It keeps O-rings supple and helps them glide instead of tear.
- Don’t crank the handle shut. Ceramic and cartridge faucets only need light pressure; over-tightening grinds the sealing surfaces.
- Consider water softening or filtration if you’re on very hard water — it protects every fixture in the house, not just this faucet.
- Keep the old cartridge’s model number written inside your sink cabinet, so next time you buy the exact match in five minutes.
The same cartridge-and-seal logic applies to your tub, by the way — if a bathroom fixture starts dripping next, the method transfers directly, as shown in our bathtub faucet replacement cartridge walkthrough.
What tools and parts do I actually need?
You need surprisingly little. For 90% of dripping kitchen faucet repairs, this covers you:
- Allen/hex key set (for the handle set screw)
- Phillips and flathead screwdrivers
- Adjustable wrench and/or channel-lock pliers
- Needle-nose pliers (for the retaining clip)
- Replacement cartridge, O-ring kit, or washer matched to your model
- Silicone plumber’s grease and plumber’s tape (PTFE)
- A rag, a flashlight, and a small container for parts
The single most important “tool” is the correct replacement part. Faucet cartridges are not universal — a Moen 1225 is not a Delta RP or a Kohler GP. Match by brand and model number, or physically bring the old part to the store.
FAQ
Is a dripping kitchen faucet an emergency?
No — a spout drip is a slow, contained leak you can safely fix on your own schedule. It’s wasting water and money, so don’t ignore it for months, but it won’t flood your kitchen. The one exception is a leak under the sink into the cabinet, which can damage the base and should be addressed within a day or two.
Why does my faucet drip only after I turn it off?
A few seconds of drip right after shutting off is just water draining from the spout — that’s normal. But if it keeps dripping steadily minutes later, the internal seal (cartridge, washer, or valve seat) is worn and letting pressurized water sneak past. That’s the repair described above.
How much does a plumber charge to fix a dripping kitchen faucet?
Expect roughly $125–$250 for a plumber to replace a cartridge or washer, since most of that is the service-call minimum and labor. The actual part is $5–$40. That price gap is exactly why this is one of the most worthwhile DIY plumbing jobs — you’re mostly paying for a 30-minute task you can do yourself.
Can hard water cause my faucet to drip?
Yes, very commonly. Calcium and magnesium deposits scratch the ceramic discs and sealing surfaces inside the cartridge and jam moving parts, so seals that would otherwise last 10+ years fail in 2–4. Cleaning the aerator, using silicone grease, and softening or filtering your water all extend seal life.
Do I need to replace the whole cartridge or just the O-rings?
If the drip comes from the spout when the faucet is off, replace the whole cartridge — that’s the part controlling the shutoff seal. If water only leaks from around the base of the spout while running, new spout O-rings usually fix it. When in doubt, replacing the cartridge is the more reliable, longer-lasting choice.
How long should a kitchen faucet last before it starts dripping?
A quality kitchen faucet should run 15–20 years, and its cartridge often 10+ years before needing service. Cheaper faucets or homes with hard water see drips sooner. Reputable brands back their fixtures with lifetime limited warranties on the faucet and finish — always keep your proof of purchase, since many will send replacement cartridges free under warranty.
A note on who wrote this — and why you can trust the fix
This guide was written by the Pagina iniziale di Avitas fixtures team, drawing on years of hands-on installation and repair of kitchen and bathroom faucets across every major valve type. At Avitas Home we specialize exclusively in faucets, showers, and bathroom fixtures — it’s all we do — and every repair method here reflects real teardown-and-rebuild experience, not generic advice. Faucet components should meet standards like ASME A112.18.1 / NSF 61 for drinking-water safety and flow; when you buy replacement cartridges and faucets, look for those certifications and check the manufacturer’s warranty terms before you install. When you’re ready to repair or upgrade, you’ll find matched cartridges, O-ring kits, and full faucets at www.avitashome.com, backed by our fit-and-finish guarantee.