 Pagina iniziale di Avitas
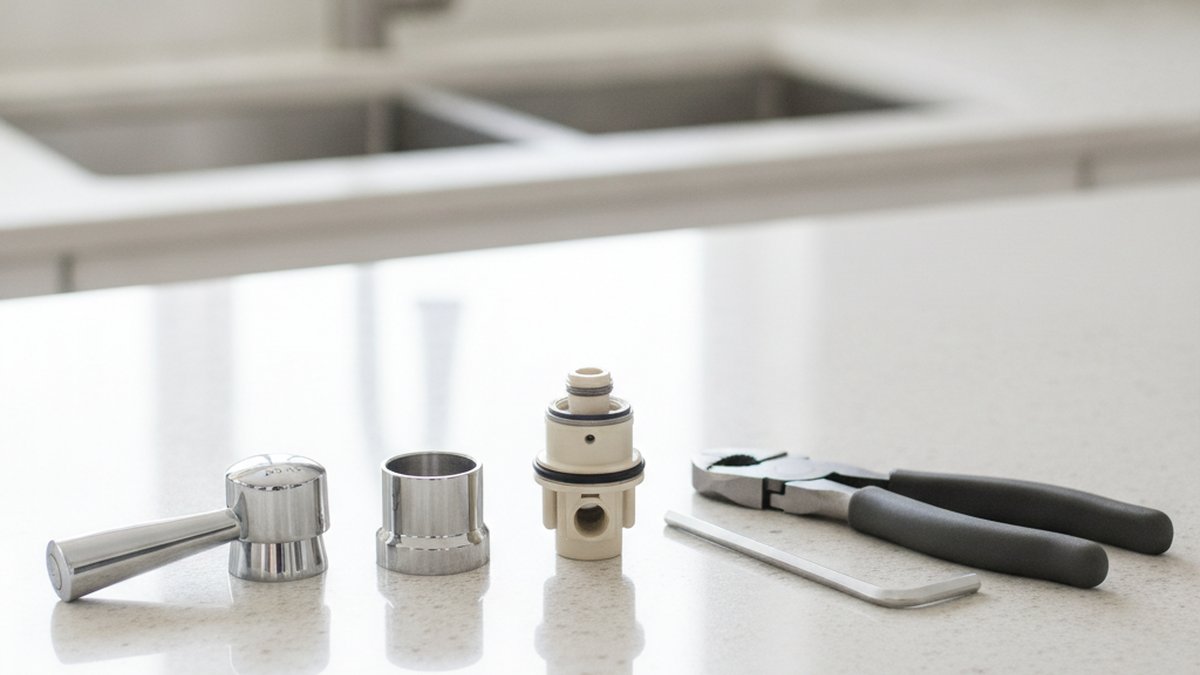
A leaking or stiff single-handle Delta kitchen faucet almost always comes down to one worn part, and a delta faucet cartridge replacement kitchen job is the fix — not a whole new faucet. The cartridge is the plastic-and-ceramic valve inside the faucet body that mixes hot and cold and turns the water on and off. When it wears out, you get drips, hard-to-turn handles, temperature that won’t hold, or water sneaking out around the base. Swapping it is one of the most beginner-friendly plumbing repairs there is, and Delta makes it easier than most brands because they publish exact part numbers and back many cartridges with a lifetime warranty.
Below I’ll walk you through how to know it’s the cartridge, how to find the right one for your specific model, the step-by-step swap, and the mistakes that turn a 20-minute job into an afternoon. This is the same process a plumber uses — you’re just skipping the $150 service call.
How do I know it’s the cartridge and not something else?
You know it’s the cartridge when the faucet drips from the spout after you’ve shut it off, the handle feels gritty or stiff, or you can’t get steady hot water — while the connections under the sink stay bone dry. Those are classic worn-cartridge symptoms. A leak coming from under the sink at the supply lines or hose is a different problem entirely.
Here’s how to tell them apart quickly:
- Drips from the spout when off → cartridge (or the seats and springs feeding it). This is the #1 sign.
- Handle is hard to move or grinds → cartridge, usually mineral buildup on the ceramic discs.
- Water leaks around the base of the handle when running → cartridge O-rings or the bonnet.
- Temperature swings or won’t get hot → cartridge is worn or scaled.
- Weak or sputtering flow only at the spray head → that’s usually the aerator or spray face, not the cartridge. Clean it first — you may not need this repair at all.
- Puddle under the cabinet, dry handle → supply line, hose, or gasket, not the cartridge.
If your flow is the real complaint, it’s worth ruling out a clogged aerator before you tear the valve apart — our guide on how to clean a faucet head with white vinegar fixes a huge share of “low pressure” faucets in ten minutes with no parts at all. And if the leak turns out to be at the base seal rather than the valve, the walkthrough on the single handle faucet gasket covers that specific fix.
Which Delta kitchen cartridge do I actually need?
You need the cartridge that matches your specific Delta faucet model or series — there’s no universal one, and installing the wrong style is the single most common reason a repair fails. Delta uses a few distinct cartridge families depending on whether your faucet is single-handle, uses a diverter for the sprayer, or is an older two-handle design.
The fastest way to find yours: look for the model number on a tag or sticker under the sink on the faucet body, or on the original box/receipt. If it’s long gone, snap a photo of the faucet and match the handle style, then confirm the cartridge shape once you pull it. Here’s a quick reference for common kitchen setups:
| Faucet type / series | Typical cartridge | What it looks like | Warranty note |
|---|---|---|---|
| Single-handle pull-down/pull-out (most modern Delta kitchen) | RP70538 / RP47201 | Ceramic disc, splined stem | Lifetime on cartridge for residential |
| Older single-handle (Classic/200 series) | RP19804 (ball-style repair kit) or RP212 ball | Brass/stainless ball + springs + seats | Kit is inexpensive, widely stocked |
| Two-handle kitchen (widespread) | RP4993 stems / ceramic cartridge pair | Two separate hot/cold cartridges | Replace both at once |
| Diverter for side sprayer | RP41702 | Small barrel valve in spout base | Often confused with main cartridge |
Don’t guess. Delta’s site lets you enter your model number and it shows the exact repair part, which is genuinely the safest route. If you’re not even sure your faucet is worth repairing versus replacing — for example an old builder-grade unit — it can be smarter to upgrade; our roundup of the best kitchen faucets by brand and the deep-dive on Delta Levette kitchen faucet reviews can help you decide before you spend money on parts for a faucet on its last legs.
What tools and parts do I need before I start?
You need surprisingly little: an Allen (hex) wrench, adjustable or channel-lock pliers, and the correct replacement cartridge. Everything else on this list just makes the job faster or handles a stuck part.
- Correct Delta cartridge (matched to your model — see above)
- Allen/hex wrench set — most Delta handles use a 7/64″ or 3/32″ set screw
- Channel-lock or adjustable pliers for the bonnet nut
- Flathead screwdriver to pry the button cap and lift O-rings
- Delta cartridge puller (RP79814) — cheap and worth it if the old cartridge is scaled in tight
- White vinegar + old rag to dissolve mineral crust around the valve
- Plumber’s silicone grease for the new O-rings
- A towel and a small bowl to catch water and hold tiny parts
Plug the sink drain or lay a rag over it before you start. The number one preventable disaster in this repair is dropping the set screw straight down the drain.
How do you actually replace a Delta kitchen faucet cartridge, step by step?
You replace it by shutting off the water, removing the handle and bonnet, pulling the old cartridge, and seating the new one in the same orientation. Here’s the full sequence — the whole thing runs 20 to 40 minutes for a first-timer.
1. Shut off the water. Turn the two shutoff valves under the sink clockwise until they stop. No under-sink valves? Shut off the main. Then open the faucet to release pressure and confirm the water is truly off — you should get a dribble, then nothing.
2. Cover the drain. Plug it or lay a rag across it. Do this before anything else.
3. Remove the handle. Find the set screw — usually under a small red/blue button cap on the side or back of the handle, or beneath the handle collar. Loosen it with the Allen wrench (don’t fully remove it, just back it out) and lift the handle straight up and off.
4. Remove the bonnet/dome and any retaining piece. Unthread the decorative bonnet nut by hand or with pliers wrapped in a rag so you don’t scratch the finish. Some models have a retaining nut or clip holding the cartridge — set any clip aside where you won’t lose it.
5. Note the orientation, then pull the old cartridge. This matters: look at how the cartridge sits — there’s usually a tab, notch, or flat that keys into a slot in the faucet body. Take a photo. Then grip the cartridge stem with pliers and pull it straight up. If it’s scaled in and won’t budge, this is where the Delta cartridge puller earns its keep.
6. Clean the valve housing. Wipe out grit and mineral scale inside the body with a vinegar-dampened rag. A clean housing lets the new cartridge seat fully and seal properly.
7. Grease and insert the new cartridge. Smear a thin film of silicone plumber’s grease on the new O-rings. Drop the cartridge in, lining up the key tab with the slot exactly as the old one sat. It should seat flush without forcing.
8. Reassemble in reverse. Retaining clip/nut, bonnet, then the handle and set screw. Snug — don’t gorilla-tighten; overtightening a plastic bonnet cracks it.
9. Turn the water back on slowly and test. Open the shutoffs gradually. Run the faucet, cycle hot to cold, check for drips at the spout and leaks around the handle base. If it’s dry and the handle moves smoothly, you’re done.
This mirrors the process for tub and shower valves almost exactly — if you also have a leaky tub, the bathtub faucet replacement cartridge guide uses the same skills, just a different cartridge shape.
How long does a Delta cartridge last, and can hard water kill it early?
A Delta ceramic-disc cartridge typically lasts 8–15 years, but hard water can cut that in half by caking mineral scale on the discs and O-rings. If your first cartridge only lasted a few years, hard water is the usual culprit — not a defective part.
Signs hard water is shortening cartridge life: chalky white crust around the base, a handle that gets progressively stiffer over months, and aerators that clog constantly. The cartridge and the aerator suffer from the same enemy. If you’re cleaning your faucet head every few weeks, your cartridge is quietly scaling too. A whole-house or under-sink softener/filter is the real long-term fix; short of that, a periodic vinegar soak of removable parts buys you time.
One practical tip: when you do a cartridge swap, buy two if your water is hard. Keeping a spare in the cabinet means the next repair is a 20-minute job instead of a trip to the store mid-leak.
Is it worth replacing the cartridge, or should I just buy a new faucet?
Replace the cartridge if the faucet body and finish are still in good shape — it costs $15–$45 in parts versus $150–$400+ for a new faucet plus install, and Delta’s lifetime warranty often makes the cartridge itself free. Buy new only if the faucet is corroded, the finish is flaking, you want new features (pull-down sprayer, touch, higher arc), or you’ve already replaced the cartridge recently and it’s still failing.
The math is lopsided in favor of repair. A cartridge is one of the cheapest fixes in the house, and Delta will frequently ship you the replacement part at no charge under their warranty if you contact them with your model number — you just pay for tools you probably already own. If you’re on the fence about upgrading anyway, comparing a repair against a modern pull-down sprayer kitchen faucet in stainless steel helps you decide whether you’re throwing good money after bad.
FAQ
Does Delta really replace kitchen faucet cartridges for free?
Often, yes. Delta backs most residential faucets with a lifetime limited warranty that covers functional parts like cartridges. Contact Delta with your model number and describe the issue, and they’ll typically ship the correct cartridge free. You still supply the labor and basic tools, but the part itself is frequently no cost.
Can I use any brand of cartridge in a Delta kitchen faucet?
No. Use the Delta cartridge that matches your specific model. Generic “universal” cartridges rarely align with Delta’s keyed slots and O-ring spacing, and a mismatch leads to leaks, cross-threading, or a handle that won’t seat. Matching the exact RP part number is the safest choice.
Why is my Delta faucet still dripping after I replaced the cartridge?
Usually one of three things: the cartridge wasn’t seated fully (not lined up with the key tab), the seats and springs feeding the cartridge are worn and also need replacing, or debris got trapped under the new cartridge. Pull it, clean the housing, check that the tab is in its slot, and confirm you replaced the seats/springs on ball-style models.
Do I need special tools for a Delta cartridge replacement?
For most jobs, just an Allen wrench and pliers. The one specialty tool worth buying is Delta’s cartridge puller (around $10–$15), which grips a stuck, scaled-in cartridge and pulls it straight out without damaging the faucet body. If yours comes out easily with pliers, you won’t need it.
How do I find my Delta kitchen faucet model number?
Check for a tag or sticker on the faucet body under the sink, look at your original receipt or box, or use Delta’s online model-finder by matching your faucet’s appearance. Once you pull the old cartridge, its physical shape confirms which family you have. Never order a part until you’ve confirmed the match.
Should I turn off the whole house water or just the sink valves?
Just the two sink shutoff valves under the cabinet if they work — turn them clockwise until they stop. Only shut off the main if the under-sink valves are missing, seized, or leak when closed. Always open the faucet afterward to release pressure and confirm the water is truly off before you start.
Author note: This guide was written by the avitashome fixtures team, drawing on hands-on Delta kitchen faucet repairs across single-handle, two-handle, and pull-down models. We’ve done this swap enough times to know exactly where the set screw hides and why the cartridge won’t come out.
About avitashome: avitashome specializes in faucets, shower systems, and bathroom fixtures, with a focus on parts that meet lead-free plumbing standards and manufacturer warranty guidelines. We test the repair steps we publish and cross-check part numbers against manufacturer documentation, so the fix you read here is the fix that actually works. Delta’s lifetime limited residential warranty on cartridges is one reason we recommend repairing before replacing whenever the faucet body is sound.