 Pagina iniziale di Avitas
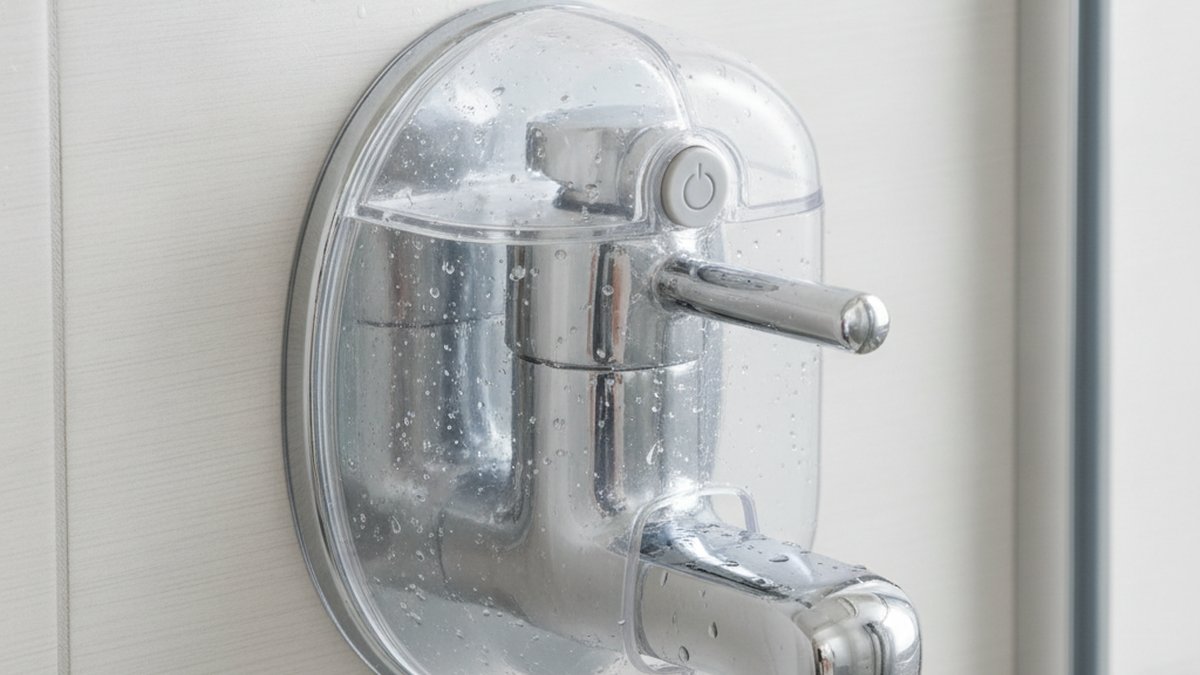
A shower faucet guard is one of those cheap, unglamorous parts that quietly does a huge job. Most people never think about the shower valve until a toddler cranks it all the way to “H,” or a painter’s roller leaves a smear across a brushed-nickel handle. This guide walks through exactly what a shower faucet guard is, the different types, who genuinely needs one, how to pick the right fit, and how to install it in a few minutes — with the real numbers and terminology you’d get from someone who sells and tests this hardware every day.
What exactly does a shower faucet guard do?
It physically blocks or limits the movement of your shower handle so the water can’t be turned on — or can’t be turned to a dangerous temperature — without an adult deliberately releasing the guard. That’s the whole point. Depending on the design, a shower faucet guard does one of three jobs: it locks the handle in place, it caps how far the handle can rotate toward hot, or it wraps the trim to protect the finish during construction.
People buy guards for very different reasons, and the “right” product depends on which problem you’re solving:
- Child safety: stop a curious 3-year-old from filling the tub or scalding themselves with 140°F water.
- Anti-scald / temperature limiting: cap the maximum hot setting for households with young kids, seniors, or anyone with reduced sensation (diabetic neuropathy, for example).
- Renovation protection: a slip-on cover that keeps paint, grout haze, drywall dust, and scratches off a new or existing faucet during a remodel.
- Vandalism / commercial use: tamper-resistant guards in gyms, dorms, and rental units where you don’t want guests adjusting or damaging valves.
Note one thing up front: a clip-on shower faucet guard is a behavioral barrier, not a plumbing fix. The gold-standard protection against scalding is a thermostatic or pressure-balancing valve set correctly at the cartridge, which we’ll cover below. The guard is your fast, renter-friendly, no-tools layer on top.
Which type of shower faucet guard is right for my situation?
Match the guard to the problem: a locking cover for toddlers, a rotation limiter for scald control, and a wrap cover for renovations. Here’s how the common types stack up so you can pick in about thirty seconds.
| Guard type | Best for | How it works | Typical price | Install |
|---|---|---|---|---|
| Locking handle cover | Toddlers, curious kids | Clear box or dome clamps over the handle; adult squeezes/twists a latch to open | $10–$20 | Tool-free, 1 min |
| Rotation limiter / temp stop | Anti-scald for kids & seniors | Sets a mechanical cap on how far the handle turns toward hot | Often built into valve; add-on $8–$25 | Remove handle, set stop |
| Silicone/foam wrap cover | Painting, tiling, drywall | Slips over trim to block paint, dust, scratches | $8–$15 | Tool-free, seconds |
| Tamper-resistant guard | Gyms, dorms, rentals | Screw-secured shroud needs a key/tool to remove | $20–$40 | Screwdriver, 5 min |
| Outdoor/freeze cover | Exterior & RV showers | Insulated cap protects hose-bib–style valve from freezing | $6–$15 | Tool-free, seconds |
If you’re only worried about one specific thing — say, a toddler who’s just learned to reach the handle — the locking cover is almost always the answer. If your real concern is water temperature, keep reading, because a cover alone won’t cap the heat.
Is a shower faucet guard actually necessary, or is it overkill?
It’s necessary in three clear situations and optional otherwise: young children in the home, vulnerable adults who can’t react fast to hot water, and any active remodel around the valve. Outside those cases, it’s a nice-to-have.
Here’s the sobering context. Scald burns are one of the most common household injuries for kids under 5, and skin damage happens fast at shower temperatures many water heaters deliver by default. At 140°F, a serious burn can occur in about 3 seconds; at 120°F, it takes closer to 5 minutes. That’s exactly why plumbing codes and manufacturers push for a maximum outlet temperature around 120°F and why anti-scald valves exist. A shower faucet guard is the everyday, always-on reminder that keeps a child from ever getting the handle to the danger zone in the first place.
For a household with no kids, no vulnerable adults, and no renovation happening, you probably don’t need a dedicated guard — but you should still confirm your valve’s hot limit stop is set (more on that next). And if you’re mid-remodel, even a $10 wrap cover pays for itself the first time it saves a $180 matte-black trim kit from a paint smear.
How do I stop the water from getting scalding-hot — guard or valve?
Do both, but the valve does the heavy lifting. A guard controls access to the handle; the valve’s hot-limit stop (also called a rotational limit stop or scald guard) controls the actual maximum temperature the shower can reach. Almost every modern single-handle shower valve — Delta, Moen, Kohler, Pfister — has one built into the cartridge or under the handle.
Setting the limit stop is a five-minute job and costs nothing:
- Run the shower as hot as it goes and check the temperature at the showerhead with a cooking or bath thermometer.
- Turn off the water and pop off the handle (usually one set screw under a small cap, hex key required).
- Find the notched plastic ring — the rotational limit stop — behind the handle.
- Rotate it a notch or two toward “freddo” to lower the maximum. Each notch is roughly a few degrees.
- Reassemble, retest, and aim for about 120°F max at the head. Adjust again if needed.
If your valve is old and has no limit stop — or the temperature swings wildly when someone flushes a toilet — that’s a pressure-balancing or thermostatic cartridge problem, not something a cover can solve. Swapping the cartridge is a very doable DIY; our walkthrough on a bathtub faucet replacement cartridge swap covers the same principle for tub/shower valves. Once the valve is dialed in, add the guard on top for access control and you’ve got two layers of protection.
How do I choose the right shower faucet guard for my valve?
Match it to your handle shape, your finish, and how permanent you want it. A guard that fits a lever handle won’t fit a round knob, and a screw-on tamper guard can scratch a delicate PVD finish if you’re not careful. Run through this quick checklist before you buy:
- Handle style: single lever, cross handle, round knob, or dual-handle. Measure the handle’s height and diameter — most locking covers list a max handle size.
- Trim clearance: check the space between the handle and the escutcheon (the wall plate). Tight modern trims need a low-profile guard.
- Finish safety: for brushed gold, matte black, or brushed nickel, choose a soft silicone or foam-lined guard so nothing rubs the coating. Cheap hard plastic can leave micro-scratches.
- Removability: everyday child safety wants tool-free release for adults; a rental or gym wants screw-secured and tamper-resistant.
- Temperature rating: for renovation covers, confirm the material tolerates the room temp and any heat guns nearby — cheap foam can deform.
If you’re shopping across an entire bathroom refresh, it’s worth knowing which manufacturers actually build valves with reliable, adjustable limit stops and durable finishes — our rundown of the best quality faucet brands to buy in 2026 is a good sanity check before you commit to a valve or trim you’ll be guarding for the next decade. And if you’re upgrading the whole shower experience at the same time, our guides to shower system jets and the best rainfall shower head for low water pressure pair naturally with a safety-first valve setup.
How do I install a shower faucet guard (and can I really do it myself)?
Yes — most guards install in under two minutes with no tools, and even the screw-secured ones take five minutes and a single screwdriver. There’s no plumbing involved because you’re covering the handle, not opening the water supply.
For a standard clip-on child-safety cover:
- Wipe the handle and surrounding trim clean and dry so the guard seats flush.
- Open the guard’s hinge or latch and position it over the handle, centered on the valve stem.
- Close the two halves around the handle until the latch clicks.
- Test the adult release — squeeze or twist as designed — a few times so you’re fast in an emergency.
- Tug the guard to confirm a child can’t pop it off or slide it up the stem.
For a renovation wrap cover, just slide it over the trim before you start painting or grouting and peel it off when you’re done — no residue, no scratches. For a tamper-resistant commercial guard, mark and drill any required pilot holes into the escutcheon area per the instructions, then secure with the included security screws.
Where does a shower faucet guard fit into a bigger bathroom-safety setup?
Think of it as one part of a layered system: guard for access, valve for temperature, and the right hardware for grip and reach. A guard on the shower handle pairs well with a couple of other low-cost upgrades that matter in the same households — kids, seniors, and anyone who values a safer, more predictable bathroom.
- Set the water heater to 120°F. This is your foundation. Even a perfect guard can’t help if the tank itself delivers 140°F.
- Confirm a pressure-balancing or thermostatic valve. It prevents the sudden hot spikes that make people flinch and slip.
- Add lever handles. Easier for small hands to avoid and older hands to use deliberately.
- Keep aerators and showerheads clean. Clogged, sputtering flow makes people crank the handle harder; our guide on cleaning a tub faucet aerator keeps flow steady so temperature stays predictable.
None of these are expensive, and together they turn a shower from a scald risk into a controlled, safe fixture — which is really what the guard is helping you achieve.
FAQ
Will a shower faucet guard fit my single-handle Delta or Moen valve?
Most universal clip-on guards fit single-lever handles from Delta, Moen, Kohler, and Pfister, as long as the handle height and diameter fall within the guard’s listed range. The one thing to check is trim clearance — very compact modern trims leave little room between the handle and the wall plate, so measure that gap and pick a low-profile guard if it’s tight.
Does a shower faucet guard replace an anti-scald valve?
No. A guard controls who can reach and move the handle; it does not limit the water temperature itself. For true scald protection you need a pressure-balancing or thermostatic valve with its rotational limit stop set to about 120°F. Use the guard and the valve setting together — the valve caps the heat, the guard caps the access.
Can adults still use the shower easily with a guard installed?
Yes. Child-safety guards are designed with a two-step adult release — usually a squeeze-and-lift or twist motion — that’s simple for grown-ups but too complex for a toddler’s coordination. Practice the release a few times after installing so it’s second nature when you’re actually standing in the shower.
Are shower faucet guards only for kids?
Not at all. They’re widely used for elderly relatives and adults with reduced heat sensation (common with diabetes-related neuropathy), in memory-care settings, and in rentals, dorms, and gyms where you want tamper resistance. Renovation wrap covers serve a completely different crowd — DIYers protecting a new finish from paint and grout.
Will a guard scratch or damage my faucet finish?
A soft silicone or foam-lined guard won’t, and that’s what you want on brushed gold, matte black, or brushed nickel PVD finishes. Avoid cheap hard-plastic clamps that contact the finish directly under pressure, since they can leave fine scratches over time. For premium trims, spend the extra couple of dollars on a lined guard.
How much should I spend on a shower faucet guard?
For basic child-safety and renovation covers, $8–$20 is plenty and buys a well-made product. Tamper-resistant commercial guards run $20–$40 because of the security hardware. There’s rarely a reason to spend more — this is a simple part, and the value is in correct fit and a reliable latch, not a high price tag.
The bottom line
A shower faucet guard is a small, smart buy for anyone with young kids, vulnerable adults, or an active remodel. Pick the type that matches your actual problem — locking cover for access, rotation limiter for temperature, wrap cover for renovation — set your valve’s limit stop to about 120°F as the real anti-scald layer, and you’ve covered the two things that matter most: keeping the water safe and keeping your finish intact.
Author note: This guide was written by the avitashome fixtures team, who spend their days specifying, installing, and stress-testing shower valves and safety hardware for real bathrooms. As a dedicated faucet and bathroom-fixture retailer, avitashome evaluates products against real-world use and manufacturer standards — including anti-scald guidance around a 120°F maximum outlet temperature — and we always recommend confirming your valve’s warranty and pressure-balancing rating before relying on any single safety layer. When in doubt about your specific valve, check the manufacturer’s spec sheet or ask our team.